CuriOdyssey Work

CuriOdyssey is a small zoo and interactive science center in Coyote Point Recreation Area, San Mateo, California. I worked there as a STEAM educator, and also contributed a lot of writing work to the organization.

“Coyote Point Hikes for the Curious Visitor”

Blog post for CuriOdyssey’s website, about places to explore nearby

Activity Write-Ups and Concepts

Lesson plans and ideas for CuriOdyssey’s Nature Quest summer camp

Exhibit Signs

Copy for new signs posted around the zoo and museum

Coyote Point Hikes for the Curious Visitor

Published September 30, 2026, on the CuriOdyssey Blog. Original post here.

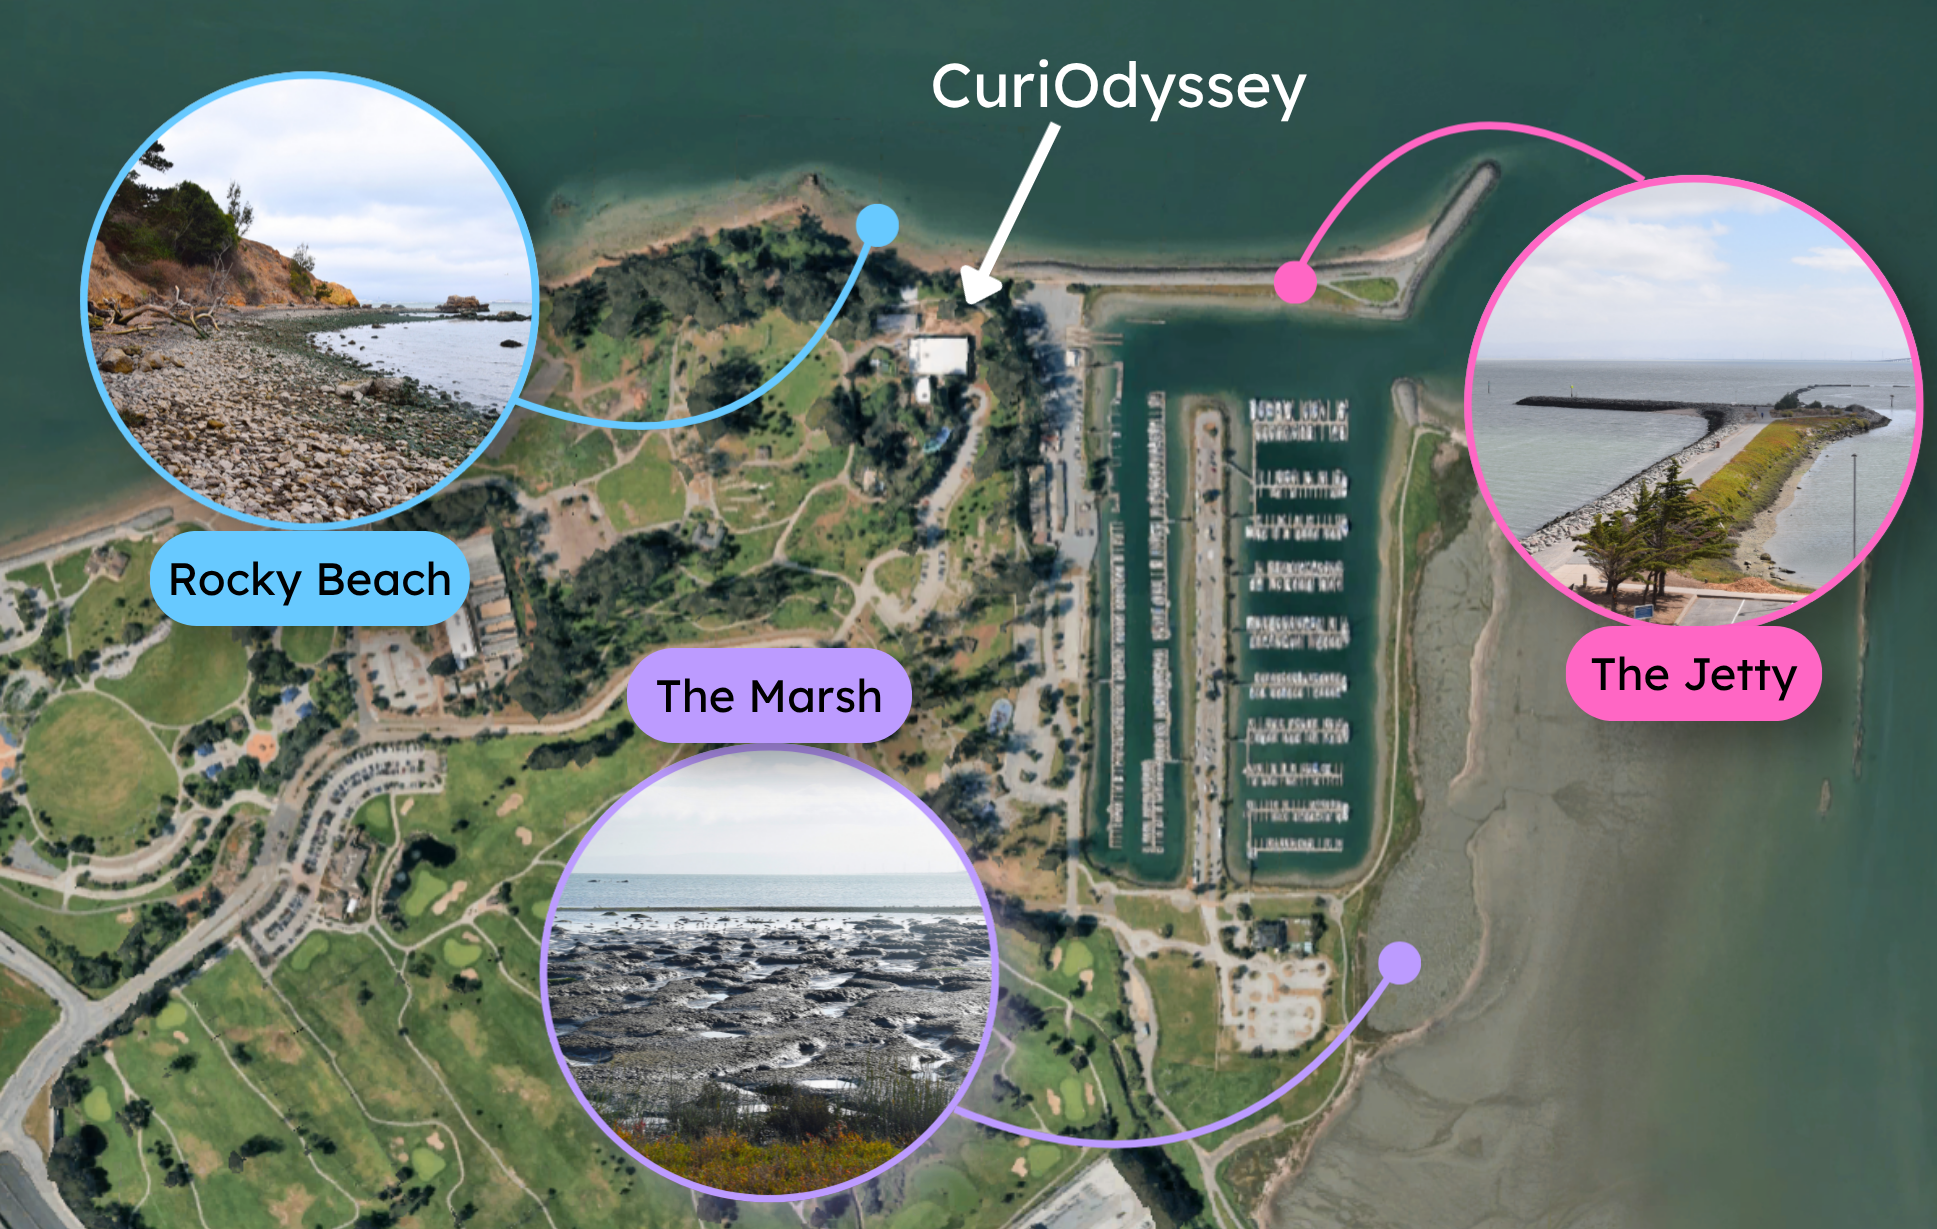
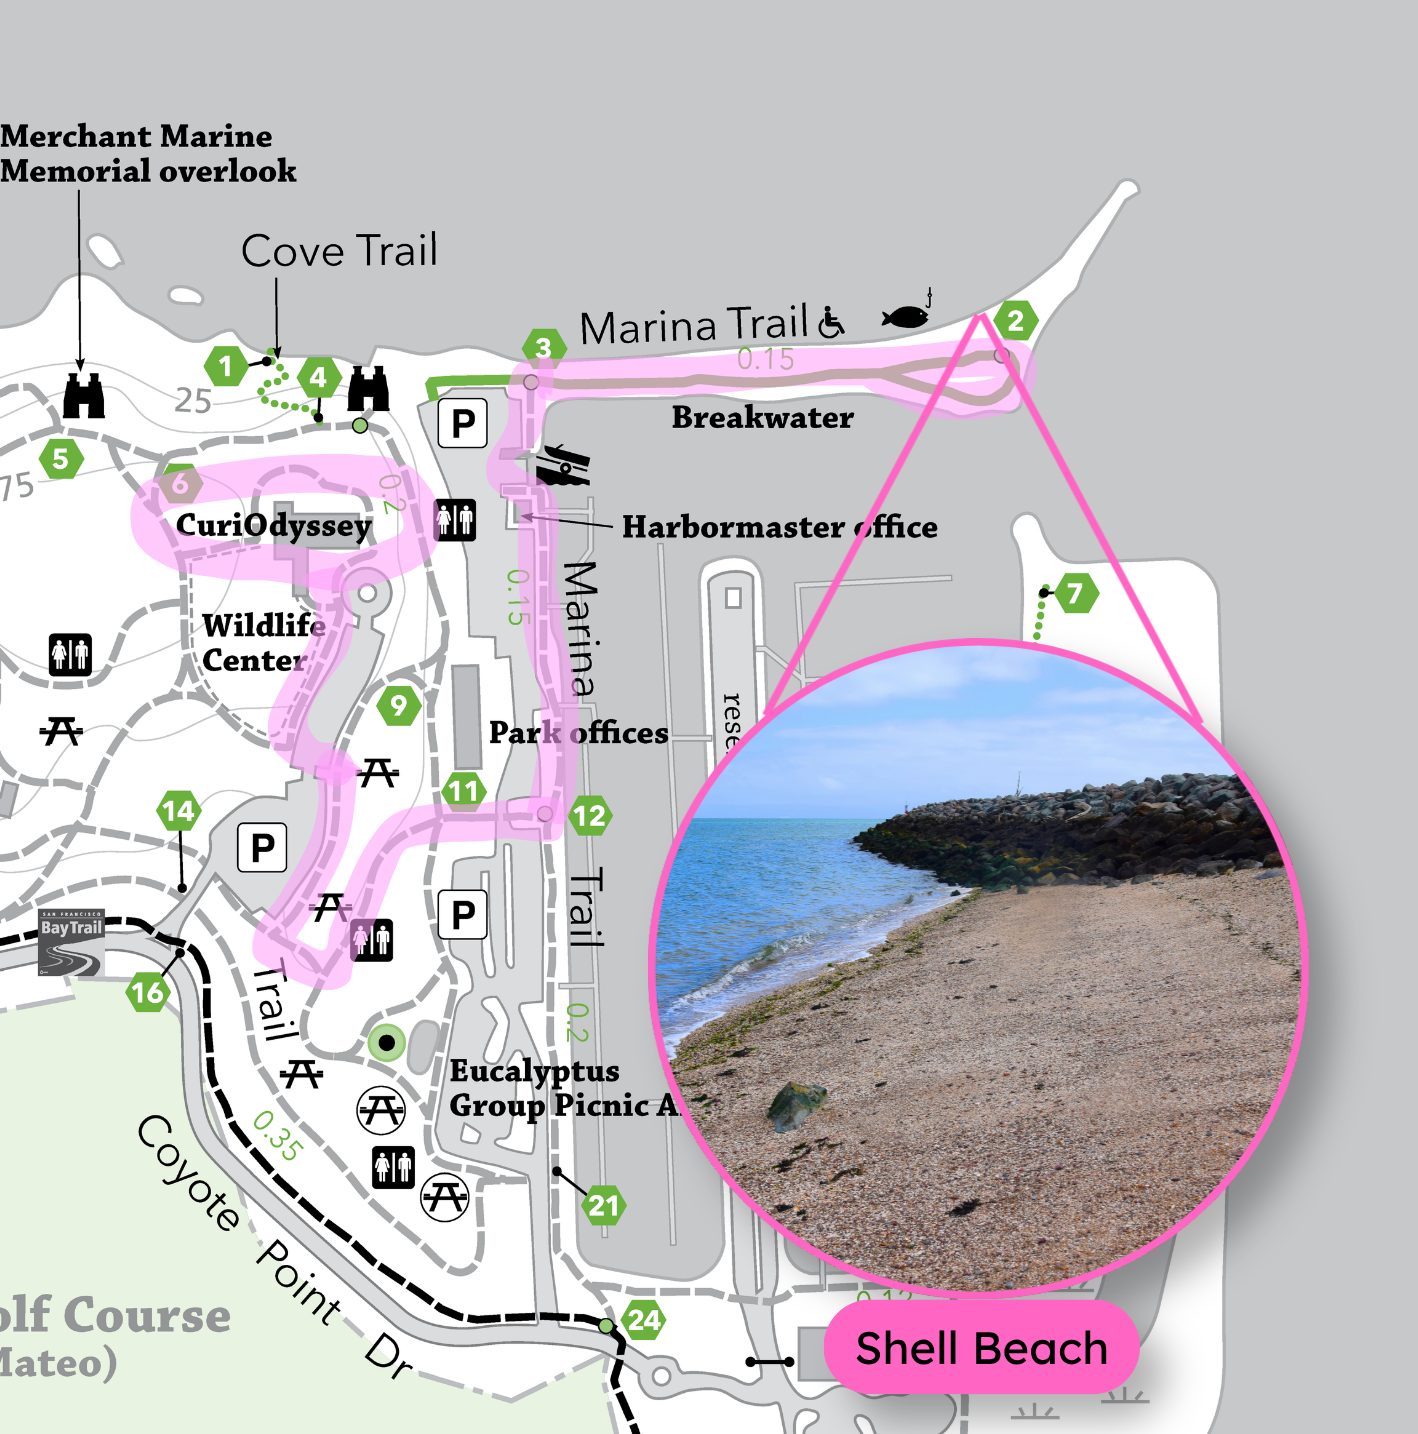
CuriOdyssey is a great place to visit, but did you know that there are a bunch of other cool spots around Coyote Point where you can discover the natural world? This post covers three places within a 10-15 minute walk of CuriOdyssey’s front gate – each with their own unique features.

Satellite image captured from Google Earth

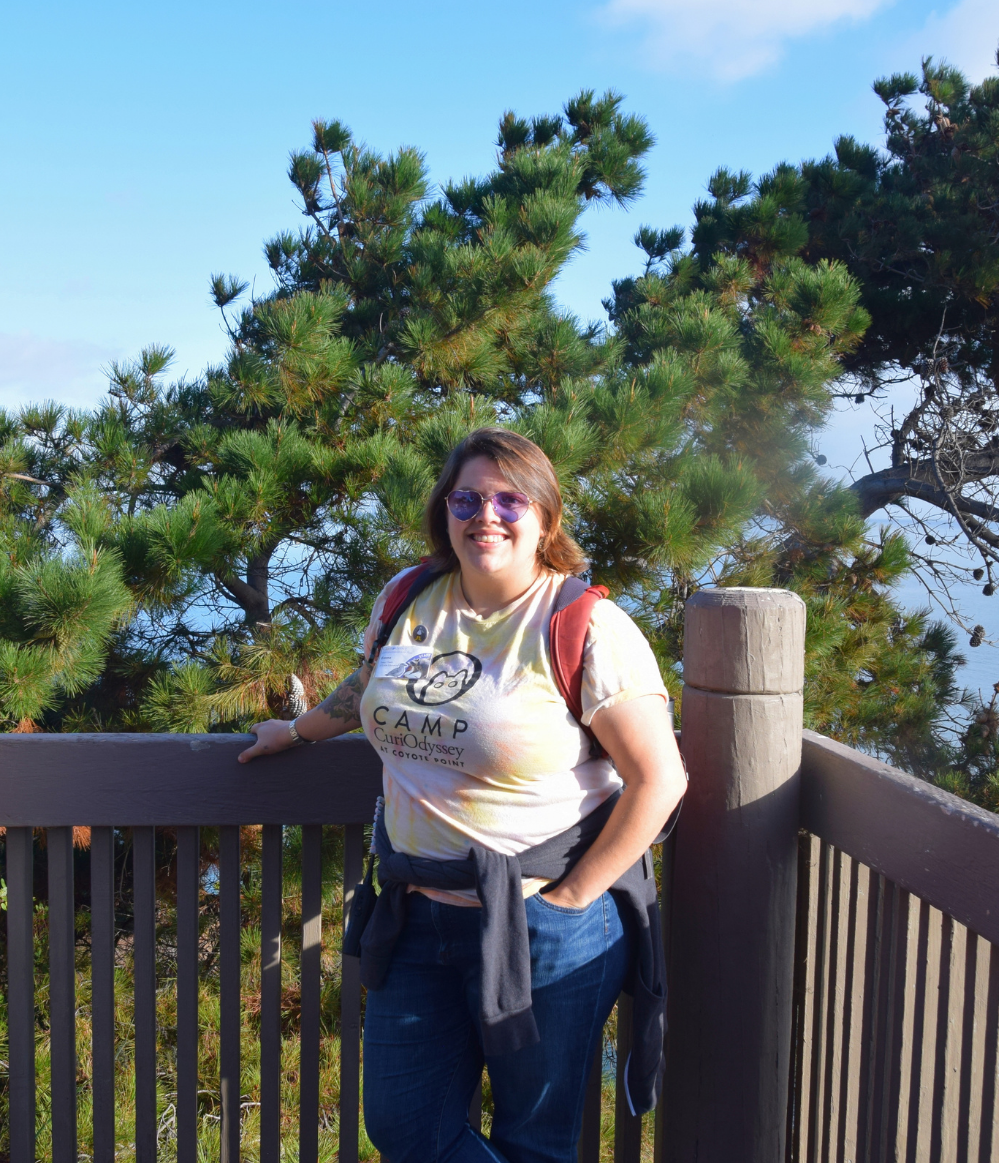
Hi! I’m Emma. I spent my summer bringing Camp CuriOdyssey campers to all of these spots to explore, learn and play. All photos were taken by me or my fellow educators, except where otherwise noted. 

Heads up! High tide can cover these places or make them inaccessible, so check the tides in Coyote Point Marina before you go. 


The Marsh

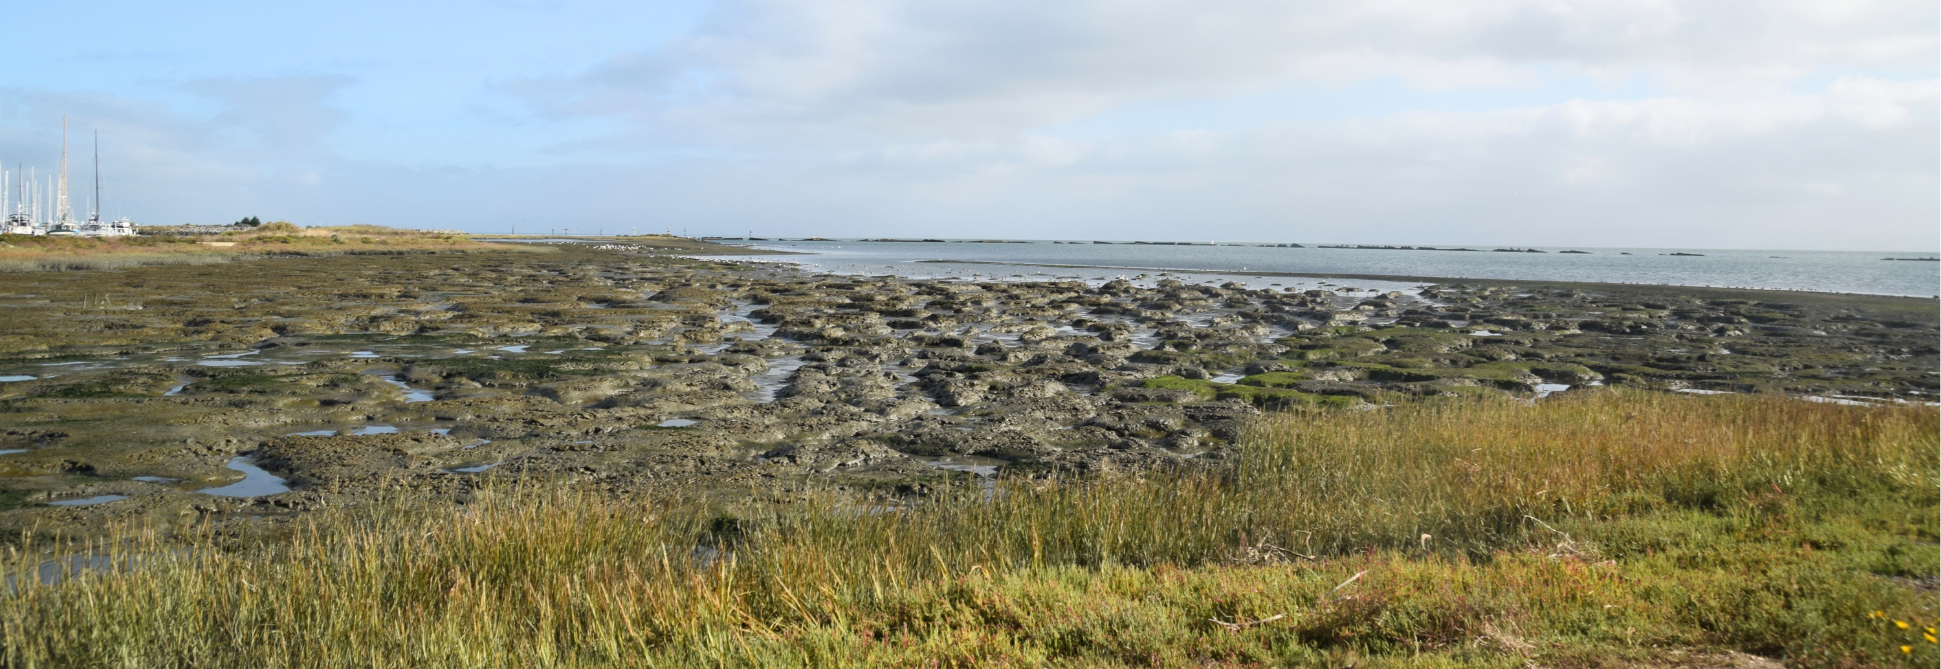
This salt marsh is a biodiversity hotspot, especially for shorebirds. It’s also a must-visit for anyone who loves squishing in the mud! 

How to get there:

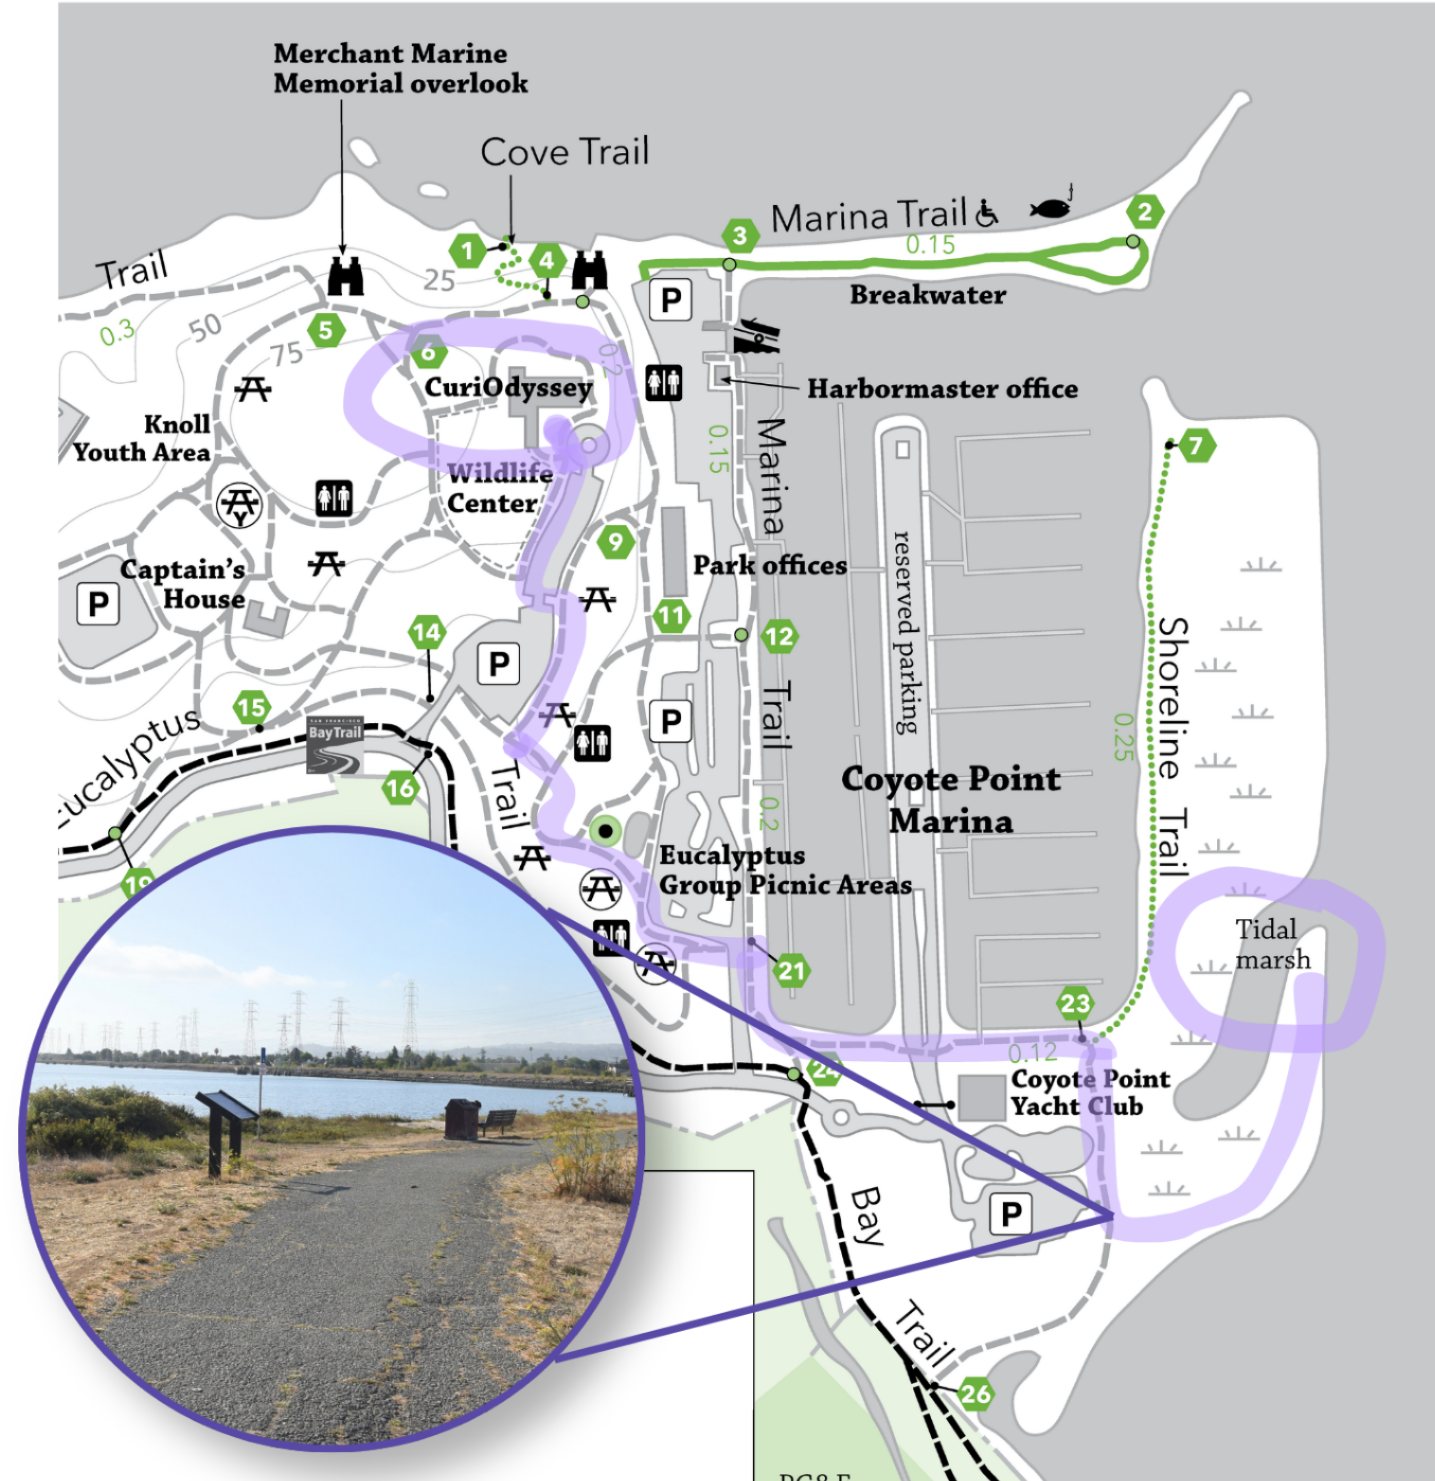
The Marsh is past the marina and the Yacht Club building, along the Marina Trail and Shoreline Trail. You can enter the higher parts of the Marsh using the small, unpaved trail across from the Yacht Club parking area. It’s marked by a sign, trash can, and bench. 

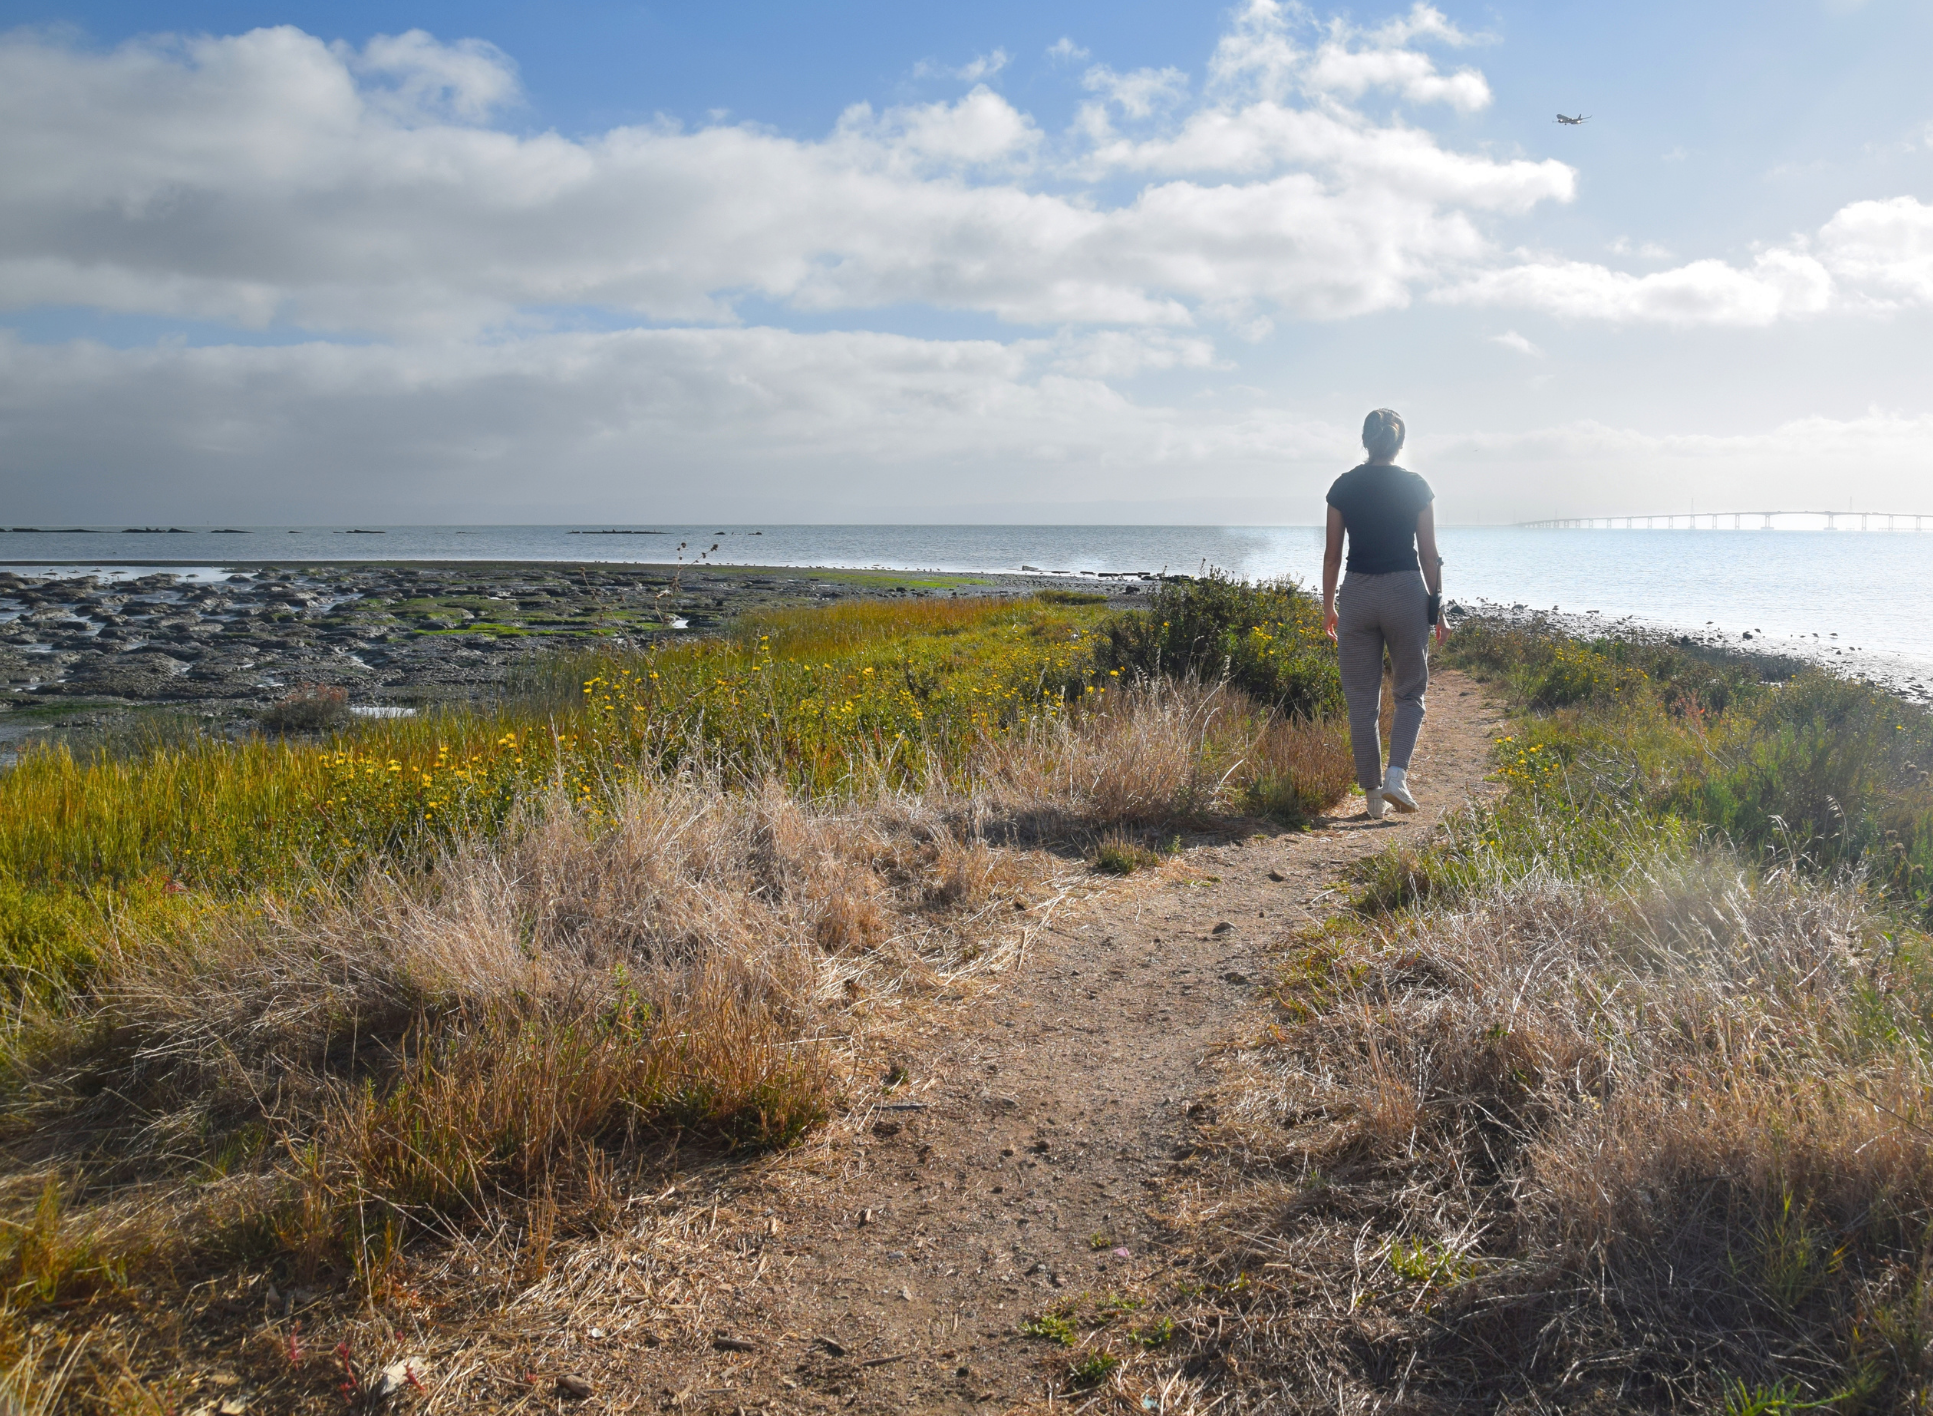
This path leads to a trail that goes into the Marsh, but you can also continue down the Shoreline Trail for more birdwatching. 

Things to see:

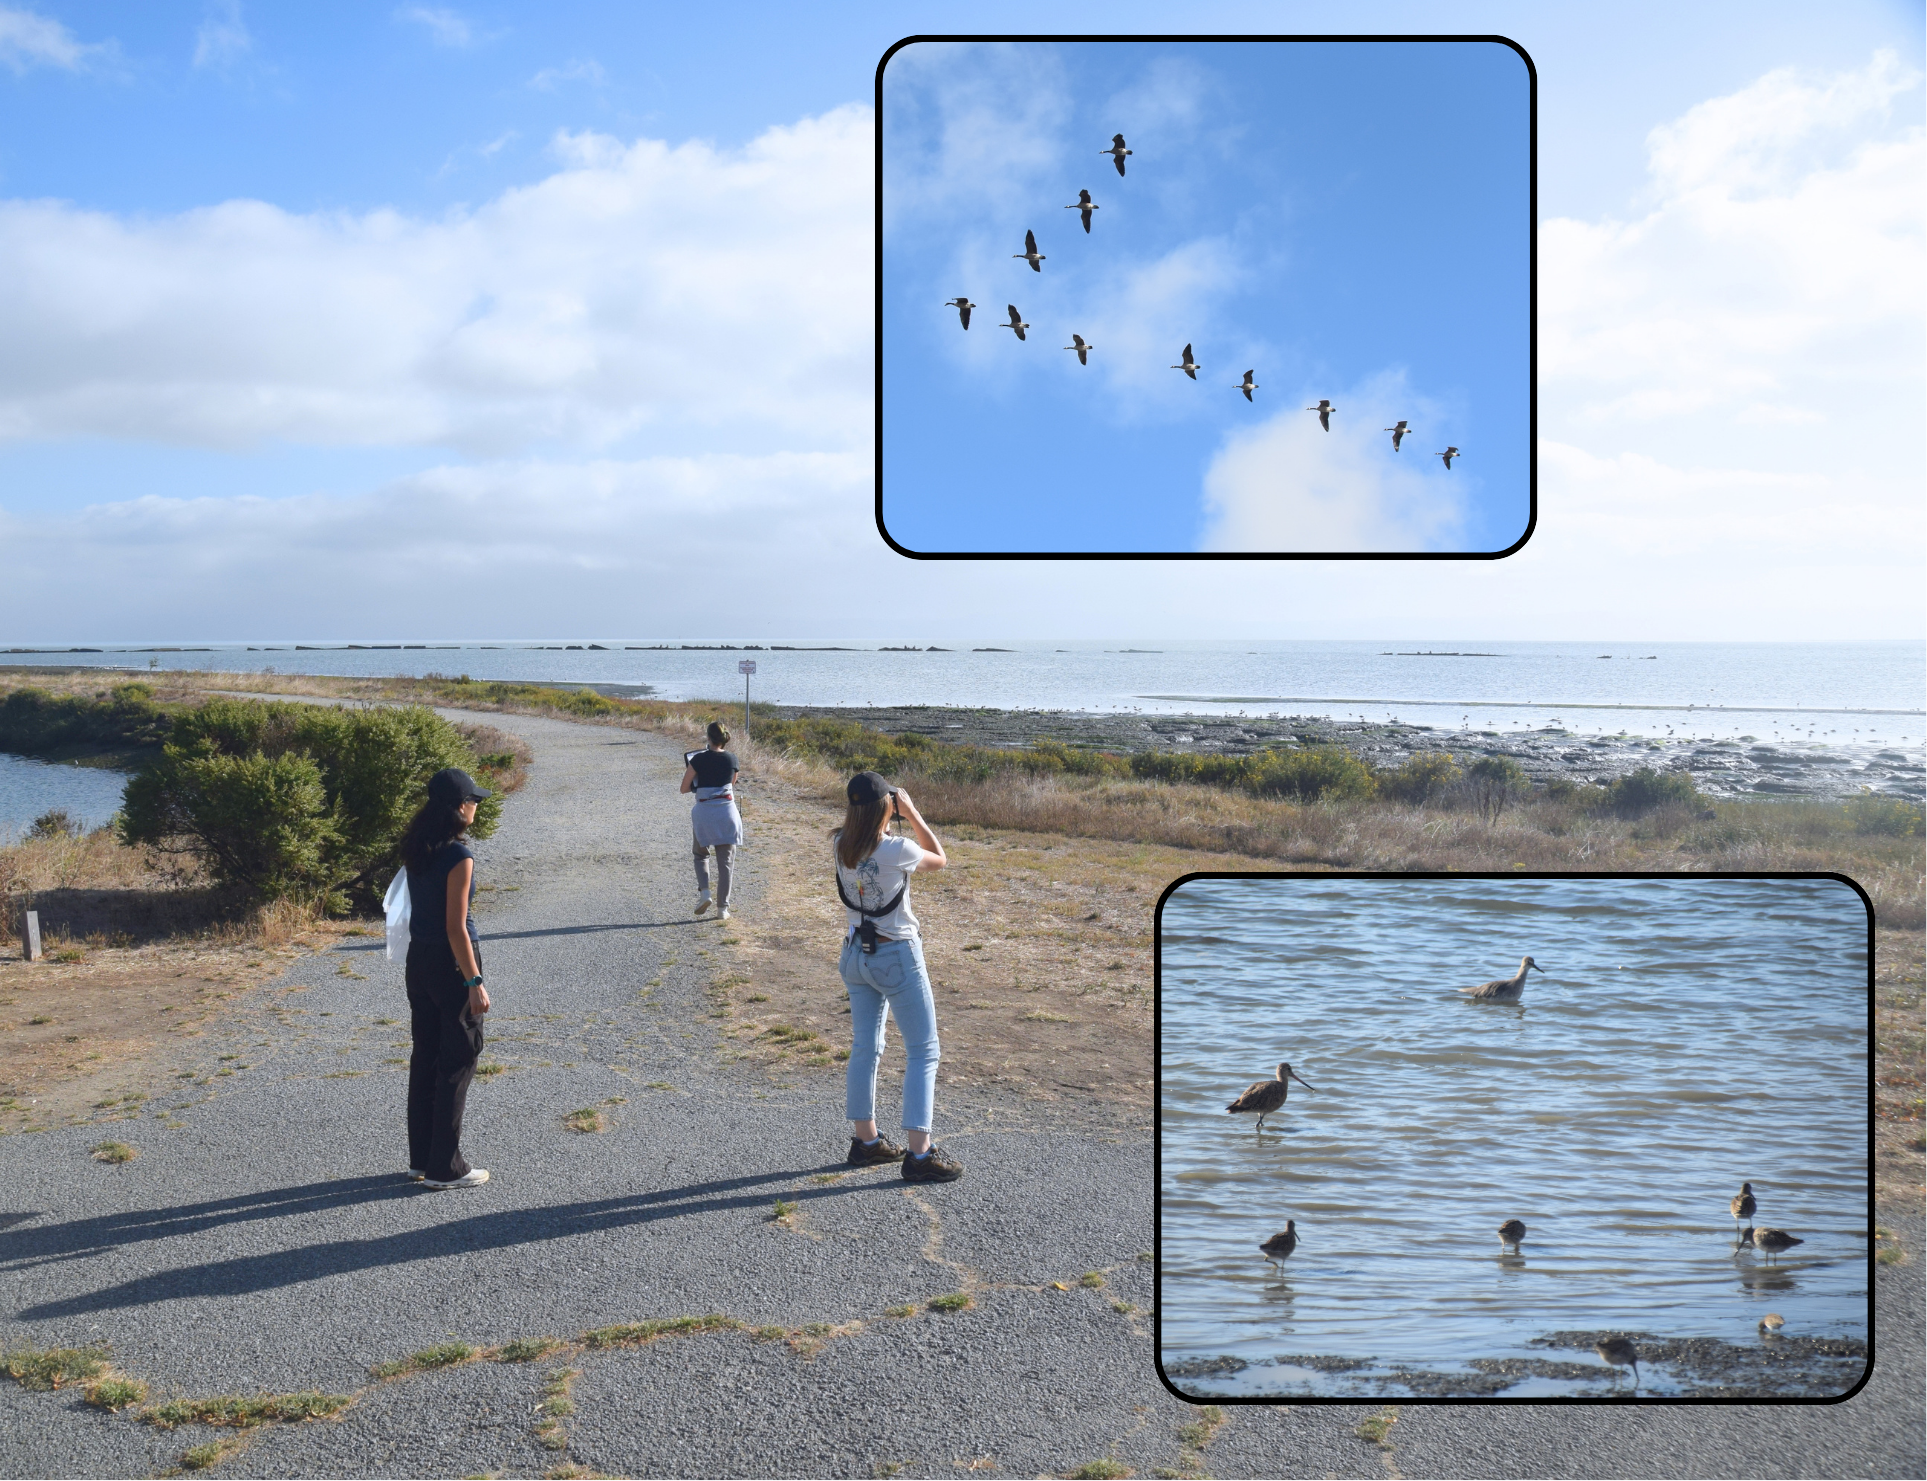
  • Birds: The Marsh provides food for all kinds of birds, including pelicans, egrets, herons, avocets, killdeer, godwits, wimbrels, plovers, and many more. Almost 300 species of birds have been documented at Coyote Point. 

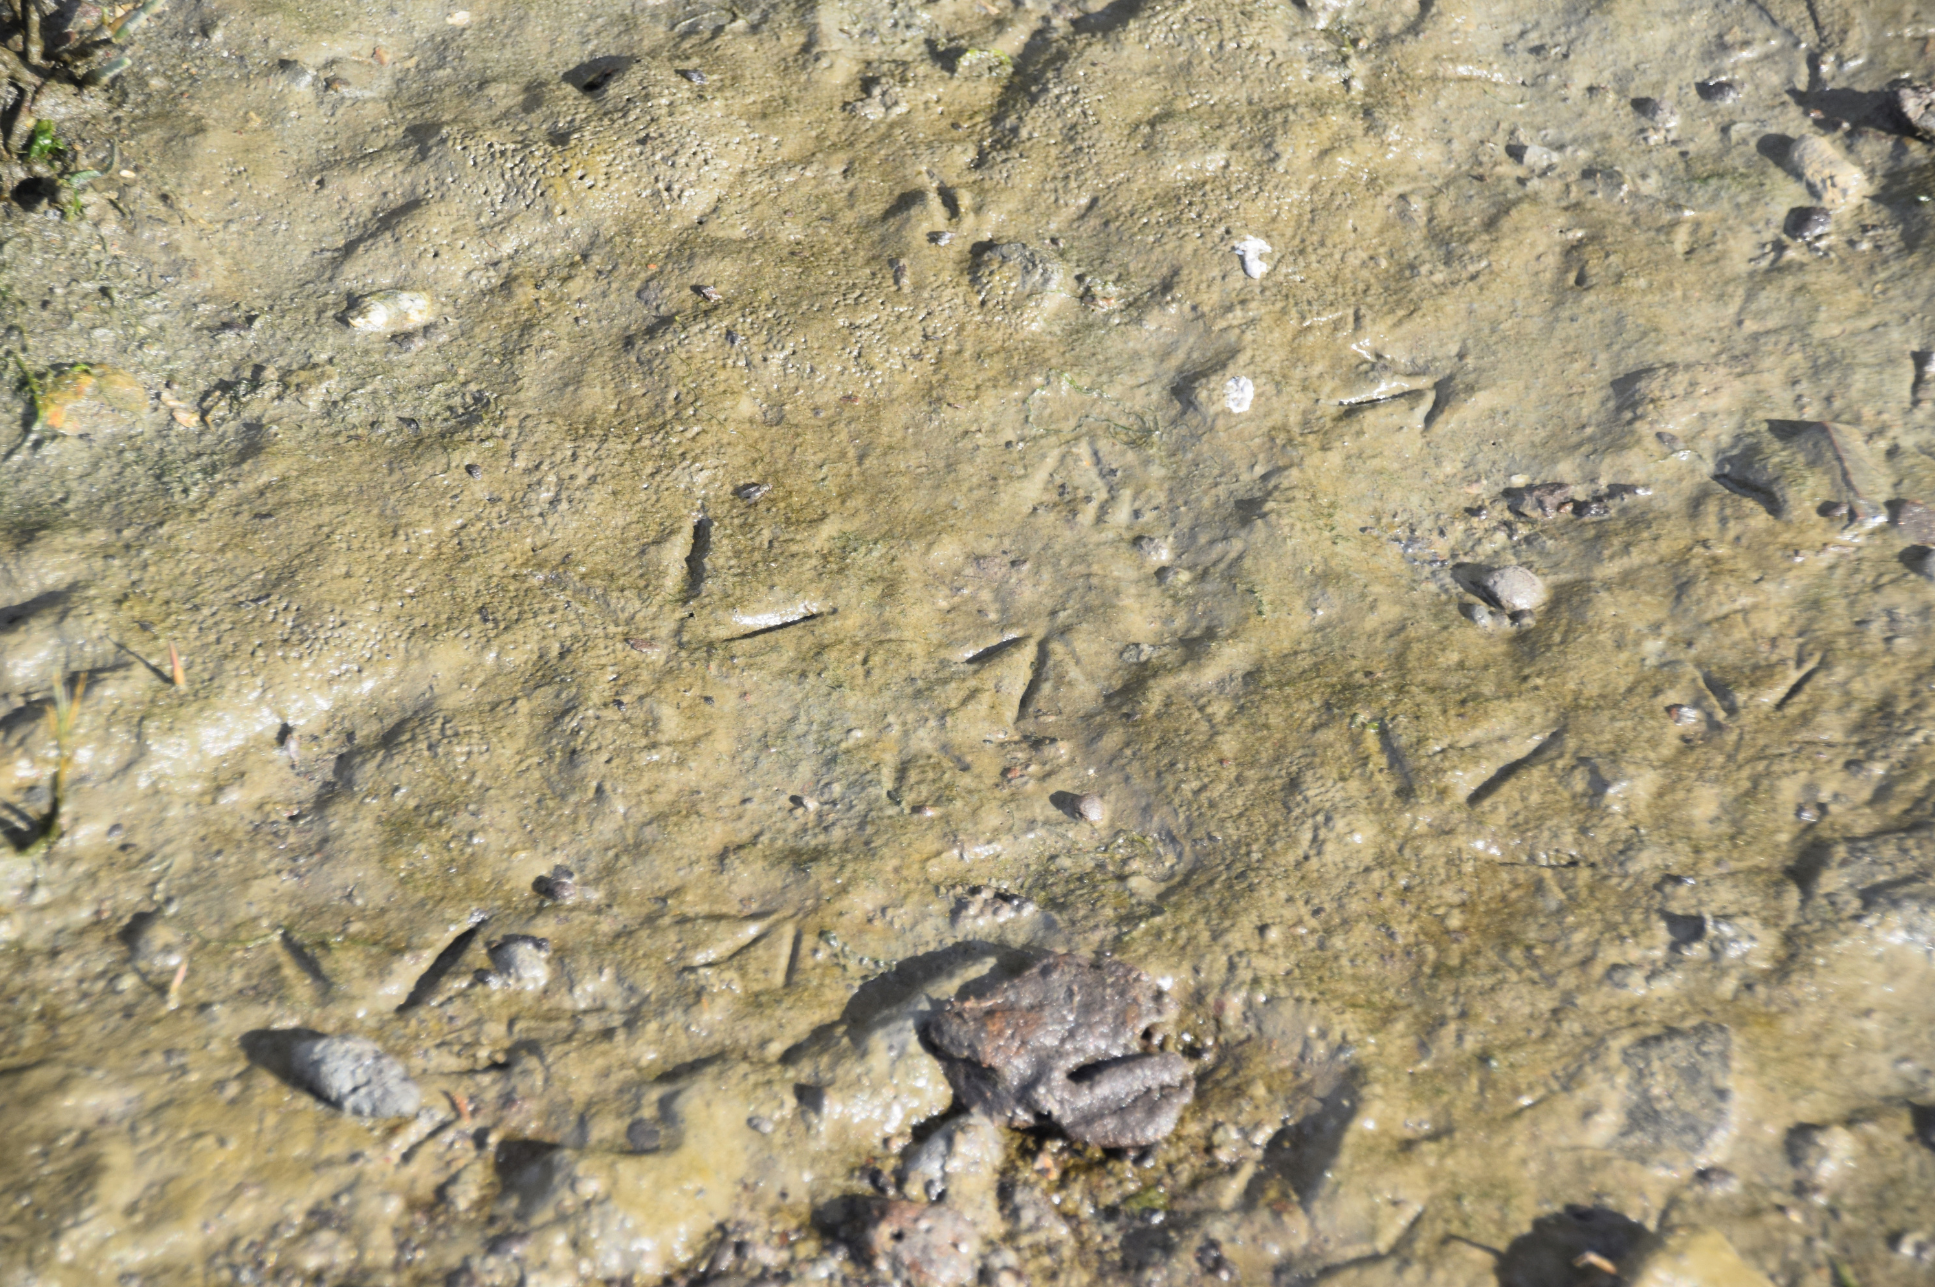
  • Tracks: All kinds of wild animals visit the Marsh for food. See if you can spot the tracks of birds, raccoons, or even coyotes in the mud. 

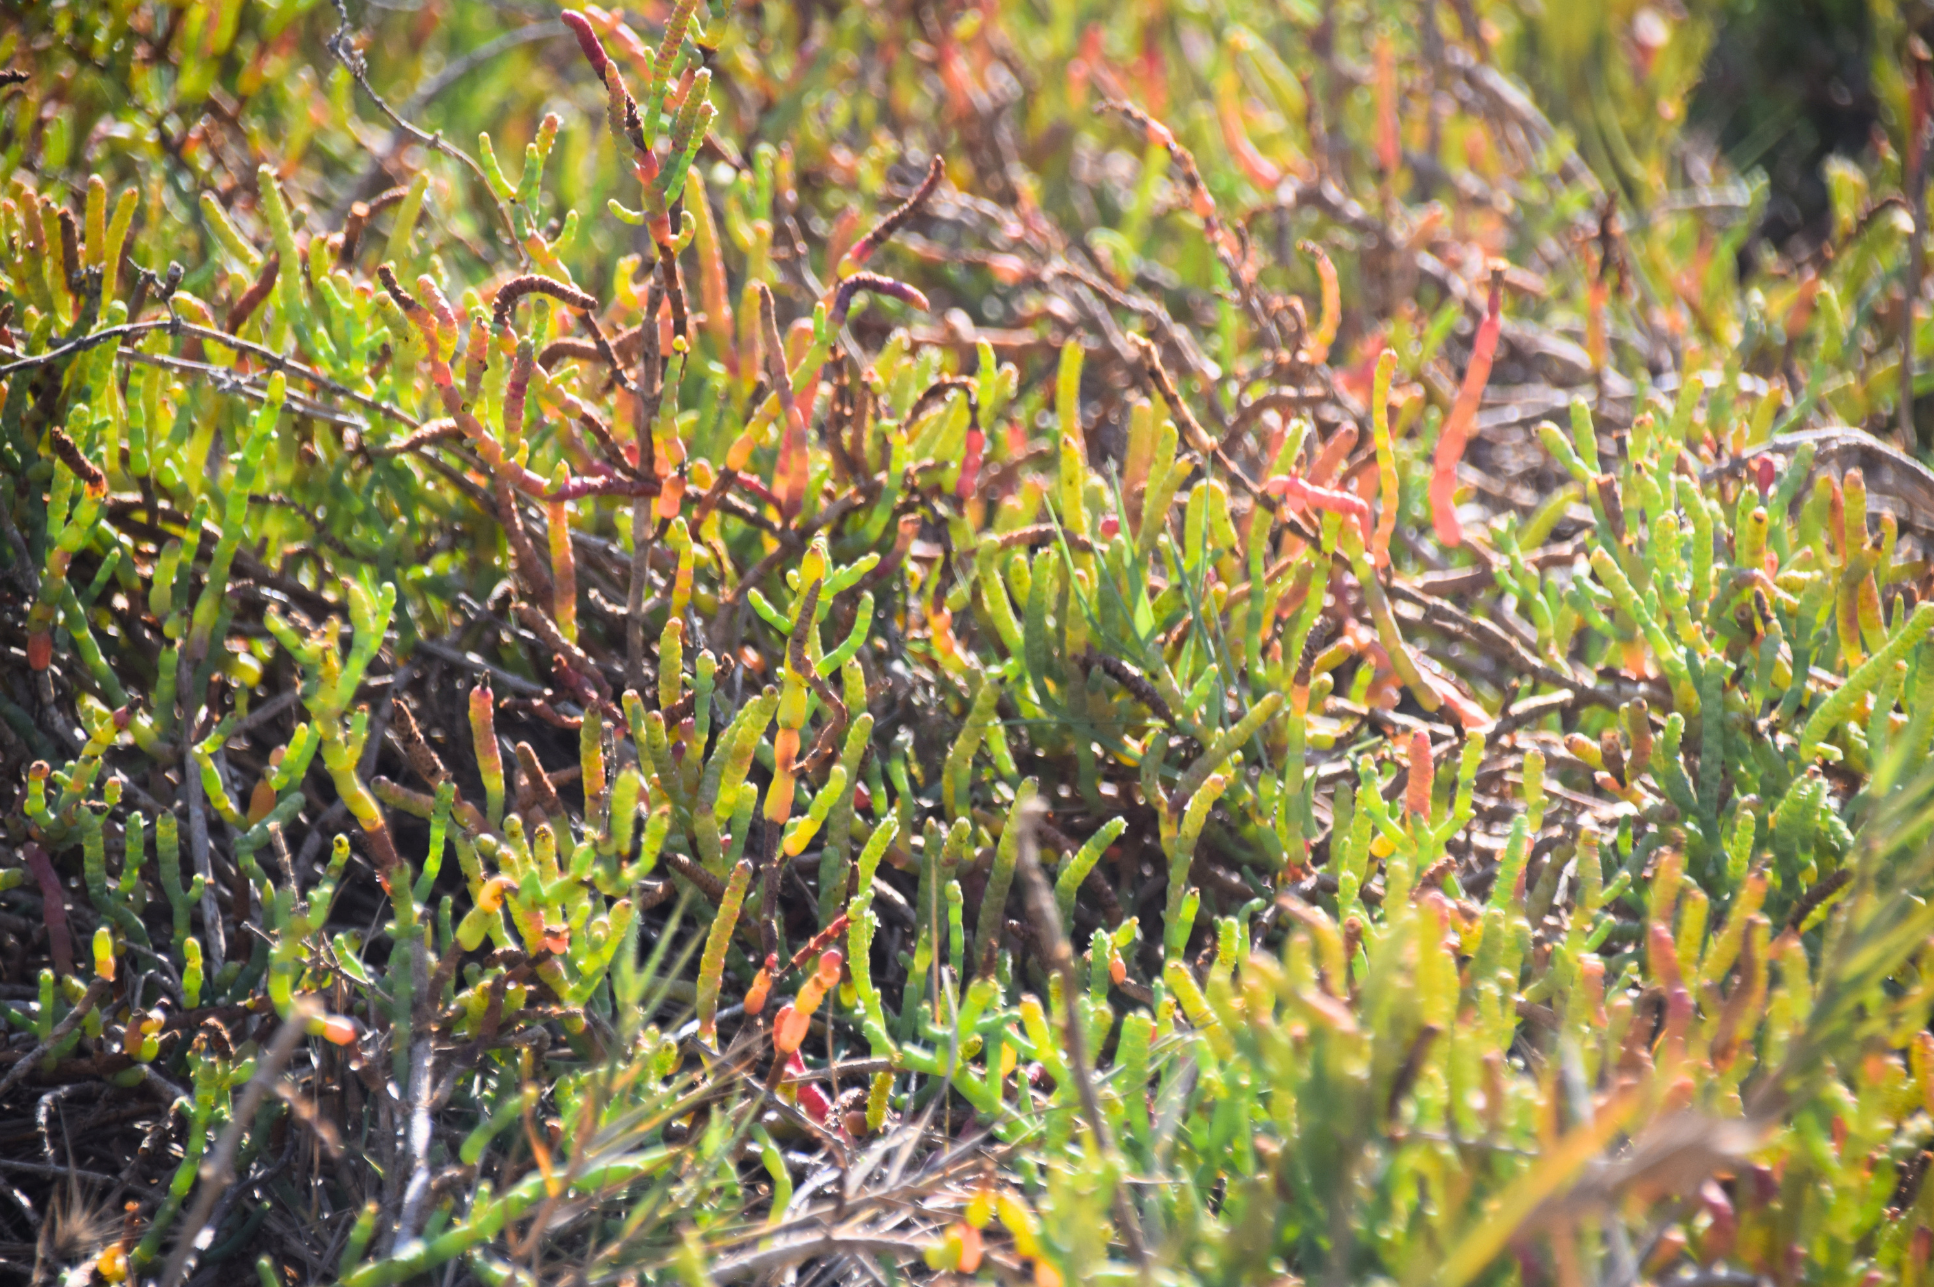
  • Salt-adapted plants: Pickleweed and salt grass grow all around the marsh, and they get their water from the salty bay. Salt grass secretes the extra salt onto its leaves, and pickleweed stores the salt in its round stems. 

Early morning is a great time to spot birds and other animals. 

The sticky mud captures footprints perfectly. 

When a pickleweed stem has extracted enough salt, it turns red and falls off. This removes excess salt from the rest of the plant. 

Marsh science:

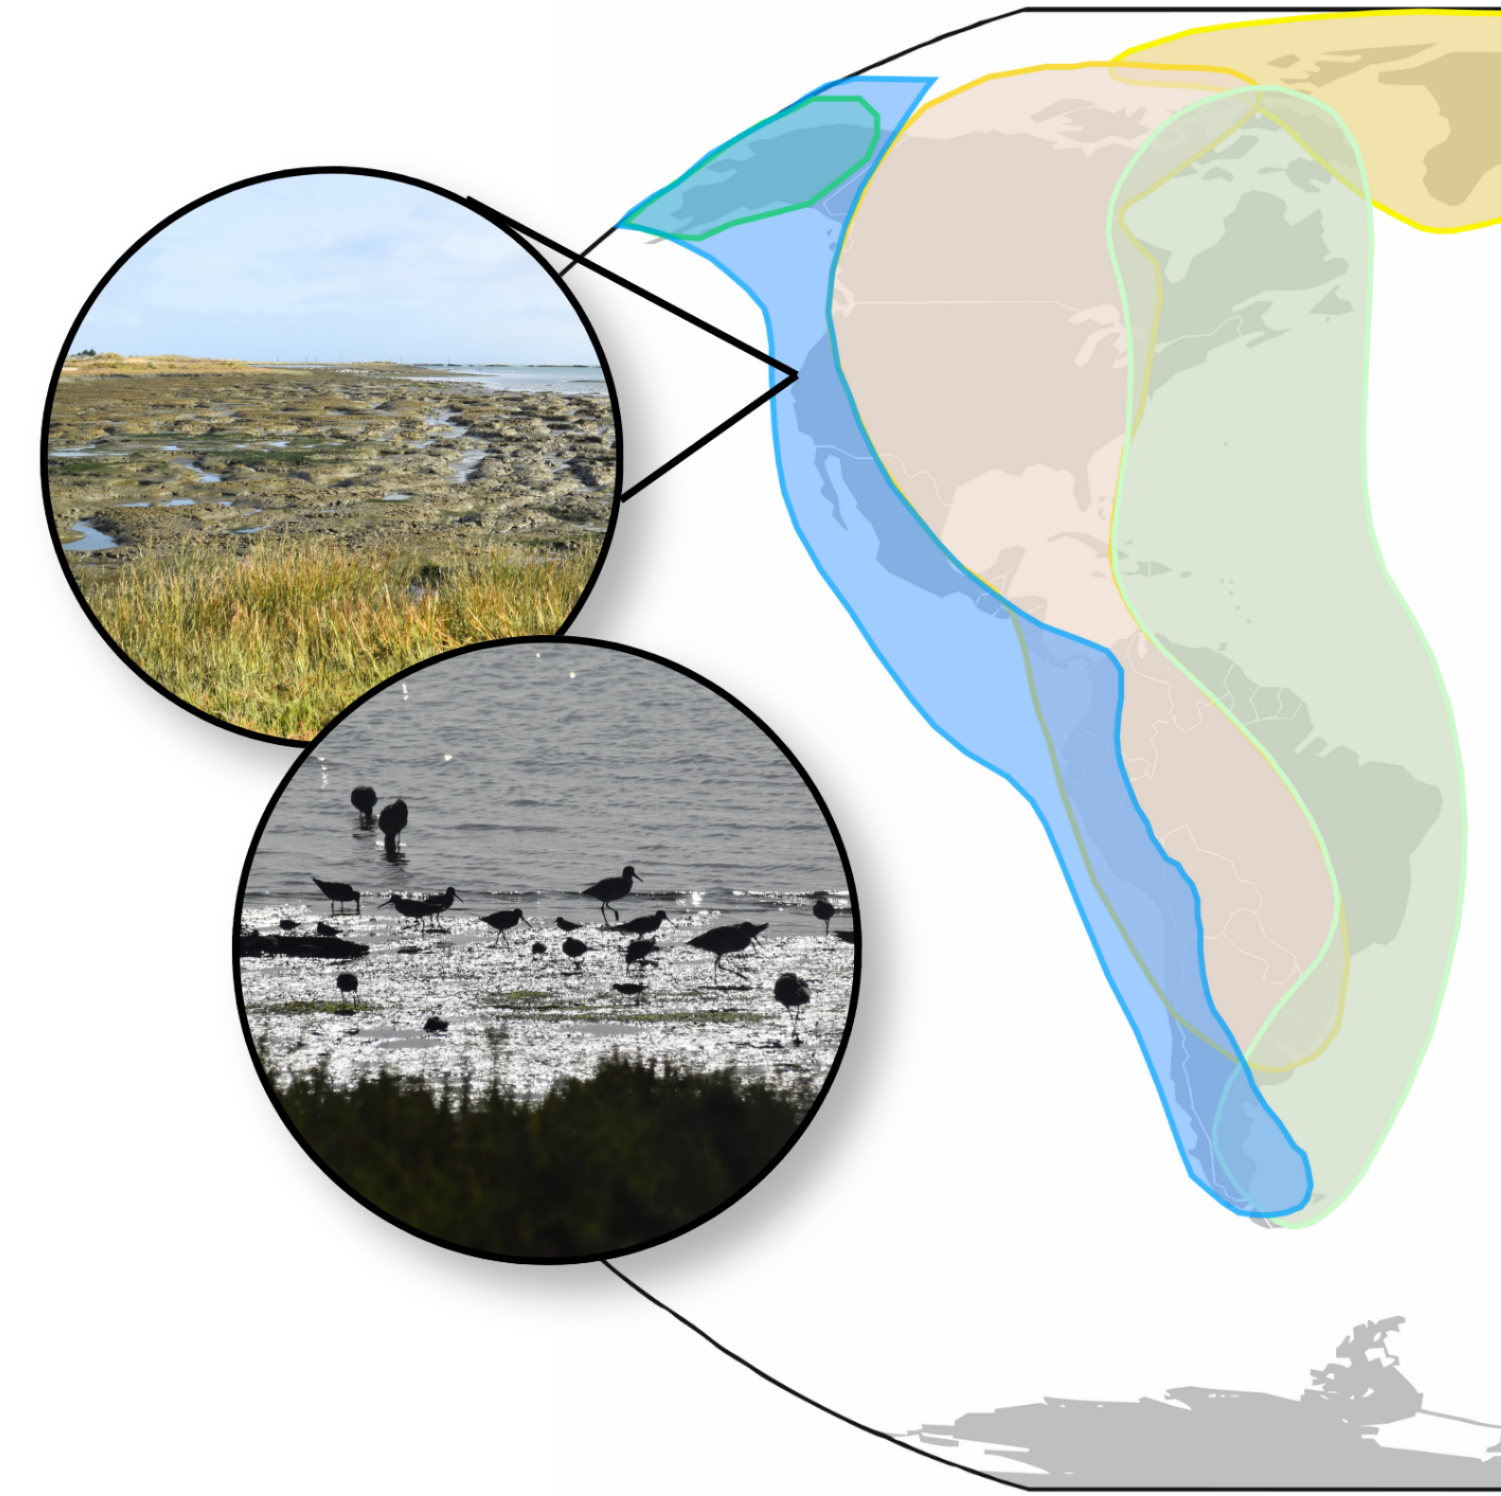
  • Coyote Point is a stop on the Great Pacific Flyway – the seasonal migration route that birds follow up and down the West Coast. It takes a lot of energy to fly hundreds of miles, so many birds stop at wetlands like the Marsh to eat and rest. 

  • Salt marshes form where sediments collect, often near where rivers meet the sea. Coyote Point used to be an island, and the (relatively) calm waters around it built up mounds of mud on all sides. Much of the historic marsh was filled in for farmland in the late 1800s. 

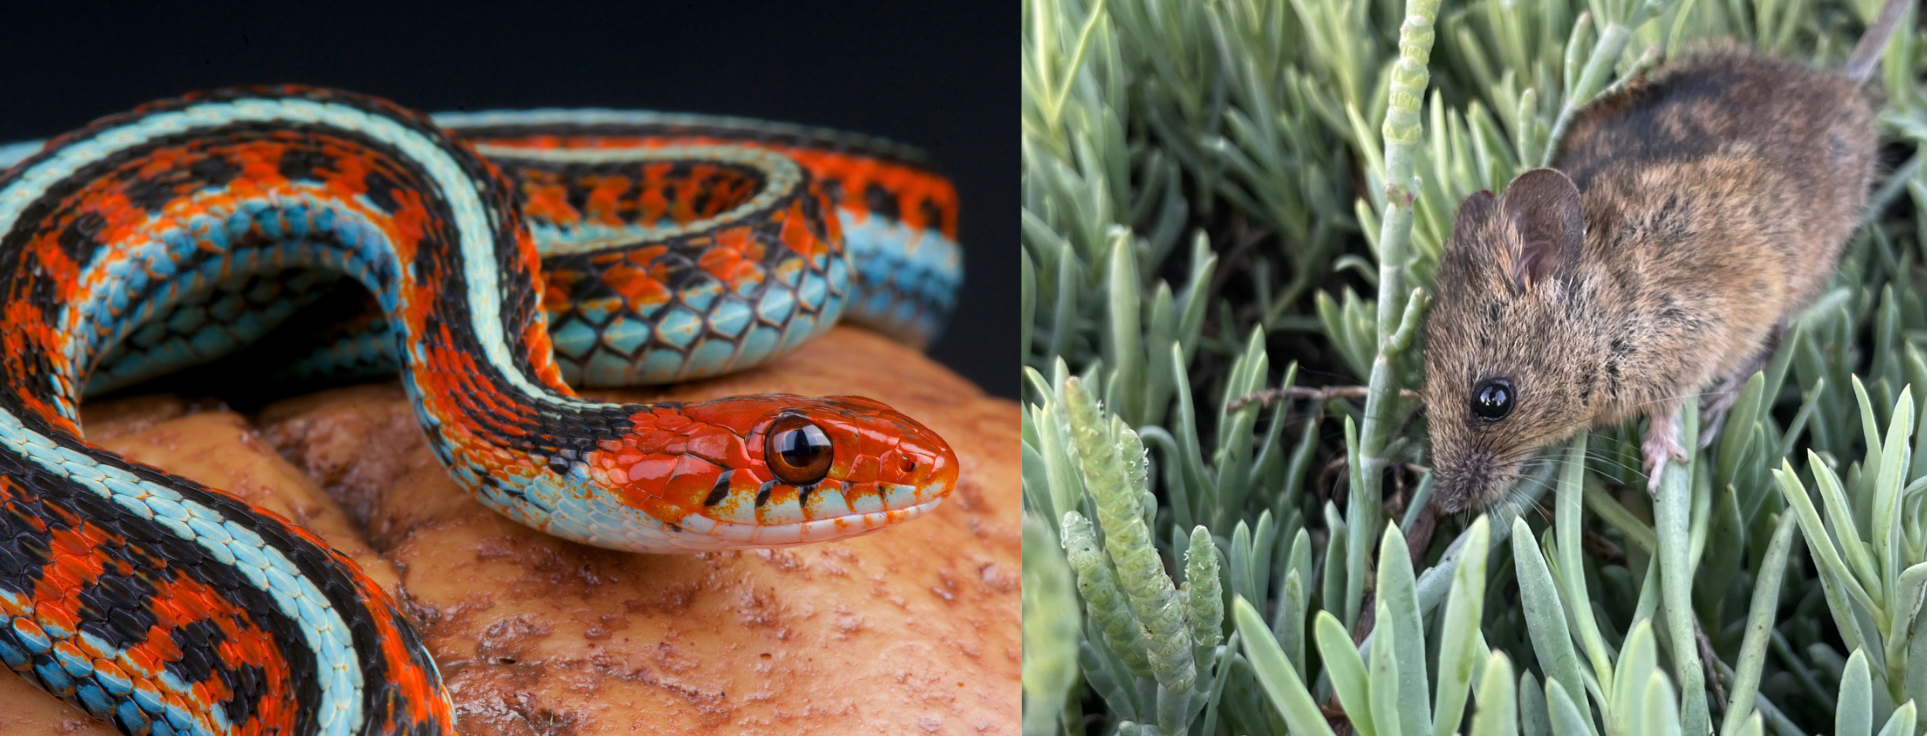
  • The Marsh is home to two endemic animal species: the salt marsh harvest mouse and the San Francisco garter snake. These animals only live in the South Bay Area and nowhere else in the world. 

The Pacific Flyway is highlighted in blue. Map by Pinpin via Wikimedia Commons (CC BY-SA 3.0)

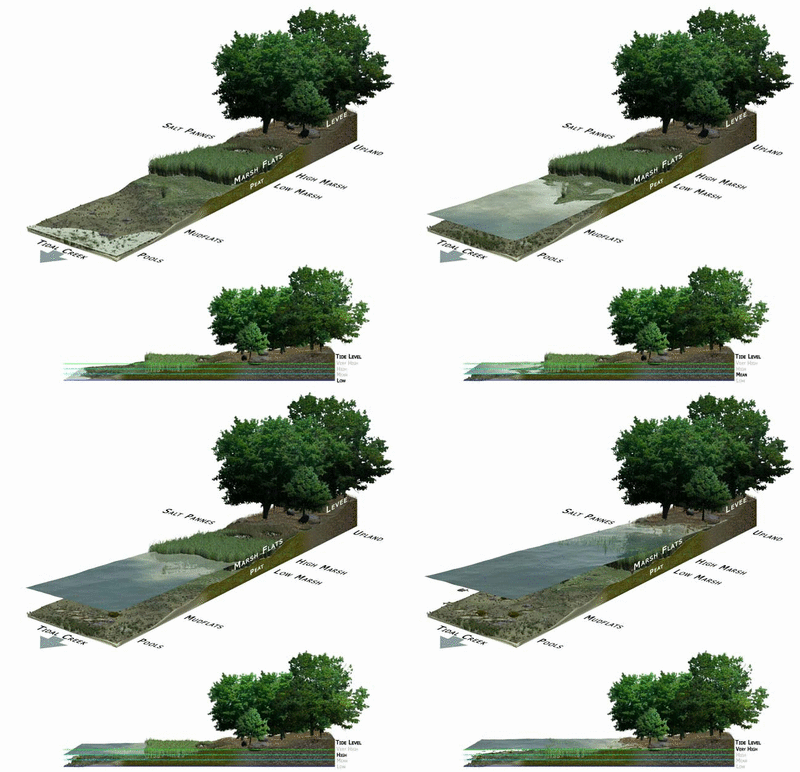
High tide floods the Marsh twice a day. Image from NOAA via Wikimedia Commons (public domain)

San Francisco garter snake by mgkuijpers via Adobe Stock; Salt marsh harvest mouse by Rachel Tertes/USFWS via Wikimedia Commons (public domain)

Know before you go:

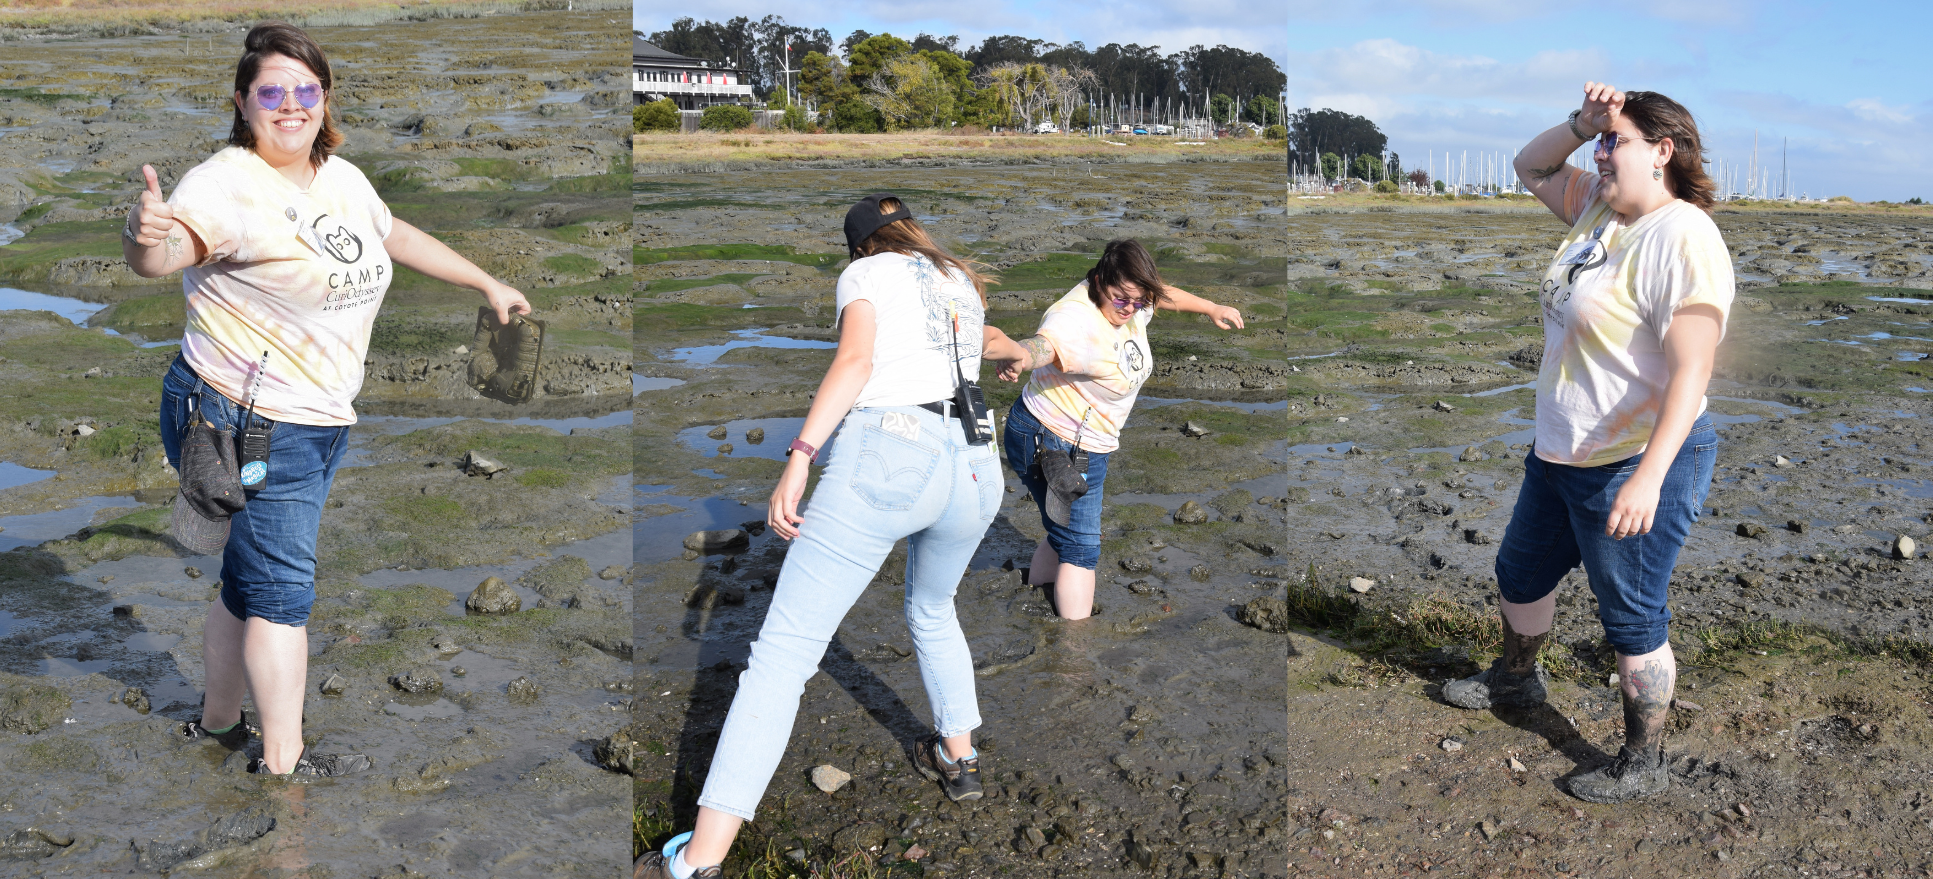
  • The Marsh is full of sticky, slippery, deep mud, so wear shoes that can get muddy and that will stay on your feet. If you venture off the path, step carefully to test the ground before you put your weight there. 

  • The path leading from the paved trail into the Marsh is narrow and uneven.

Exploring the mud is lots of fun, but go with a friend and hang on tight to your shoes! The mud will rinse off your skin with water.

The Marsh access trail goes out onto a long, curved gravel bar.


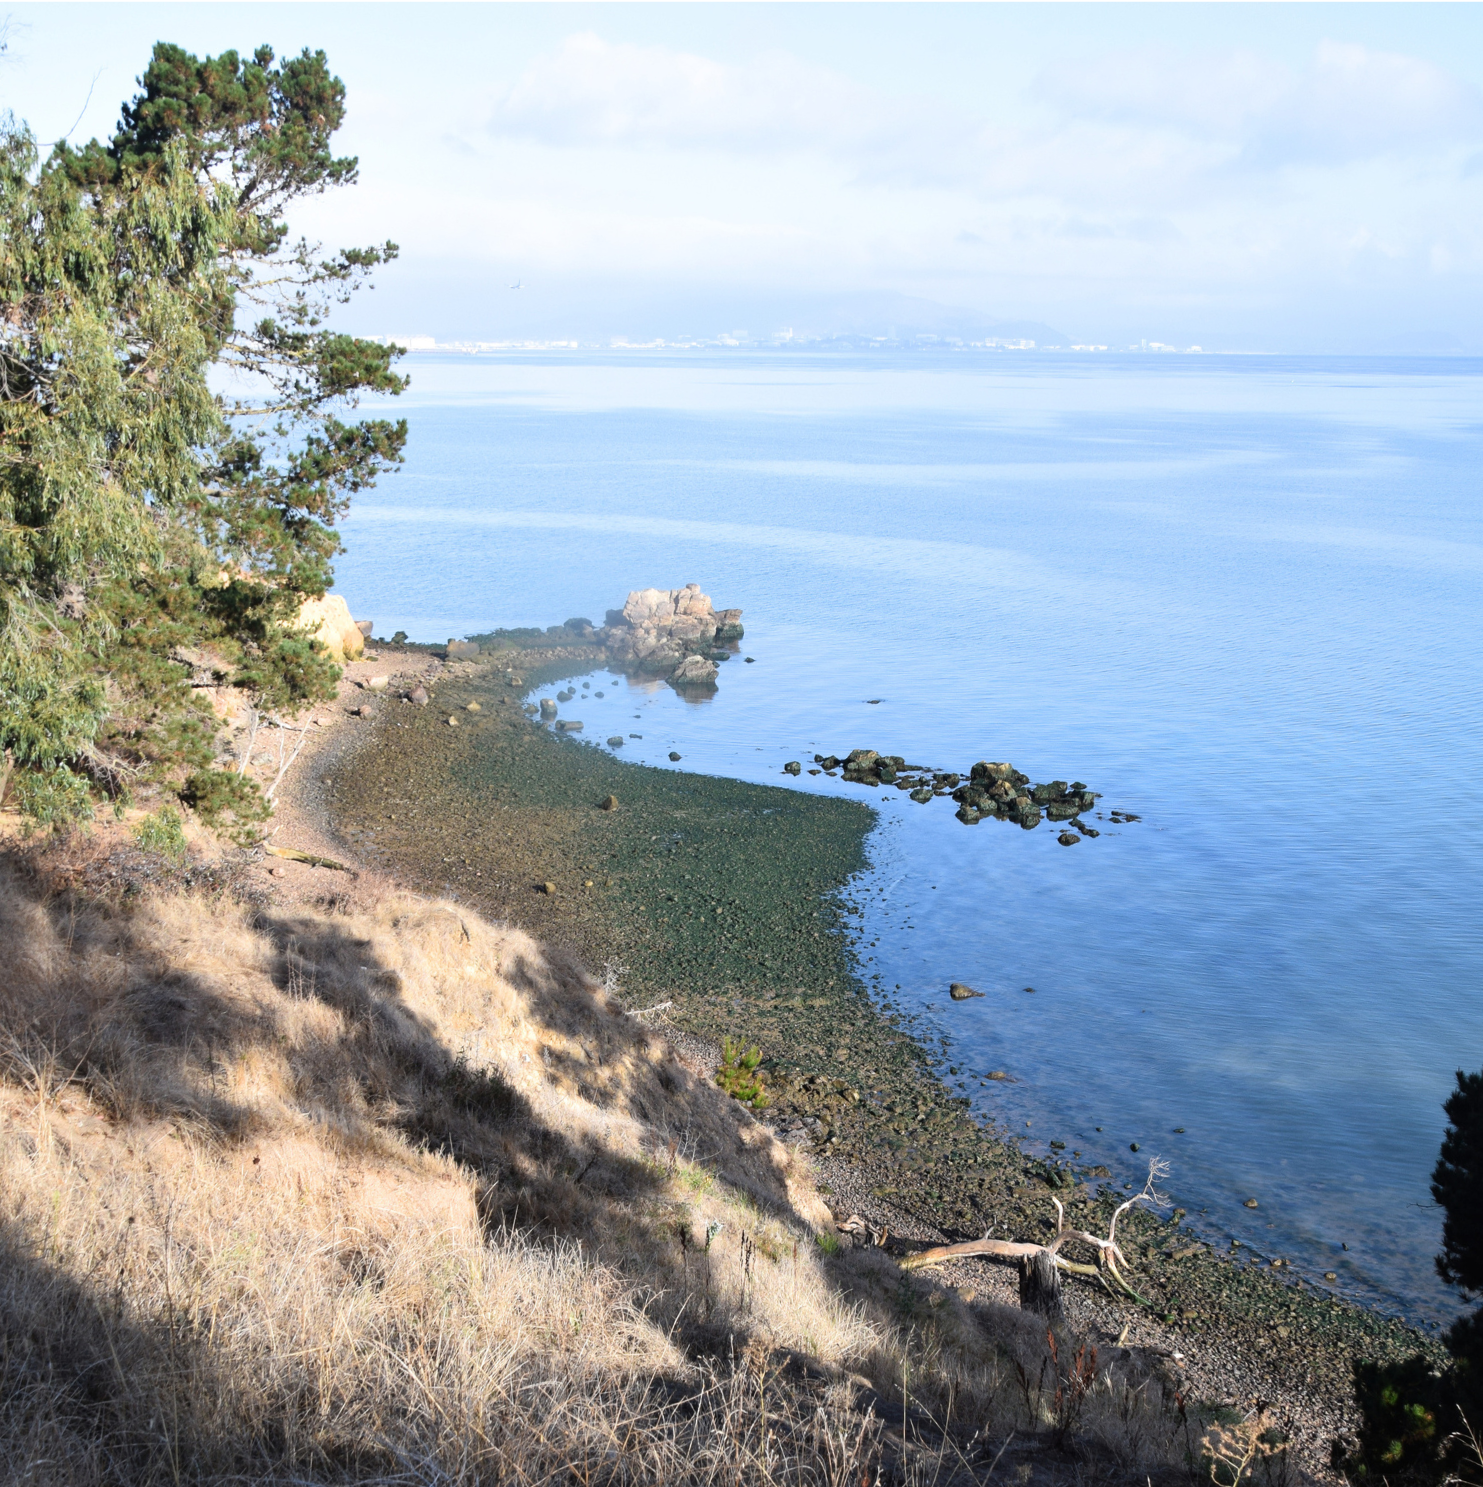
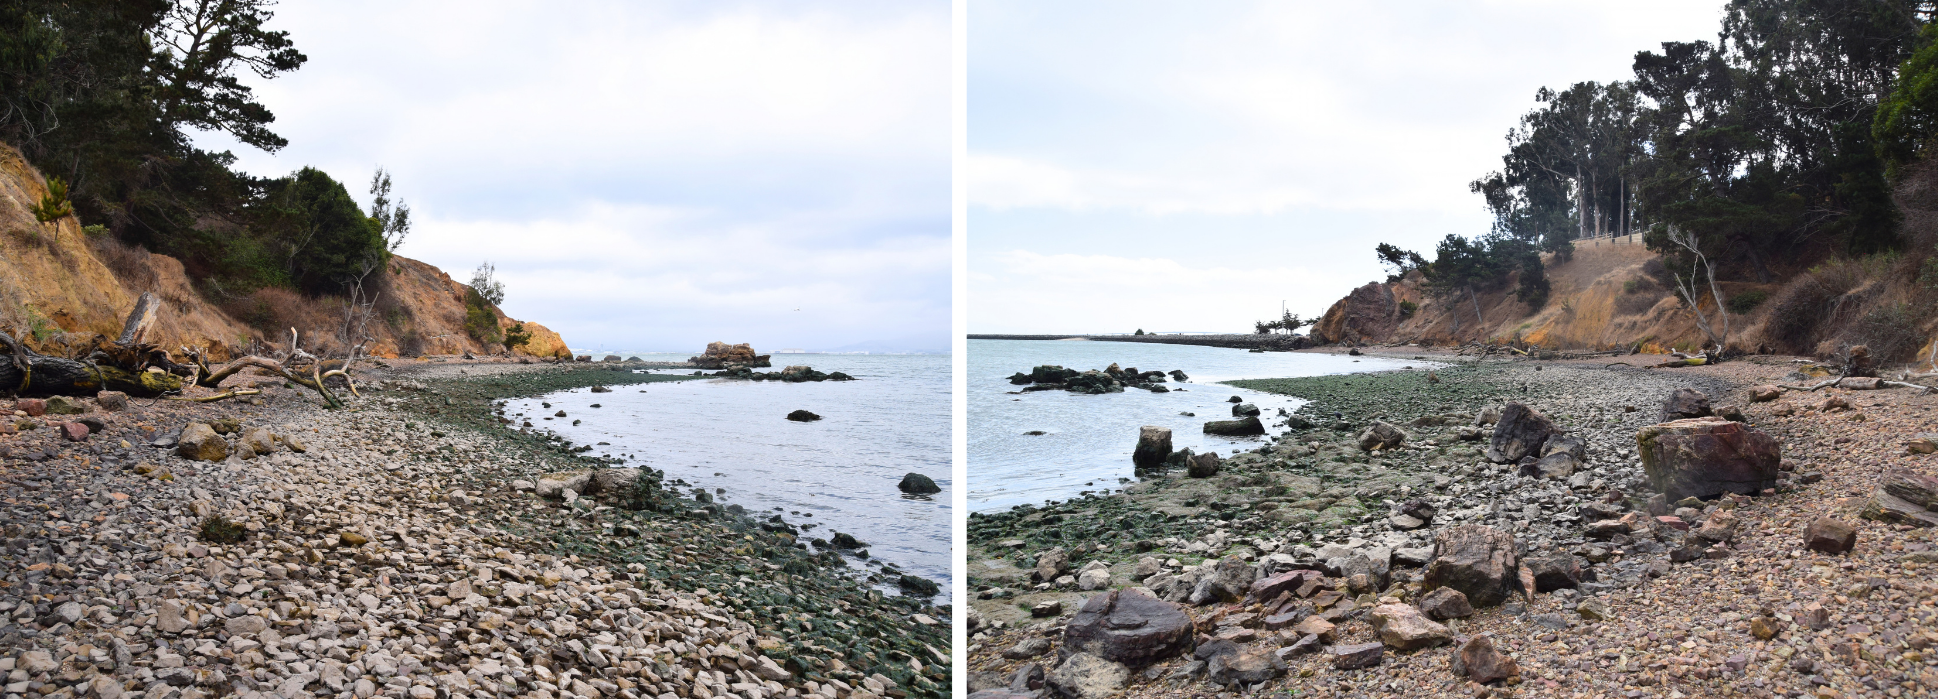
The Rocky Beach

The Rocky Beach is a great place to explore the intertidal zone (the region between high and low tide), along with the animals and plants that live in this constantly-changing world. 

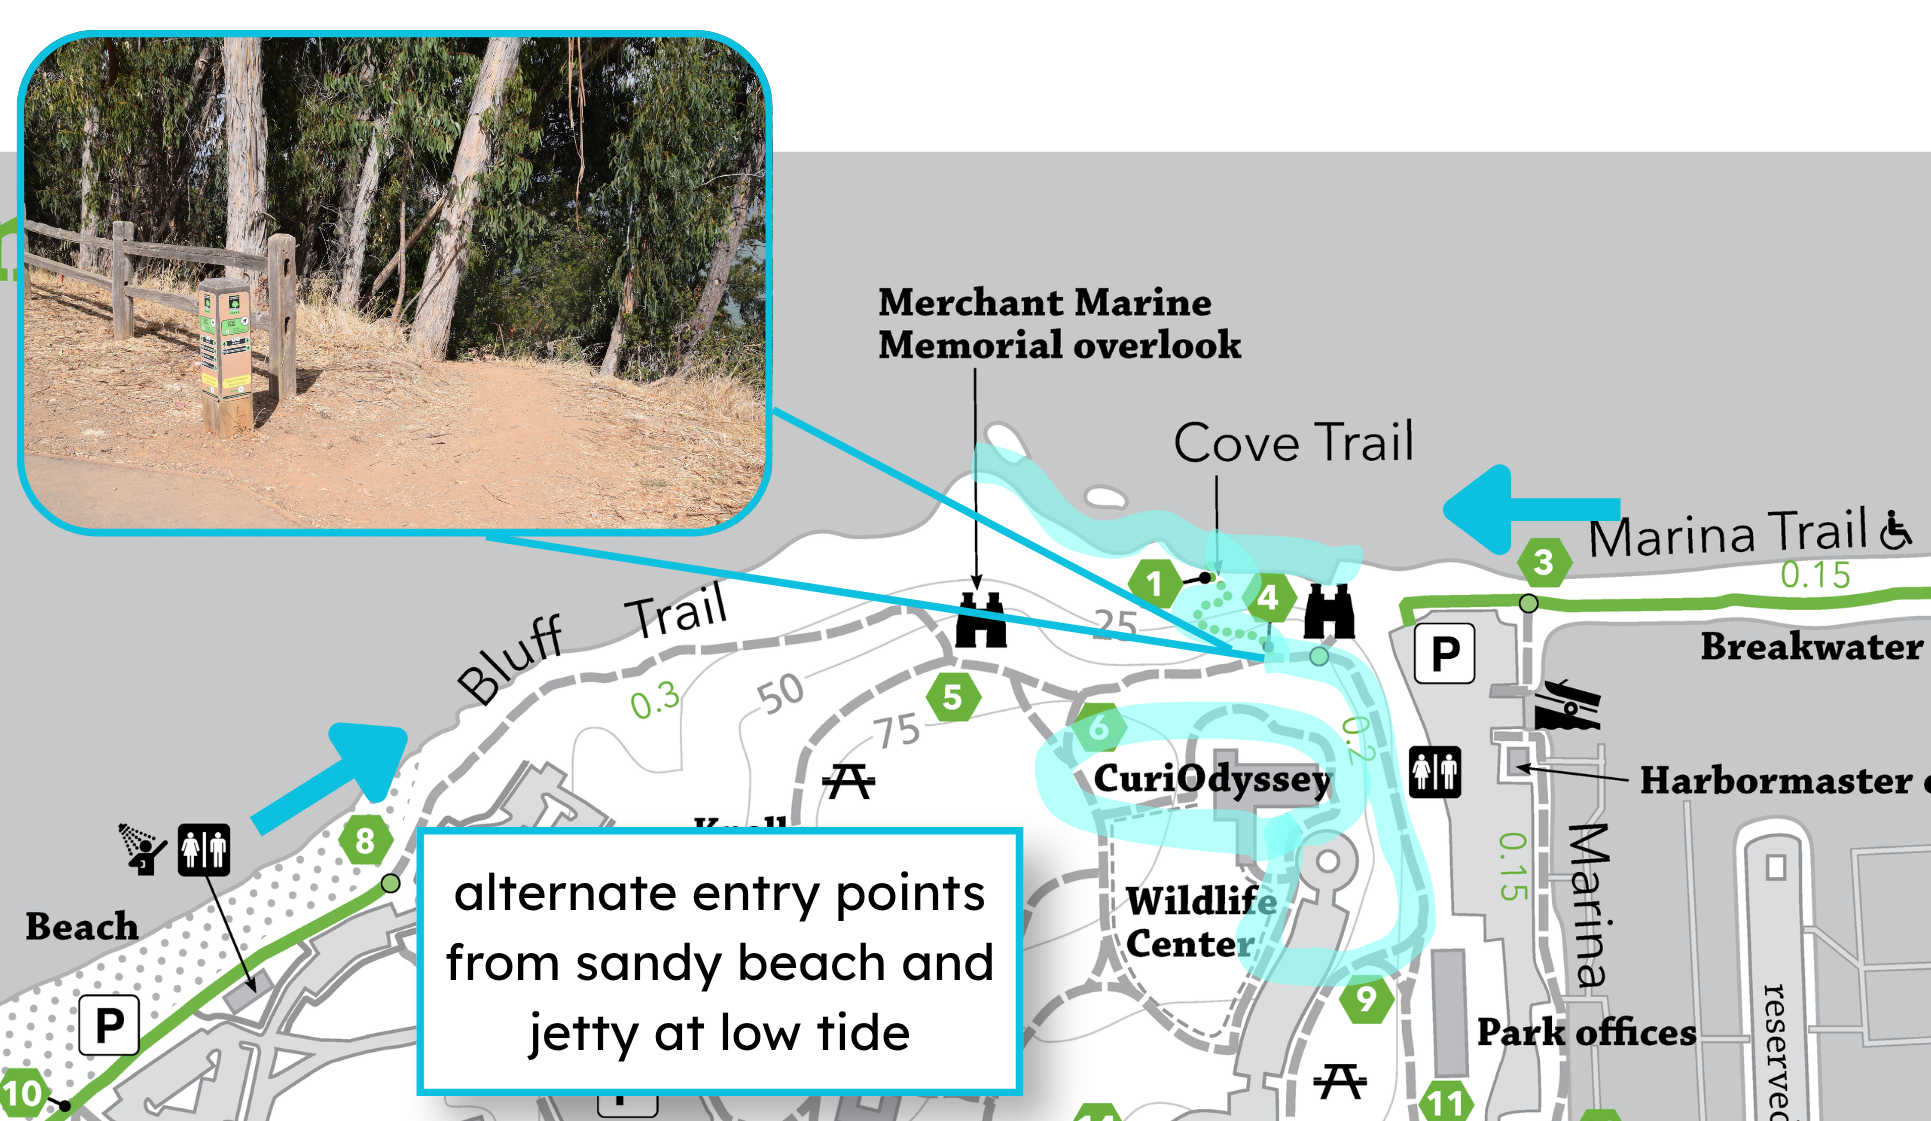
How to get there:

Head down the Cove Trail behind the Bay Gallery (the blue building at the back of CuriOdyssey). You can also reach Rocky Beach from the parking area by the Jetty or from the right end of the sandy beach near the park entrance. 

If you want to walk along the whole Rocky Beach from end to end, go at low tide (unless you want to swim around the points).

Things to see:

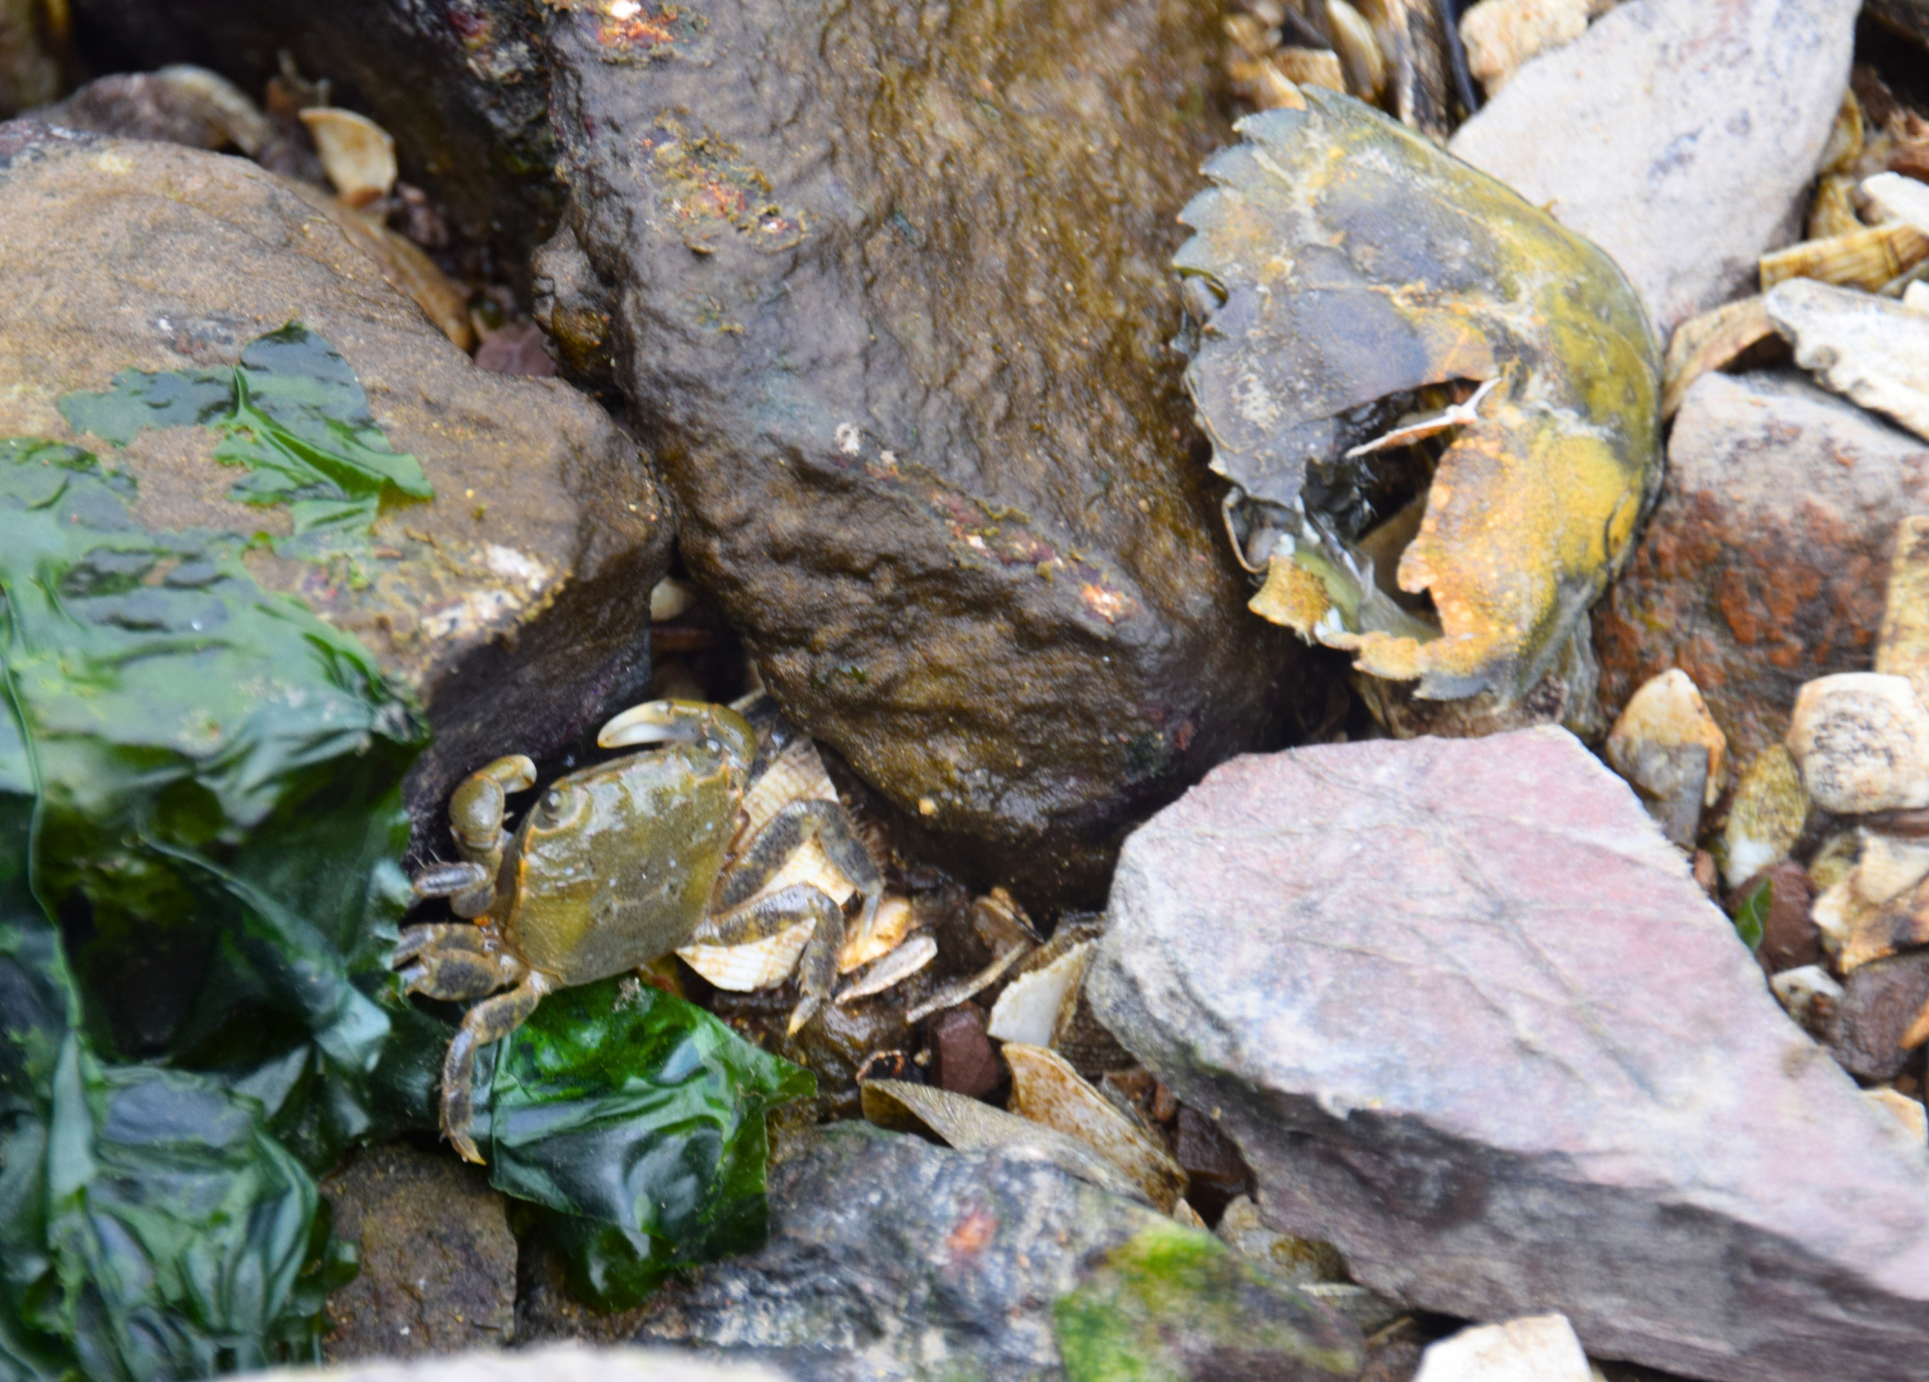
  • Crabs: These tiny yellow and green shore crabs are all over the place, but you may not see them unless you pick up rocks near the water. Move rocks slowly and gently to see what’s underneath. 

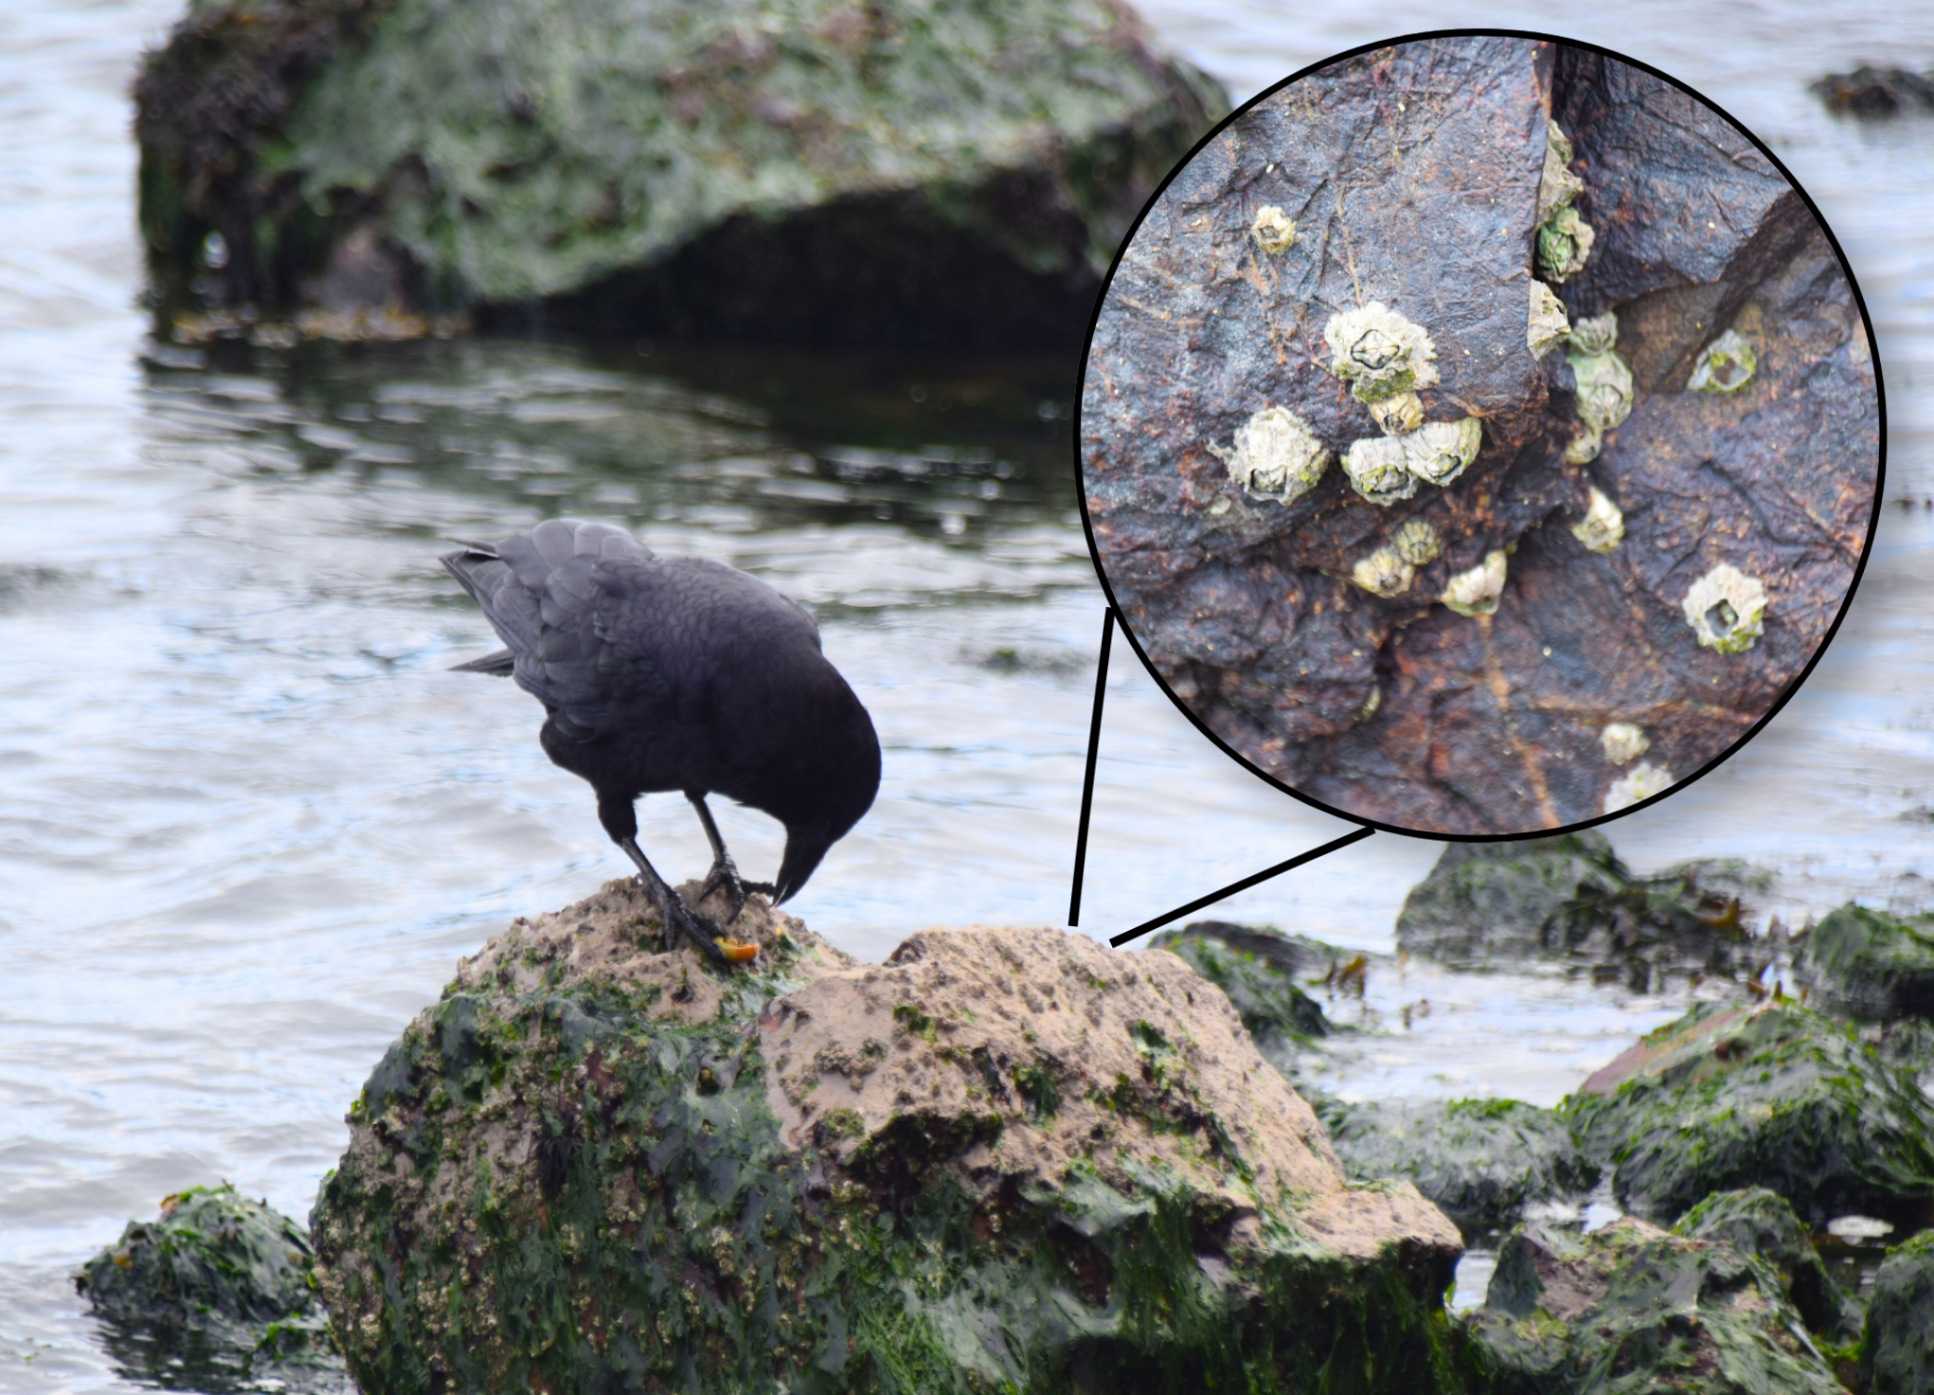
  • Intertidal life: Some animals live on rocks that are underwater at high tide, but are exposed at low tide. Barnacles, marine snails, and ocean isopods are adapted for both wet and dry conditions. 

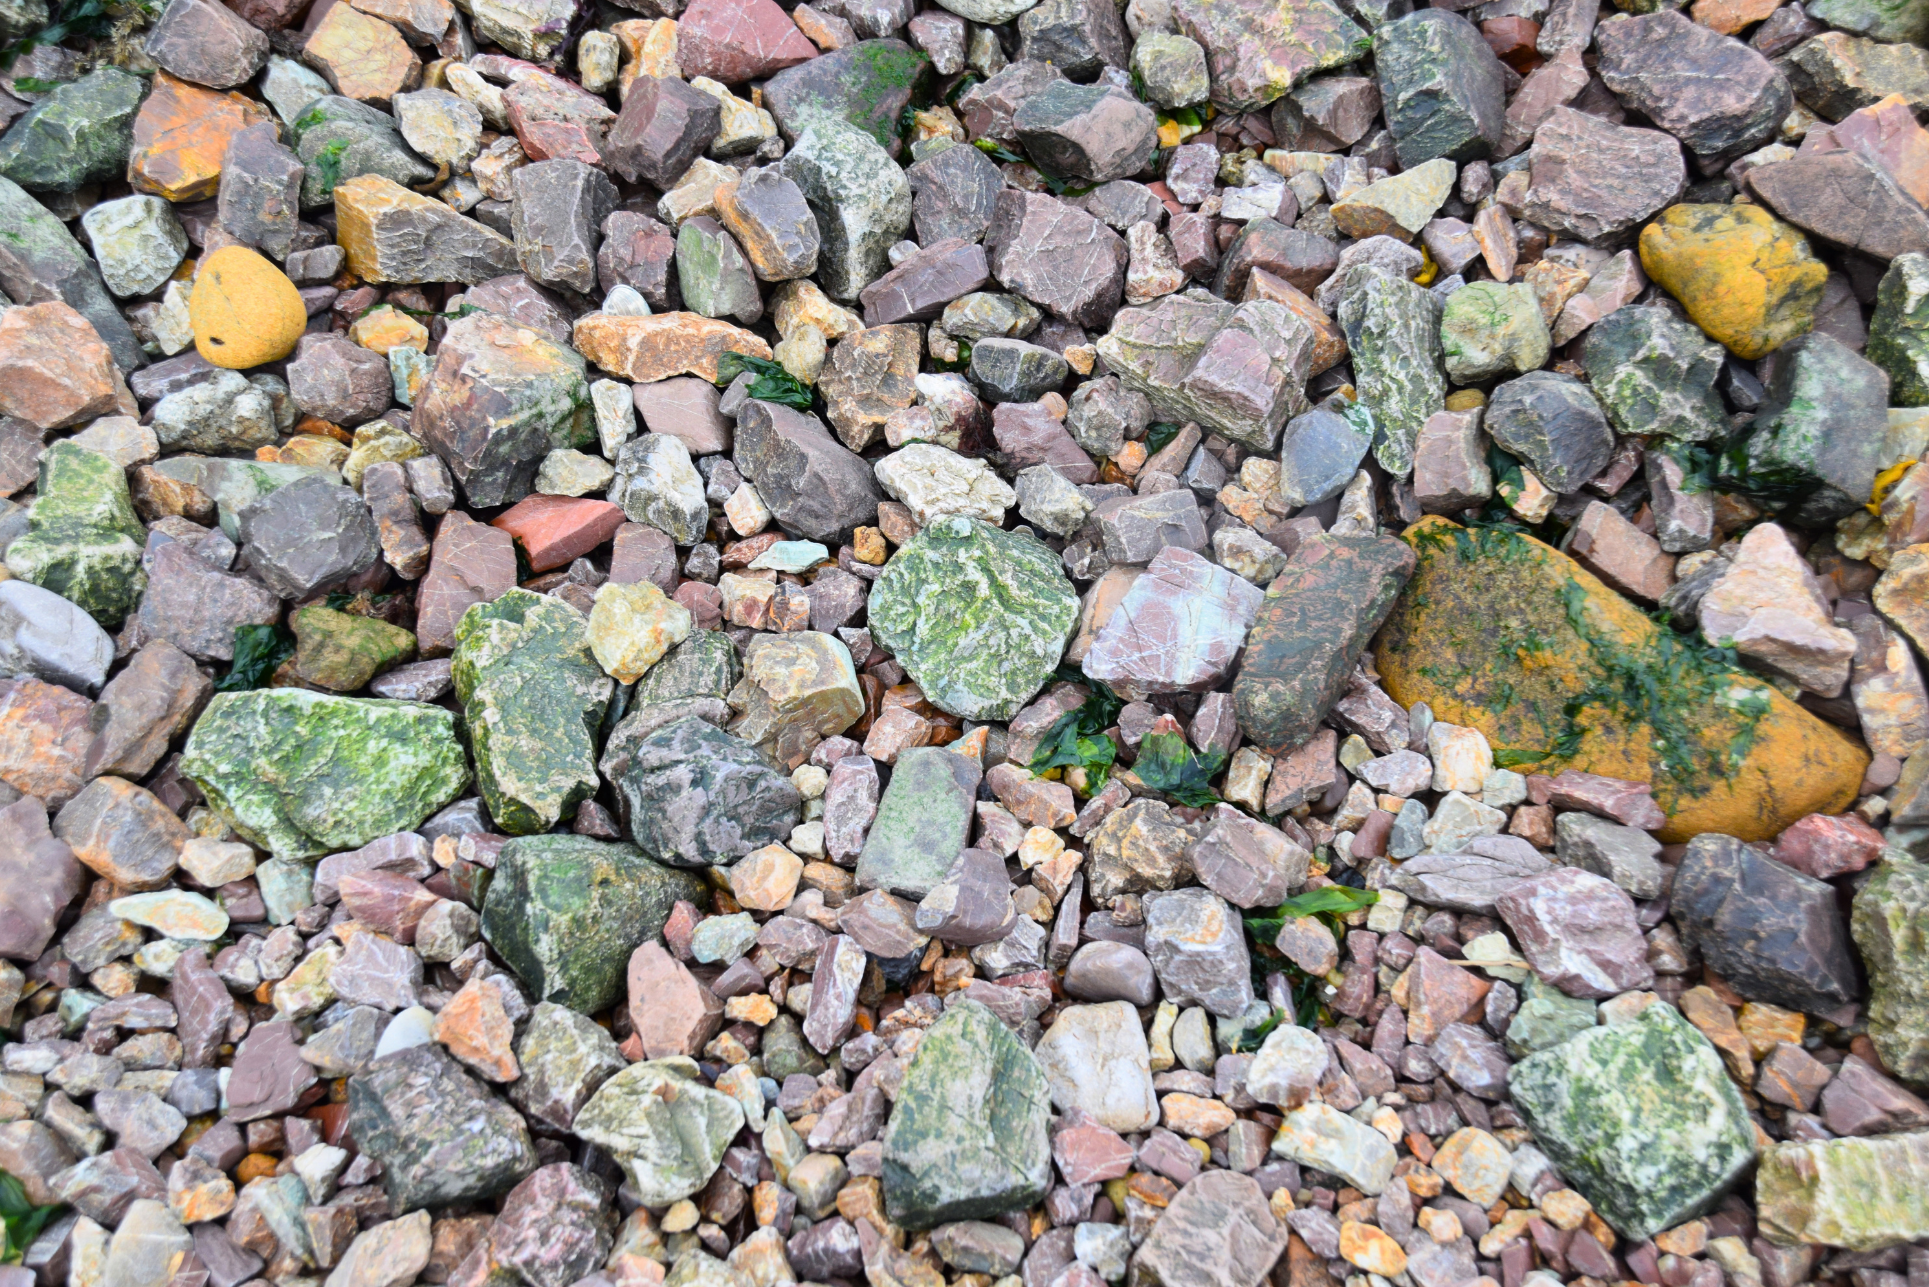
  • Colorful rocks: The colors come from mixes of different minerals in the rock, like iron for red, magnesium for green or black, and silica for lighter grays and tans. 

Most of these crabs are the size of a quarter or smaller. They shed their exoskeletons (hard outer coverings) as they grow bigger.

This crow found a tasty treat among all the closed-up barnacles in the intertidal zone: a juicy snail.

There are a lot of minerals in this photo, but some of the green also comes from algae or seaweed. The plants can be slippery near the water, so watch your step.

Rocky Beach science:

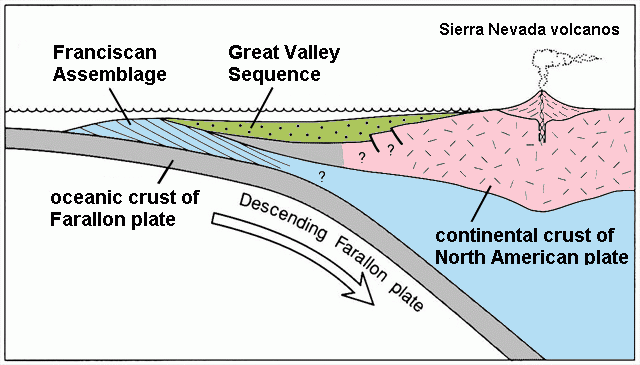
  • A camper asked me an amazing question this summer: “How did the rocks get here?” I didn’t know the answer, so I read a whole book about it (Building California by John McPhee). Coyote Point is part of the Franciscan Assemblage: a messy formation of different rock types that were mushed together as they collided with North America.

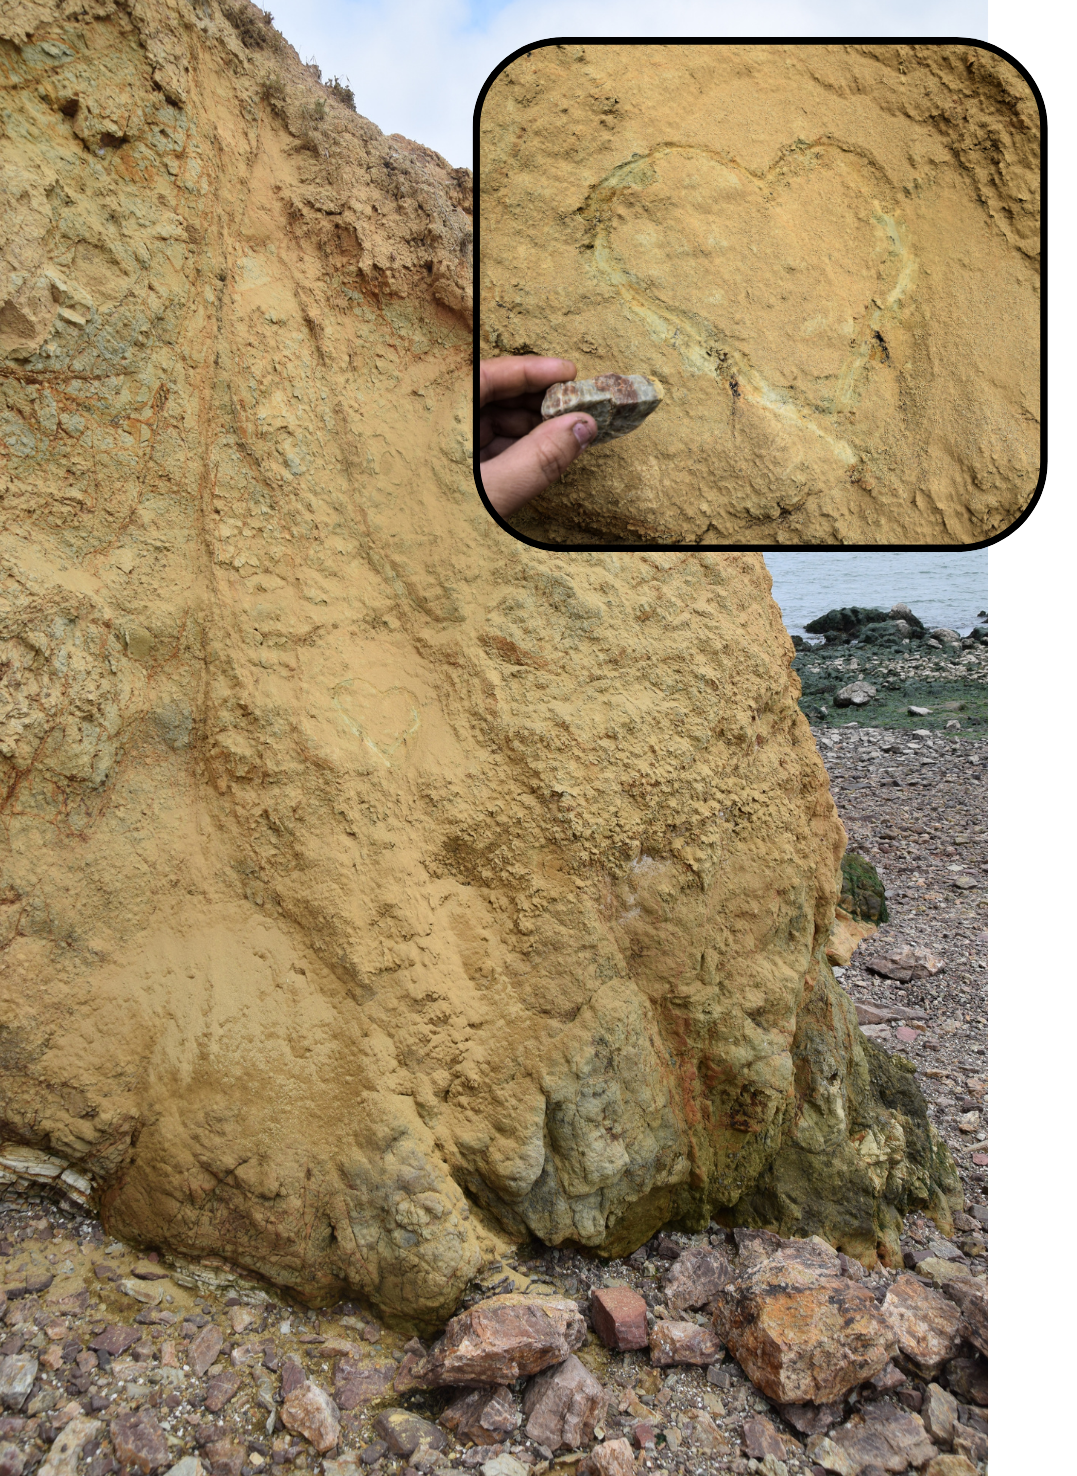
  • Some of the rocks on the beach have washed ashore, but most eroded out of the hillside. The wind and waves strip away softer rock like sandstone, leaving the harder rocks behind. You can see this happening at the yellow sandstone bluff to the left of the Cove Trail. 

  • People have been visiting Coyote Point for at least 4,000 years. The Ohlone, the original people of the San Francisco Peninsula, use local, native plants for food and medicine. Sticky monkey flower can help treat digestive issues and burns, and laurel leaves provide a natural insect repellent. 

Tectonic plate collisions account for most of California’s geology. The one that built the current coastline happened in the age of the dinosaurs. Image by Mikesclark via Wikimedia Commons (CC BY-SA 3.0)

This sandstone is so soft that you can draw on it or carve into it with another rock.

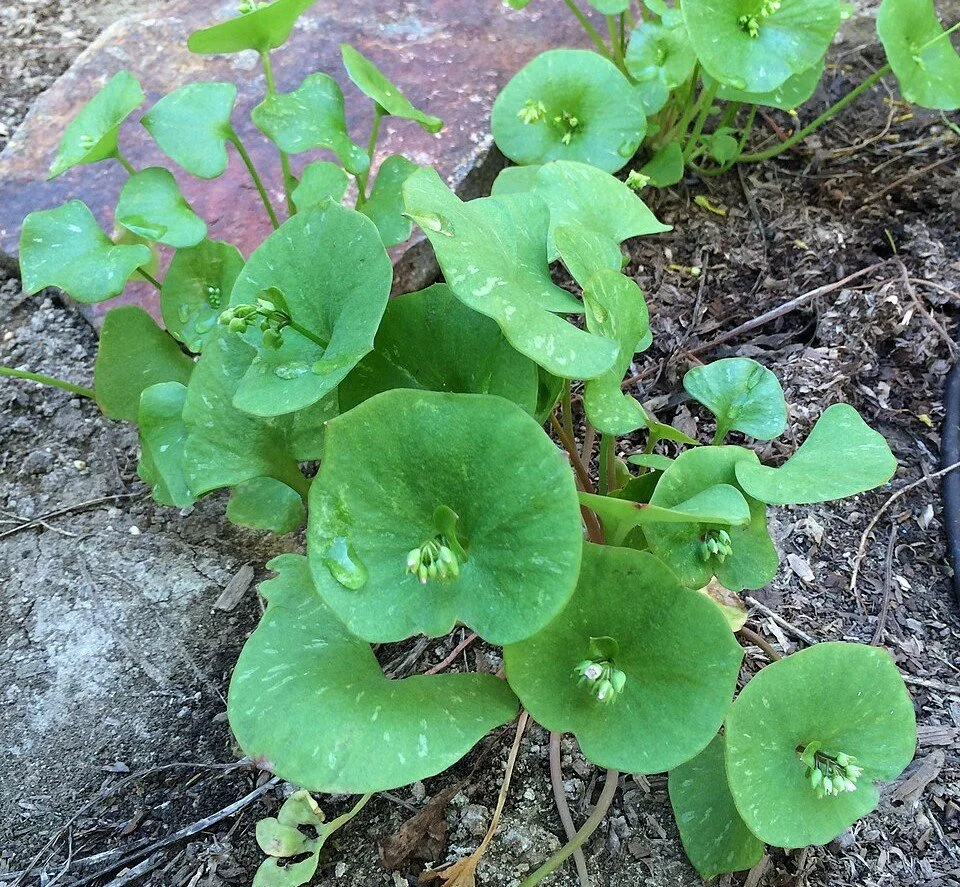
Rooreh, or miner’s lettuce, is a tasty herb that provides lots of Vitamin C. Please don’t pick or eat any in the park, though (especially considering all the dogs that walk here). Photo by glmory via Wikimedia Commons (CC0 1.0)

Know before you go:

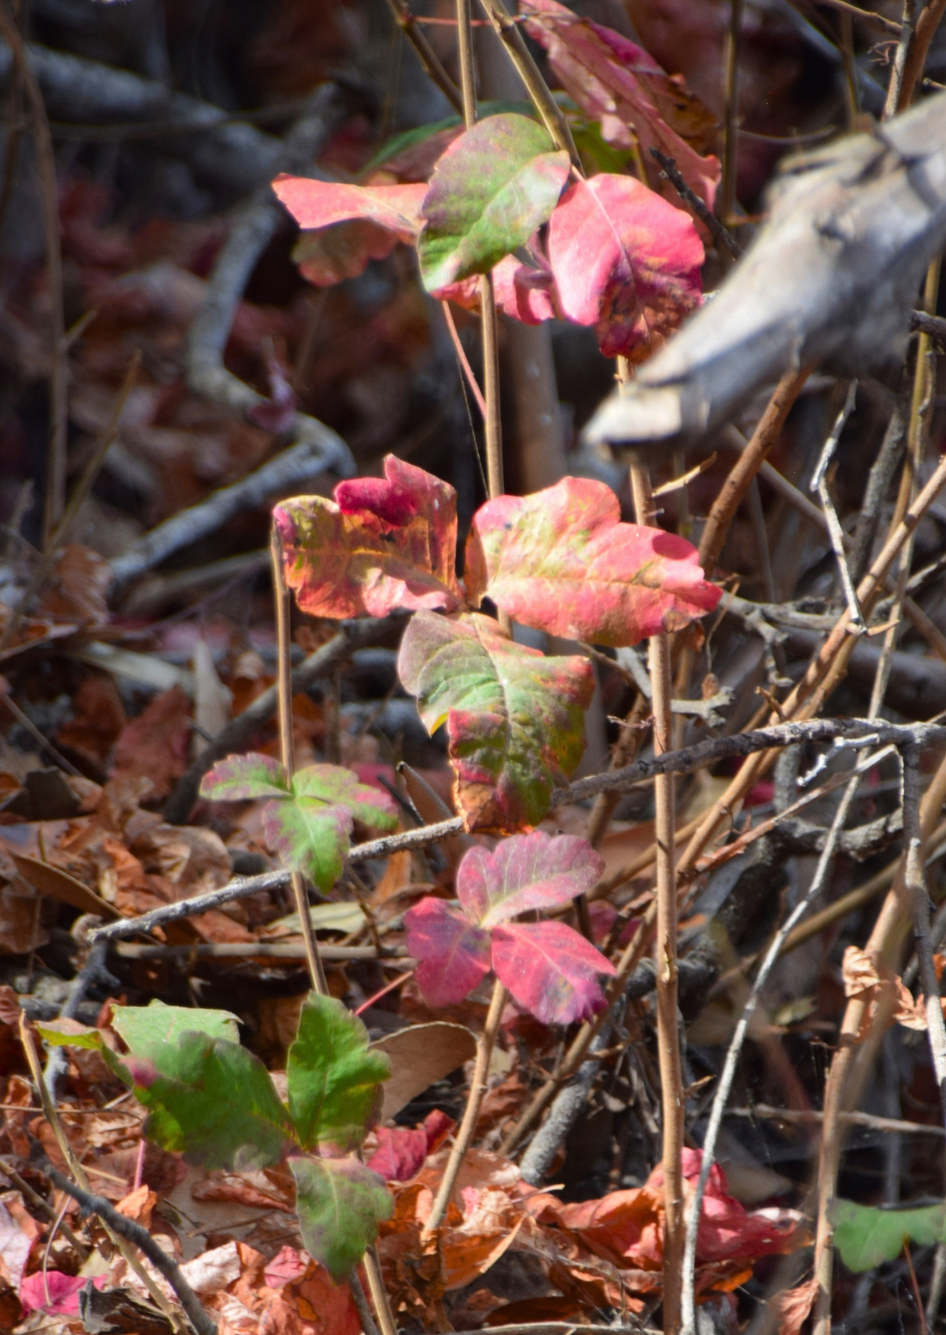
  • The hillside above the Rocky Beach is home to poison oak, which can give you an itchy rash if you touch it. We leave the poison oak growing on the hill because it’s a native plant, but we clear it off the trail. If you stick to the path, it’s easy to avoid.

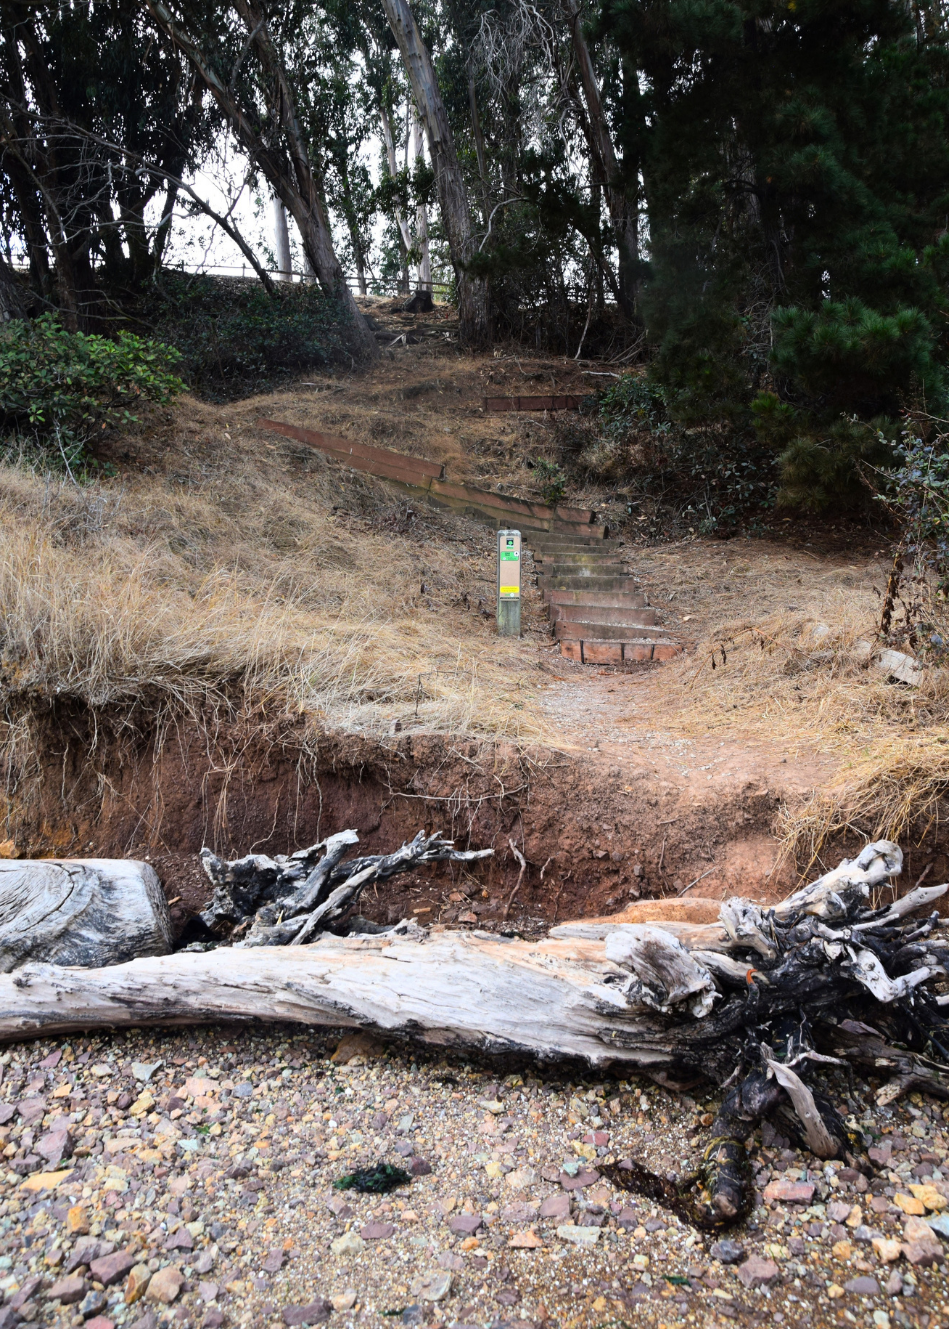
  • The Cove Trail is short, but steep and narrow. The lower portion is made of stairs, and there’s a big step down onto a log at the bottom.

Poison oak can look different as the seasons change. Learn more about recognizing and treating poison oak here.

I usually scoot over the lowest ledge on my bottom.


The Jetty & Shell Beach

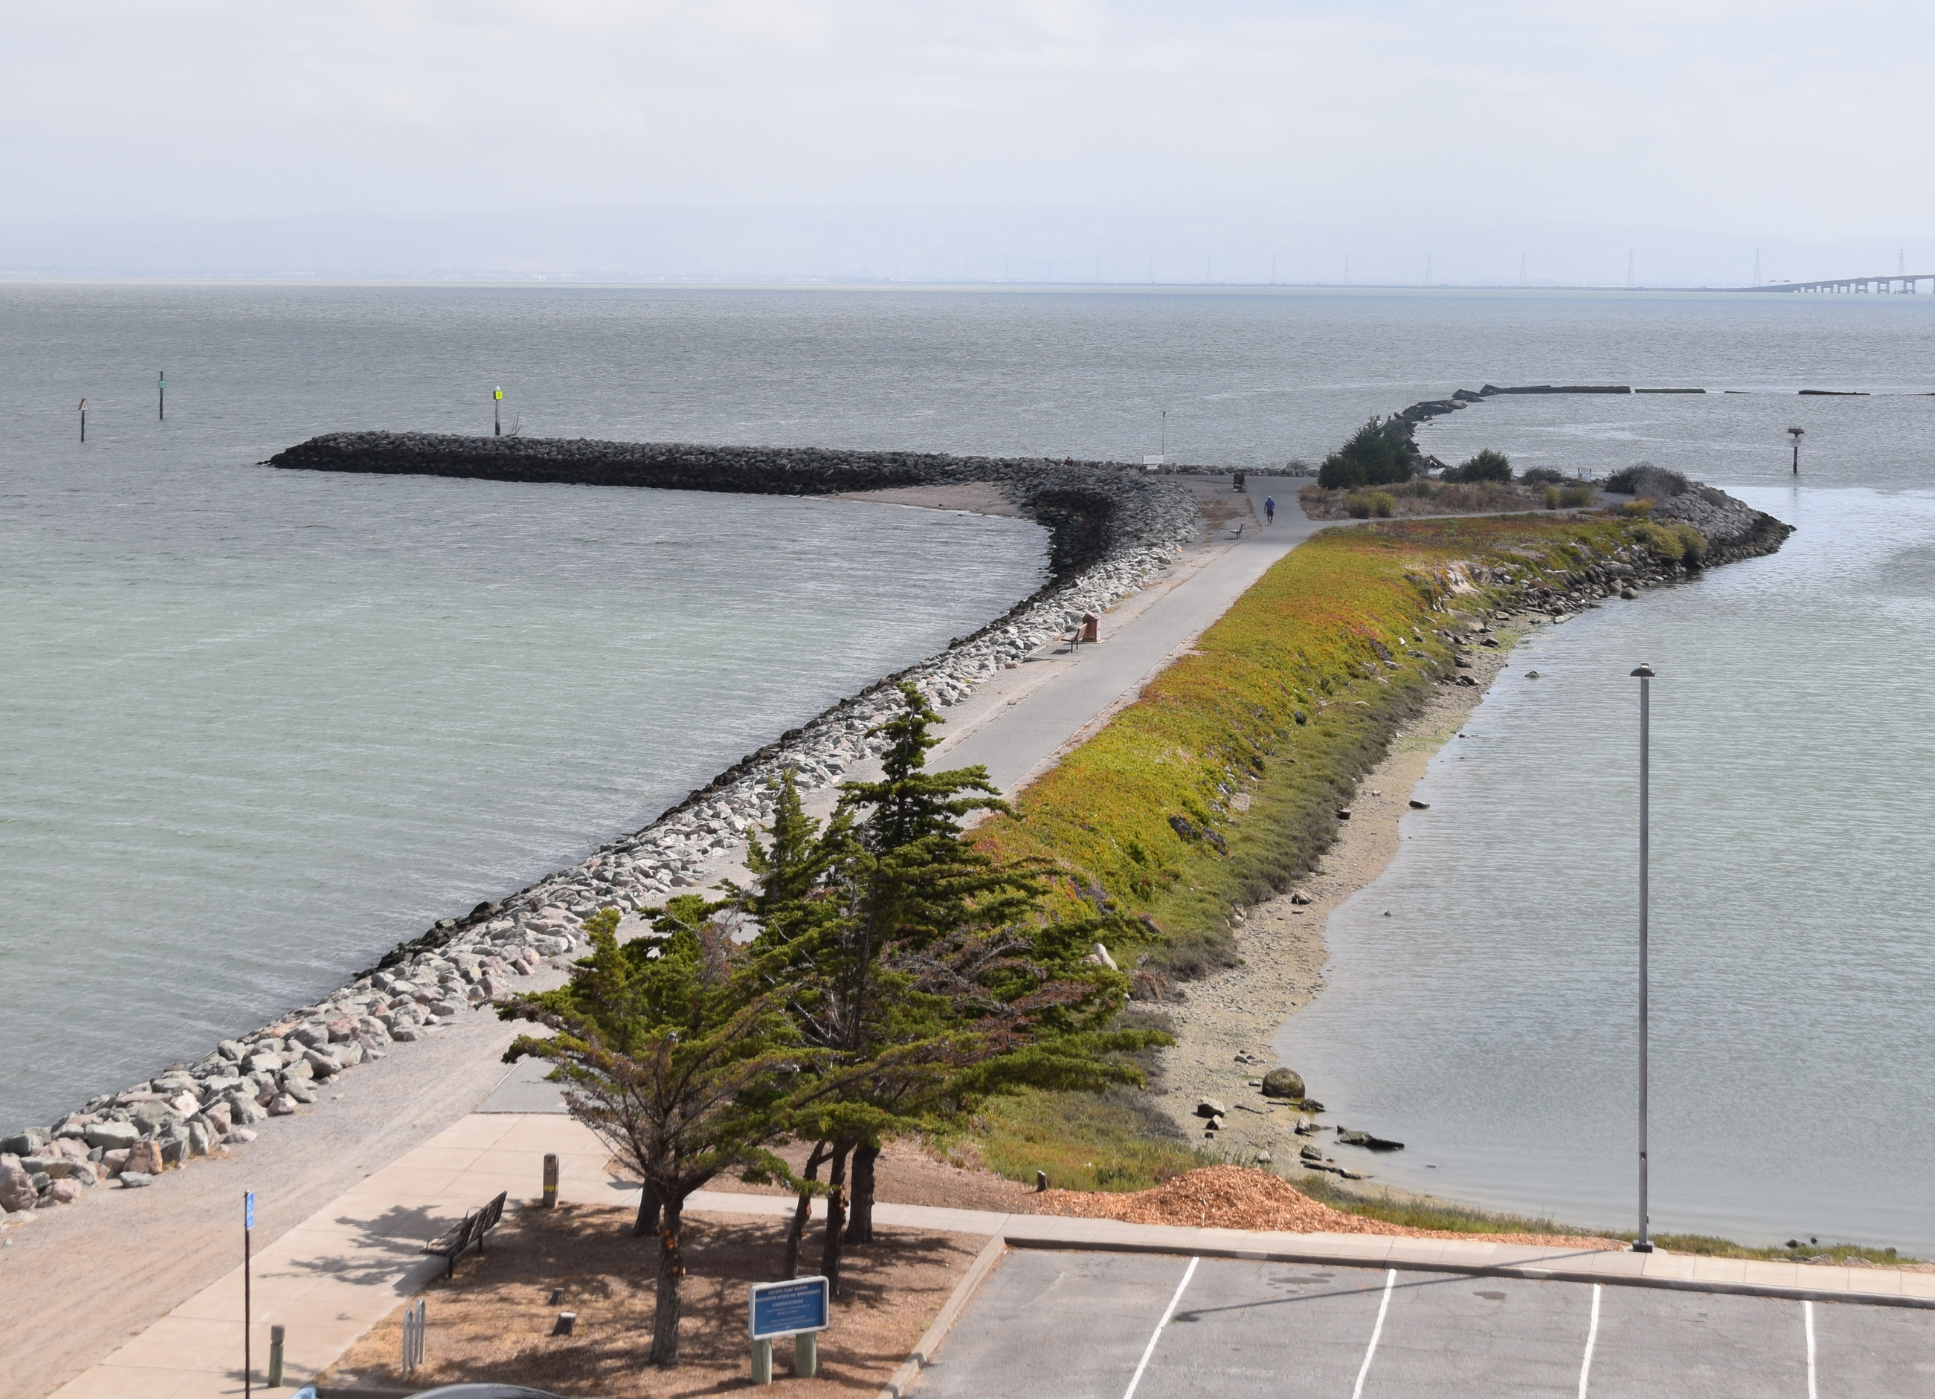
The jetty offers unparalleled views of the Bay, letting you see (and feel!) the wind and waves in action.

How to get there:

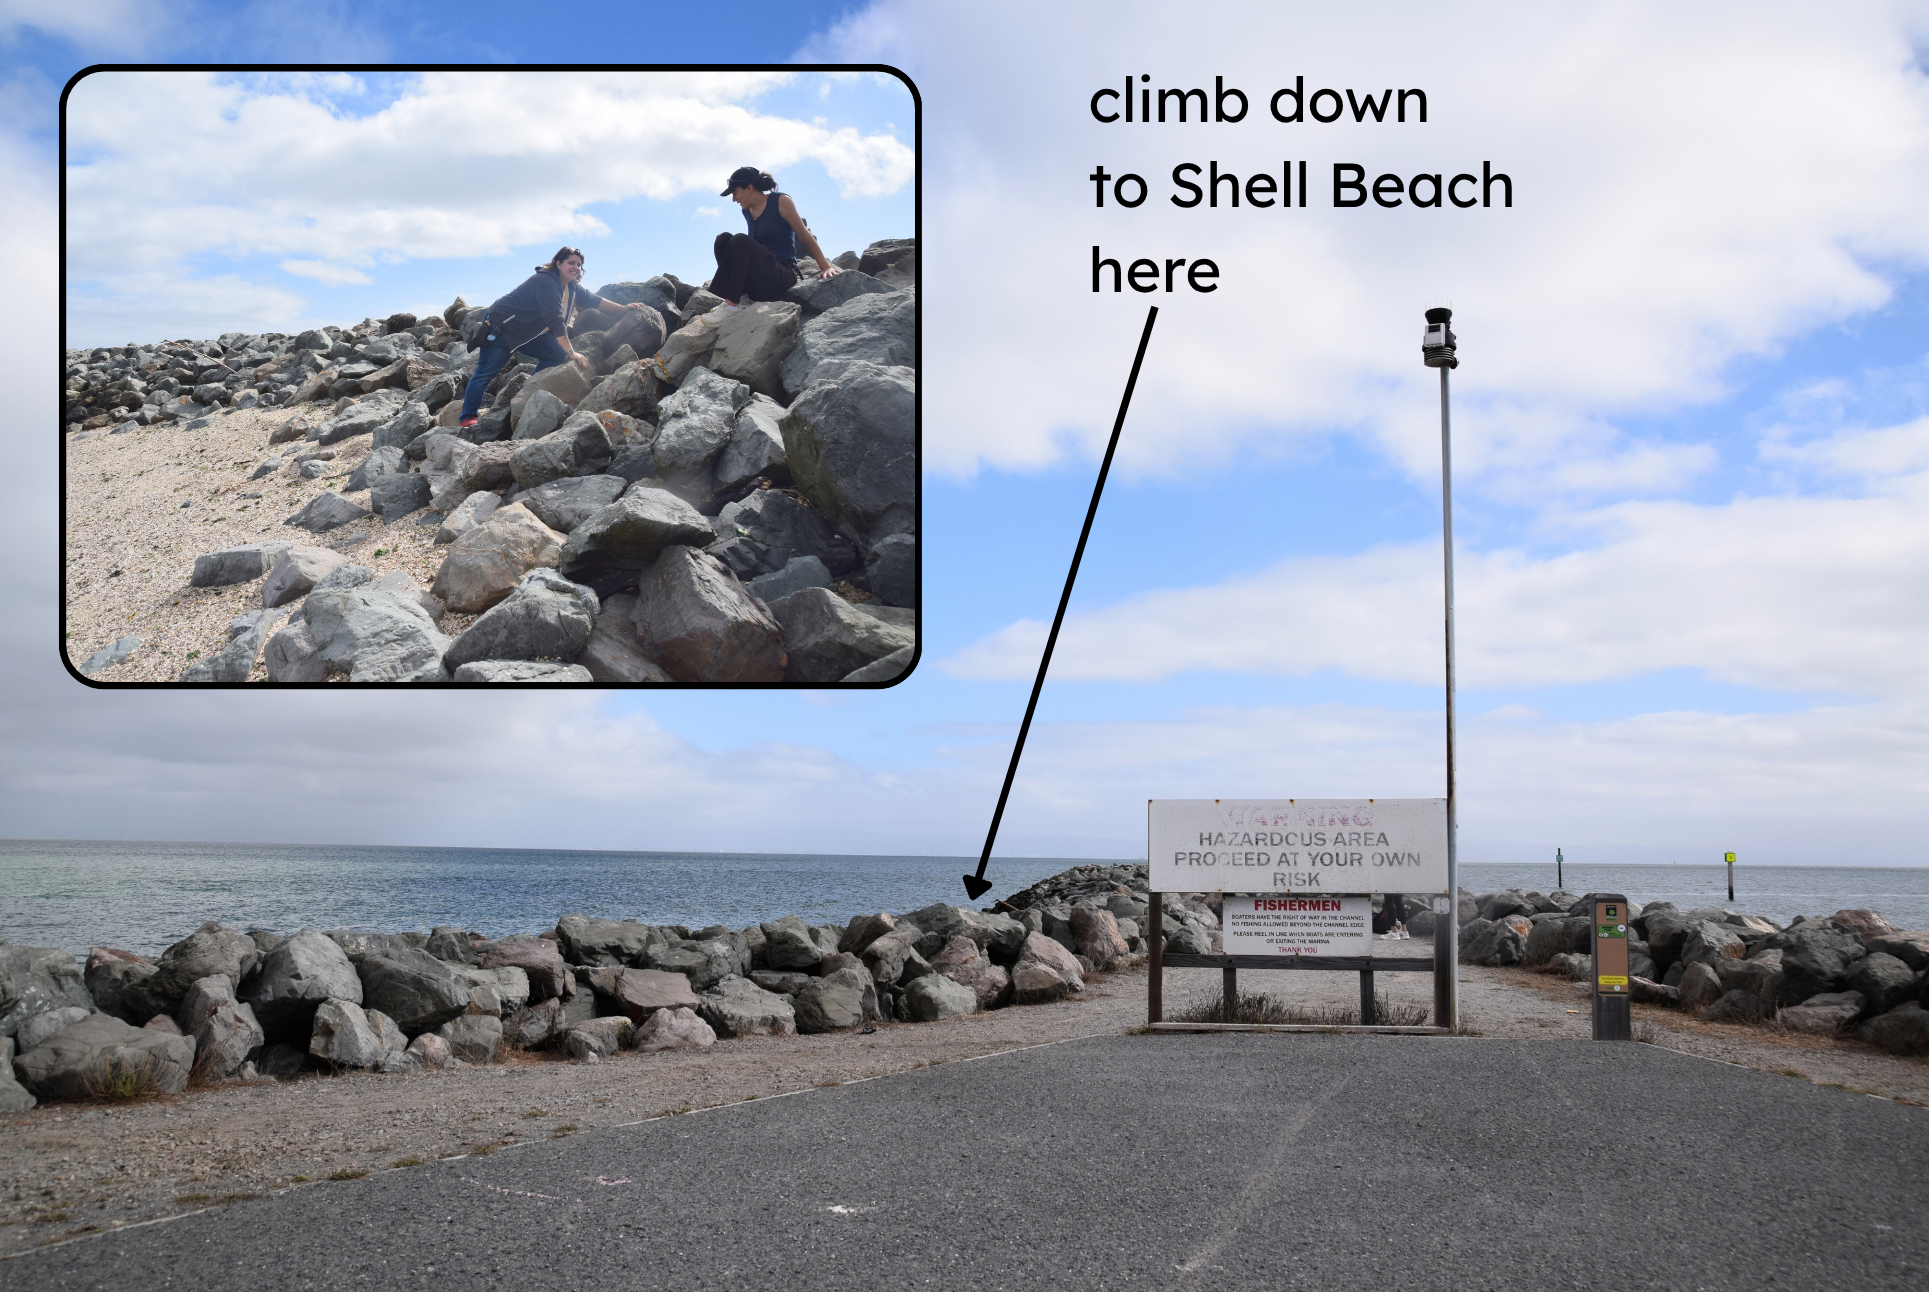
From CuriOdyssey, head down to the marina and go all the way to the left, past the boat launch. The paved Marina Trail leads out onto the Jetty. If you want, you can climb onto the boulders past the end of the trail, either to Shell Beach or to the very end of the Jetty. 

Here, the Jetty is referred to as the Breakwater. You can also park down by the boat ramp and Harbormaster’s office.

Things to see:

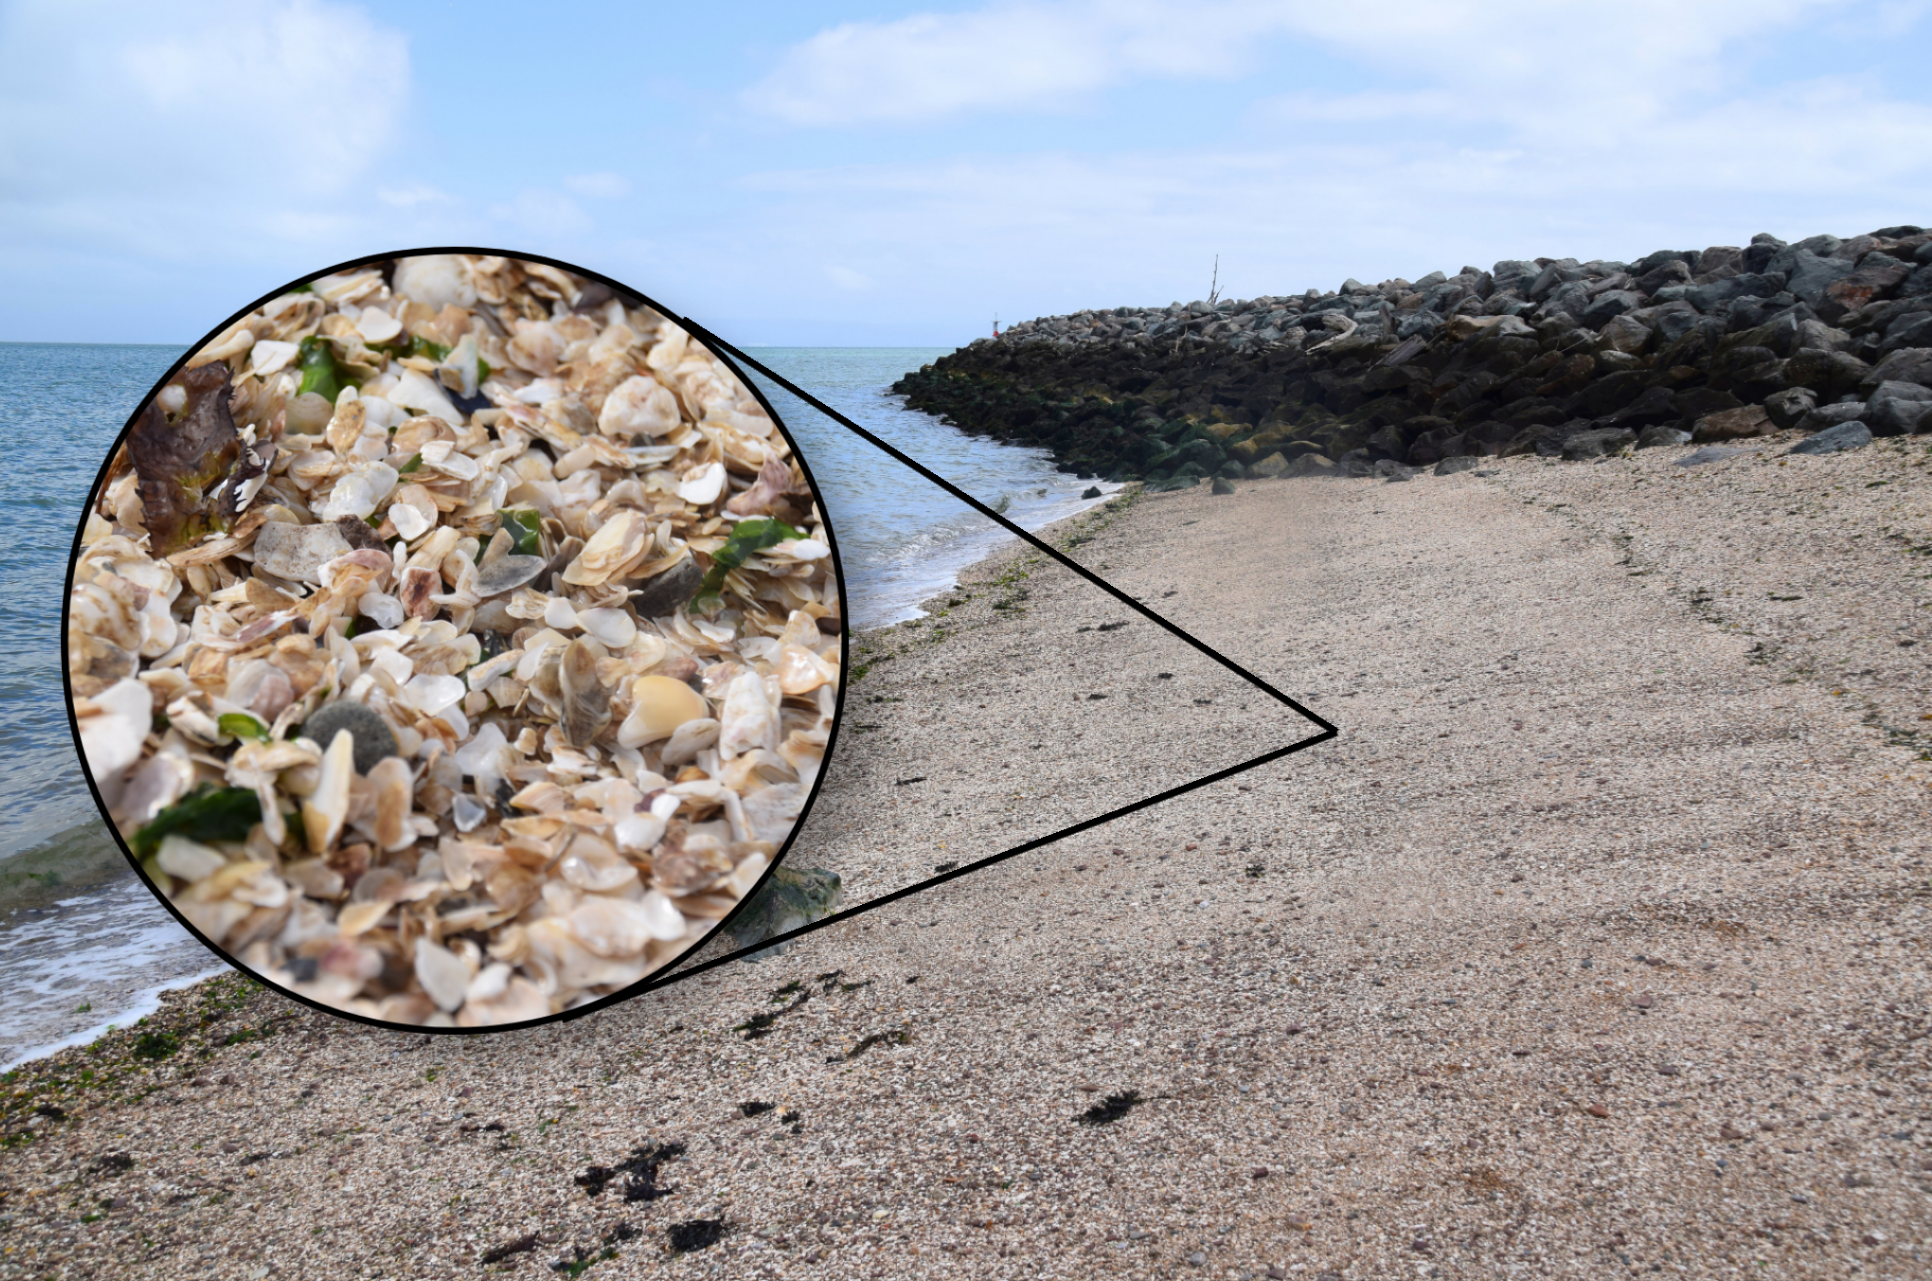
  • Shells and seaglass: The bend in the jetty collects things from the waves, forming a beach. The beach is made almost entirely out of seashells, with a sprinkling of smooth seaglass. 

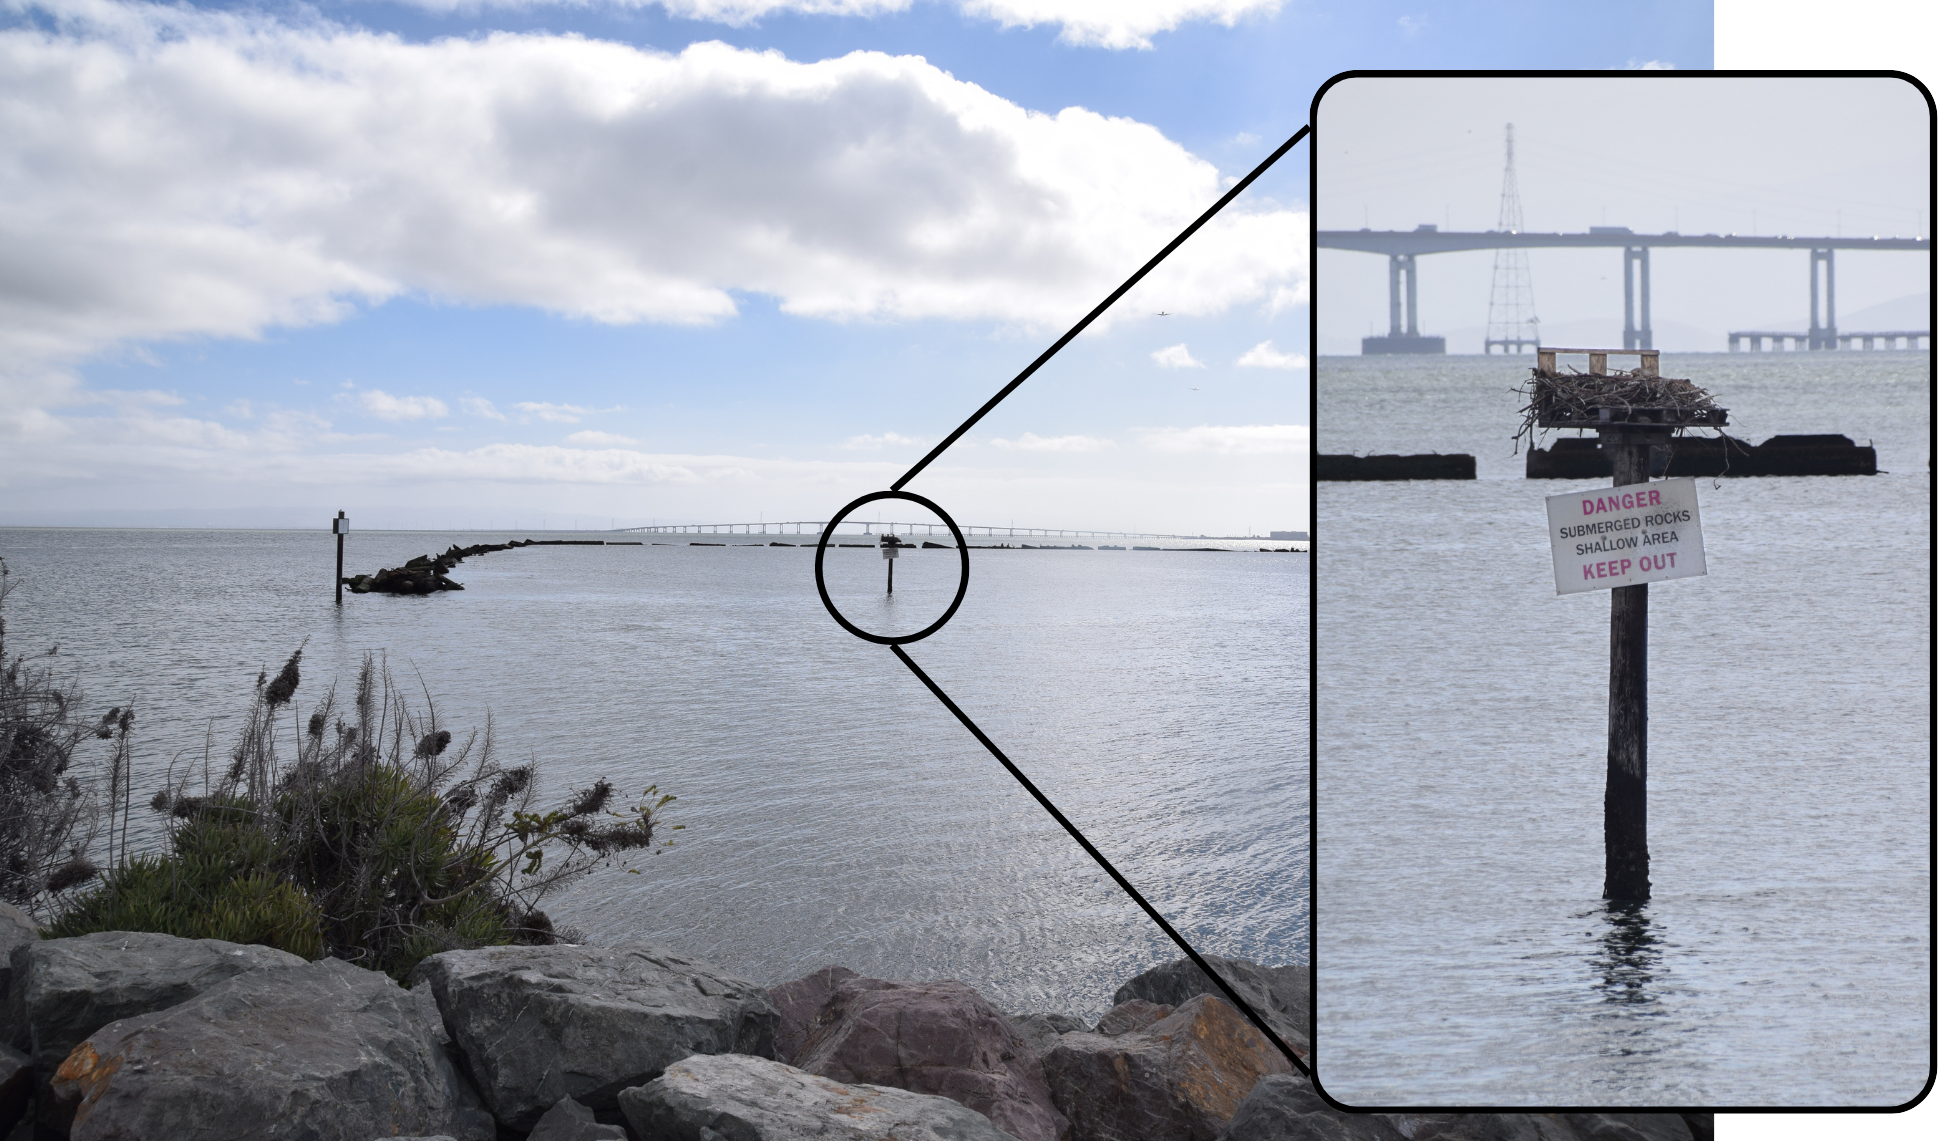
  • Osprey nest: If you look at the channel marker halfway between the Jetty and the spit across the marina, you’ll see a nest made of sticks. Ospreys return to that nest every year, usually arriving in February and leaving in August or September. If you visit in spring or early summer, you might even see a chick! 

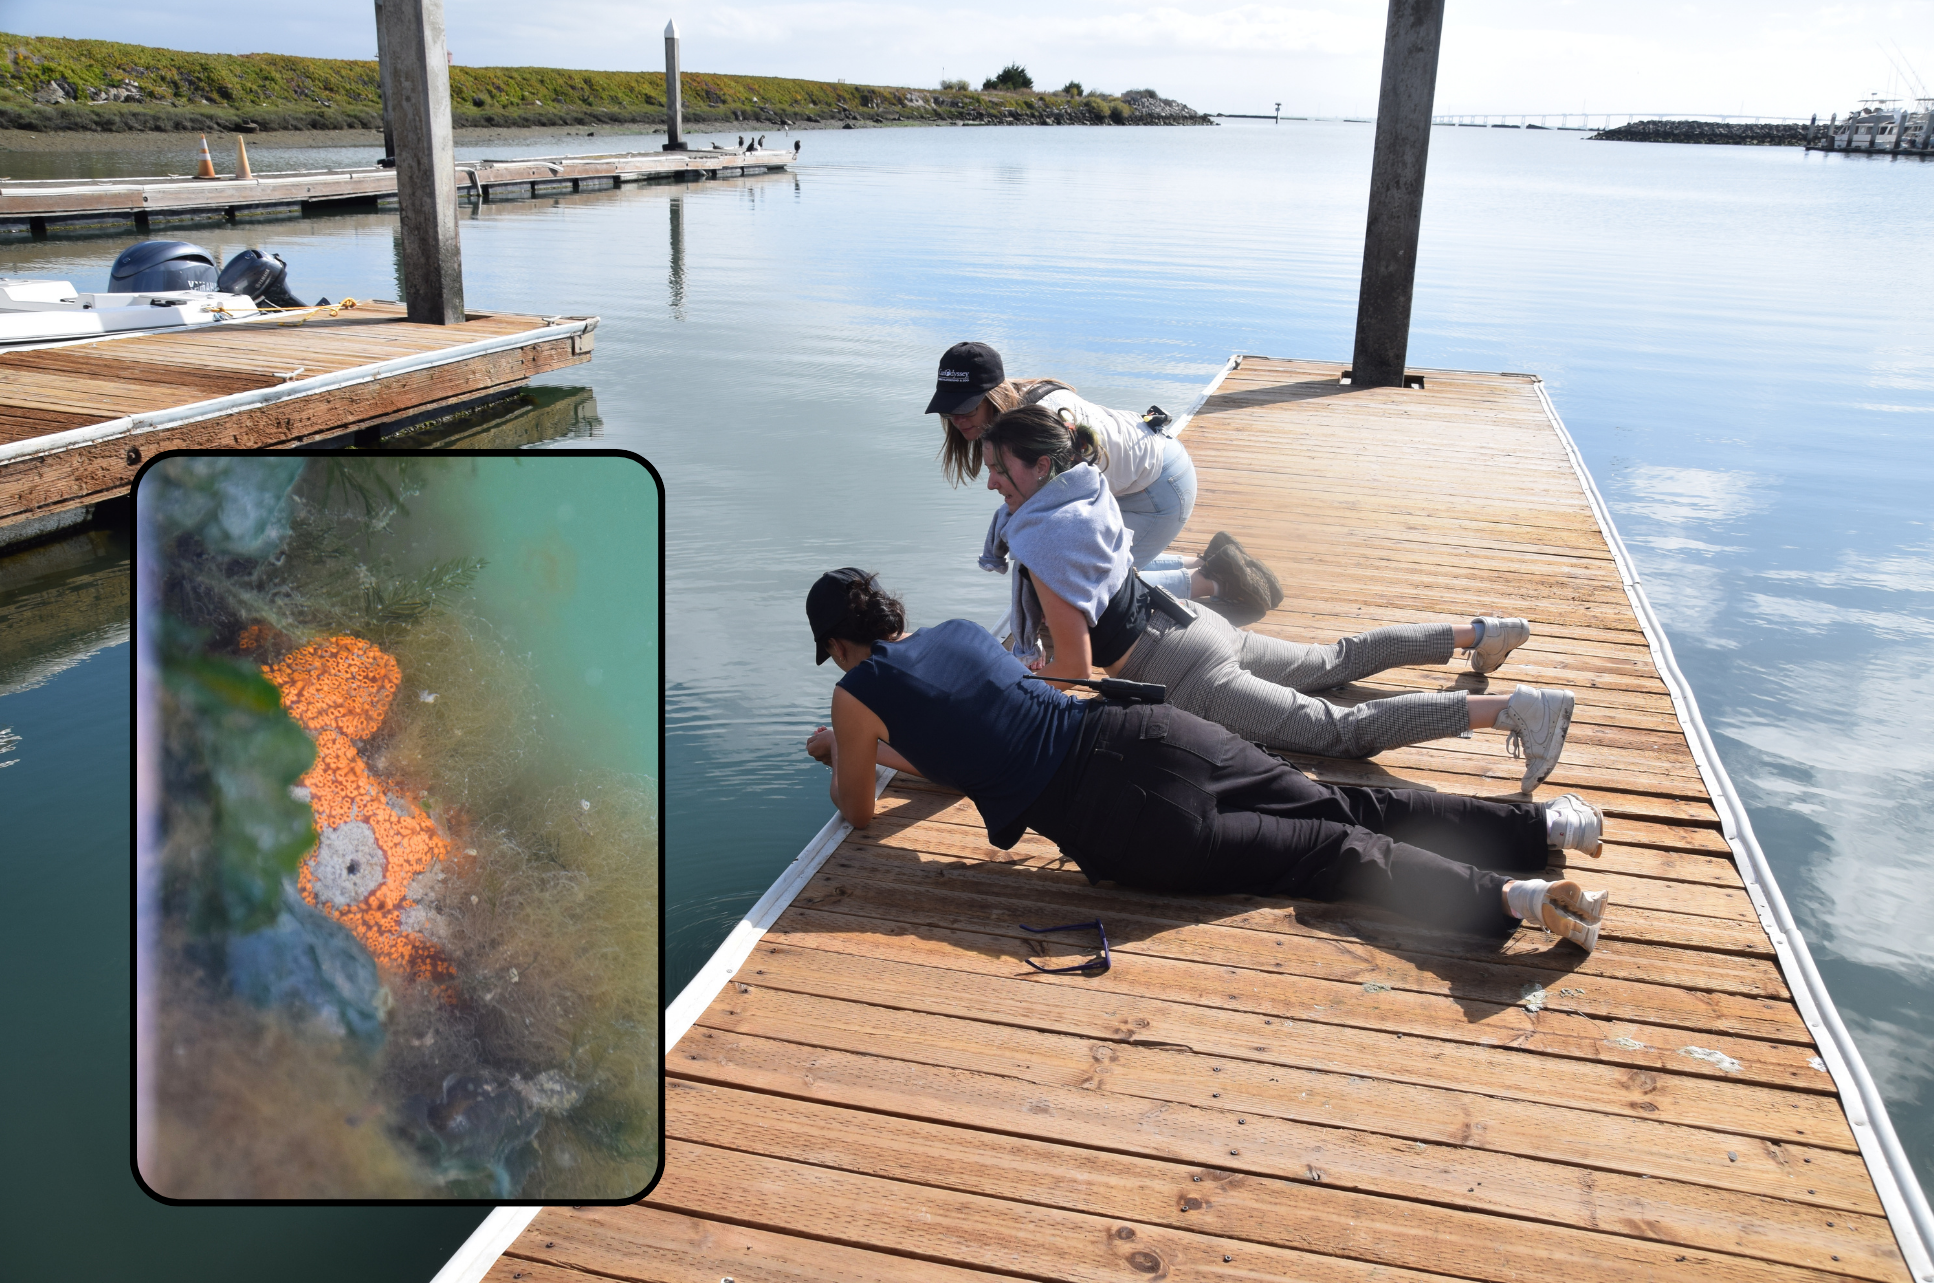
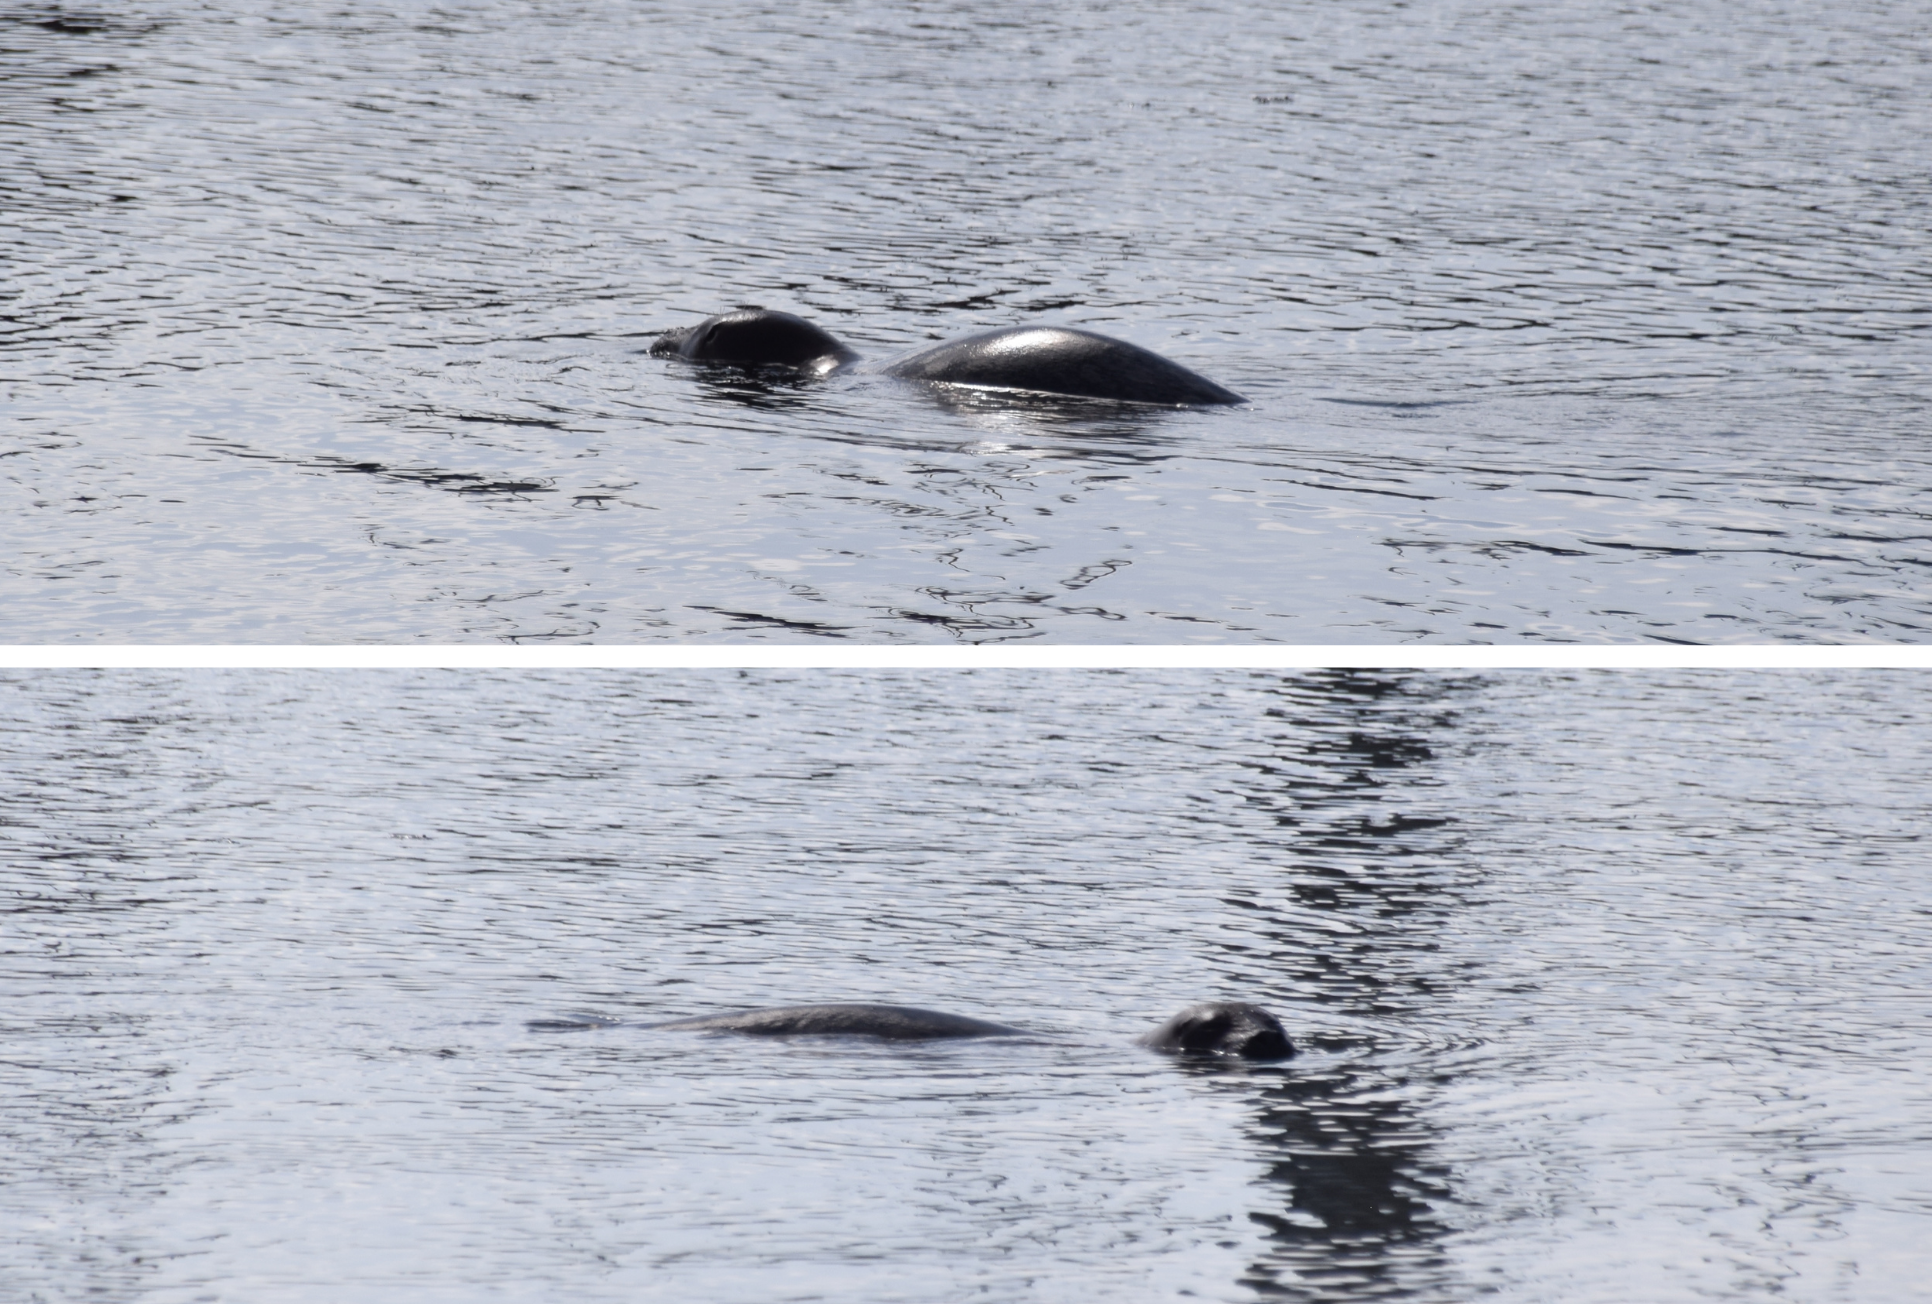
  • Boat ramp discoveries: The boat ramp near the Jetty is a great place to do “belly science” and peer at sponges, tunicates, and other small critters in the water. Keep an eye out for bigger ocean animals too, like harbor seals or bat rays.

The darker rocks of the jetty show how high the tide can get.

This pole makes a great spot for fishing and raising chicks.

We spent ages checking out all the bright orange sea squirts just below the waterline.

We were on the dock for so long that this seal snuck up behind us!

Jetty science:

  • Where do shells come from? Animals like snails, clams, and oysters build them out of a hard mineral called calcium carbonate and special proteins. When the animals die, their shells can wear down into sand, or they might stack up to build natural chalk or limestone. 

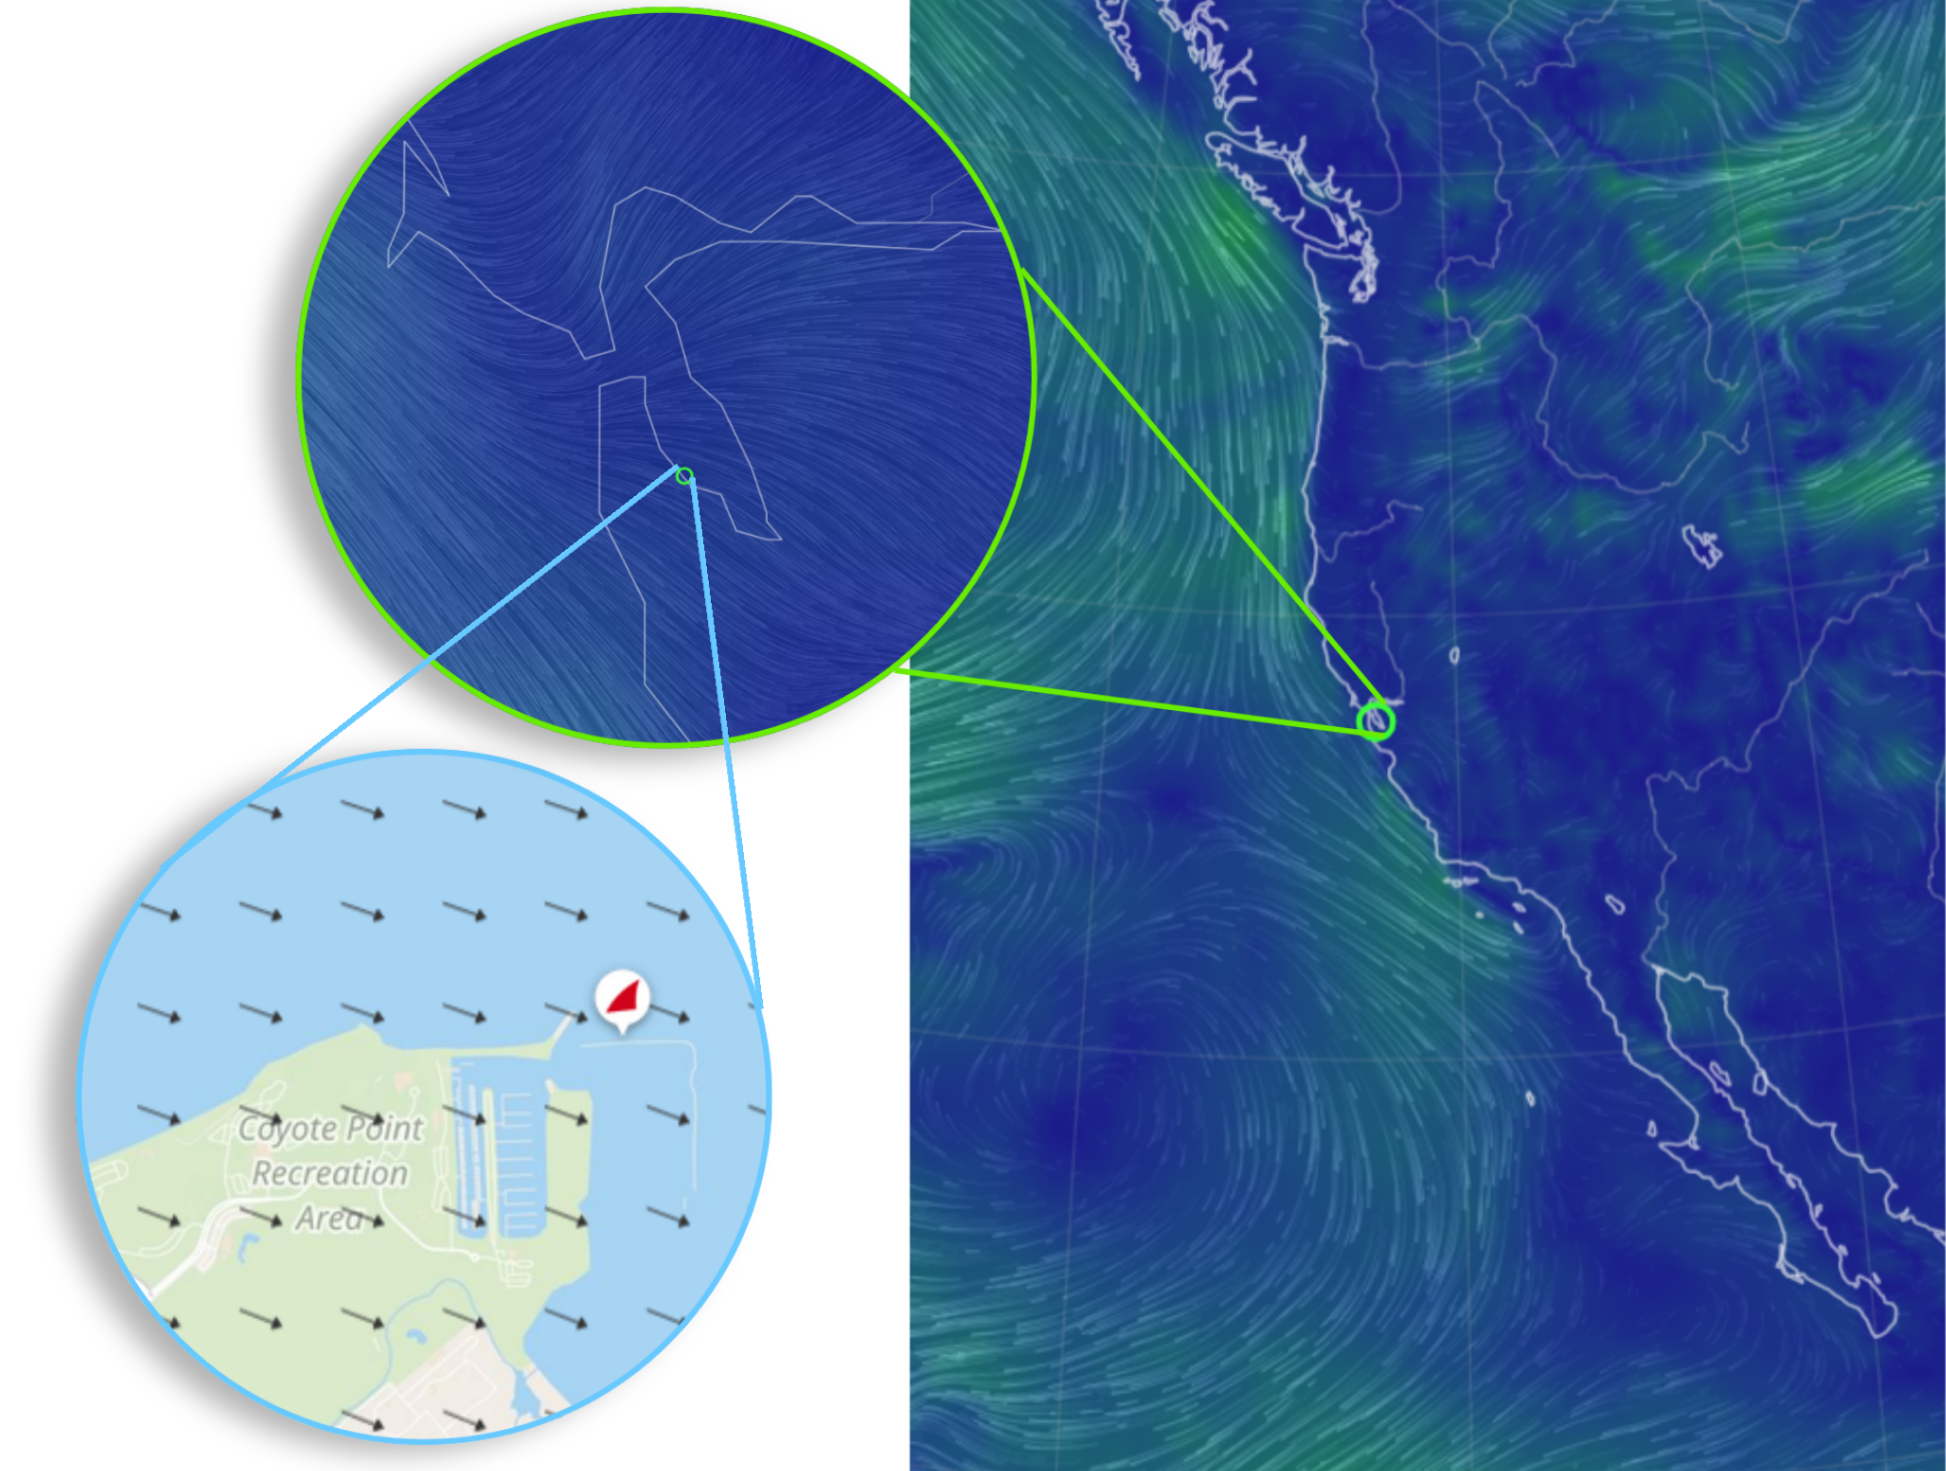
  • When you stand on the jetty, you can feel the wind and see the waves moving from the northwest (near San Francisco) to the southeast (toward the inner Bay). When planes land at the nearby SFO Airport, they like to fly into the prevailing wind to keep their path stable. 

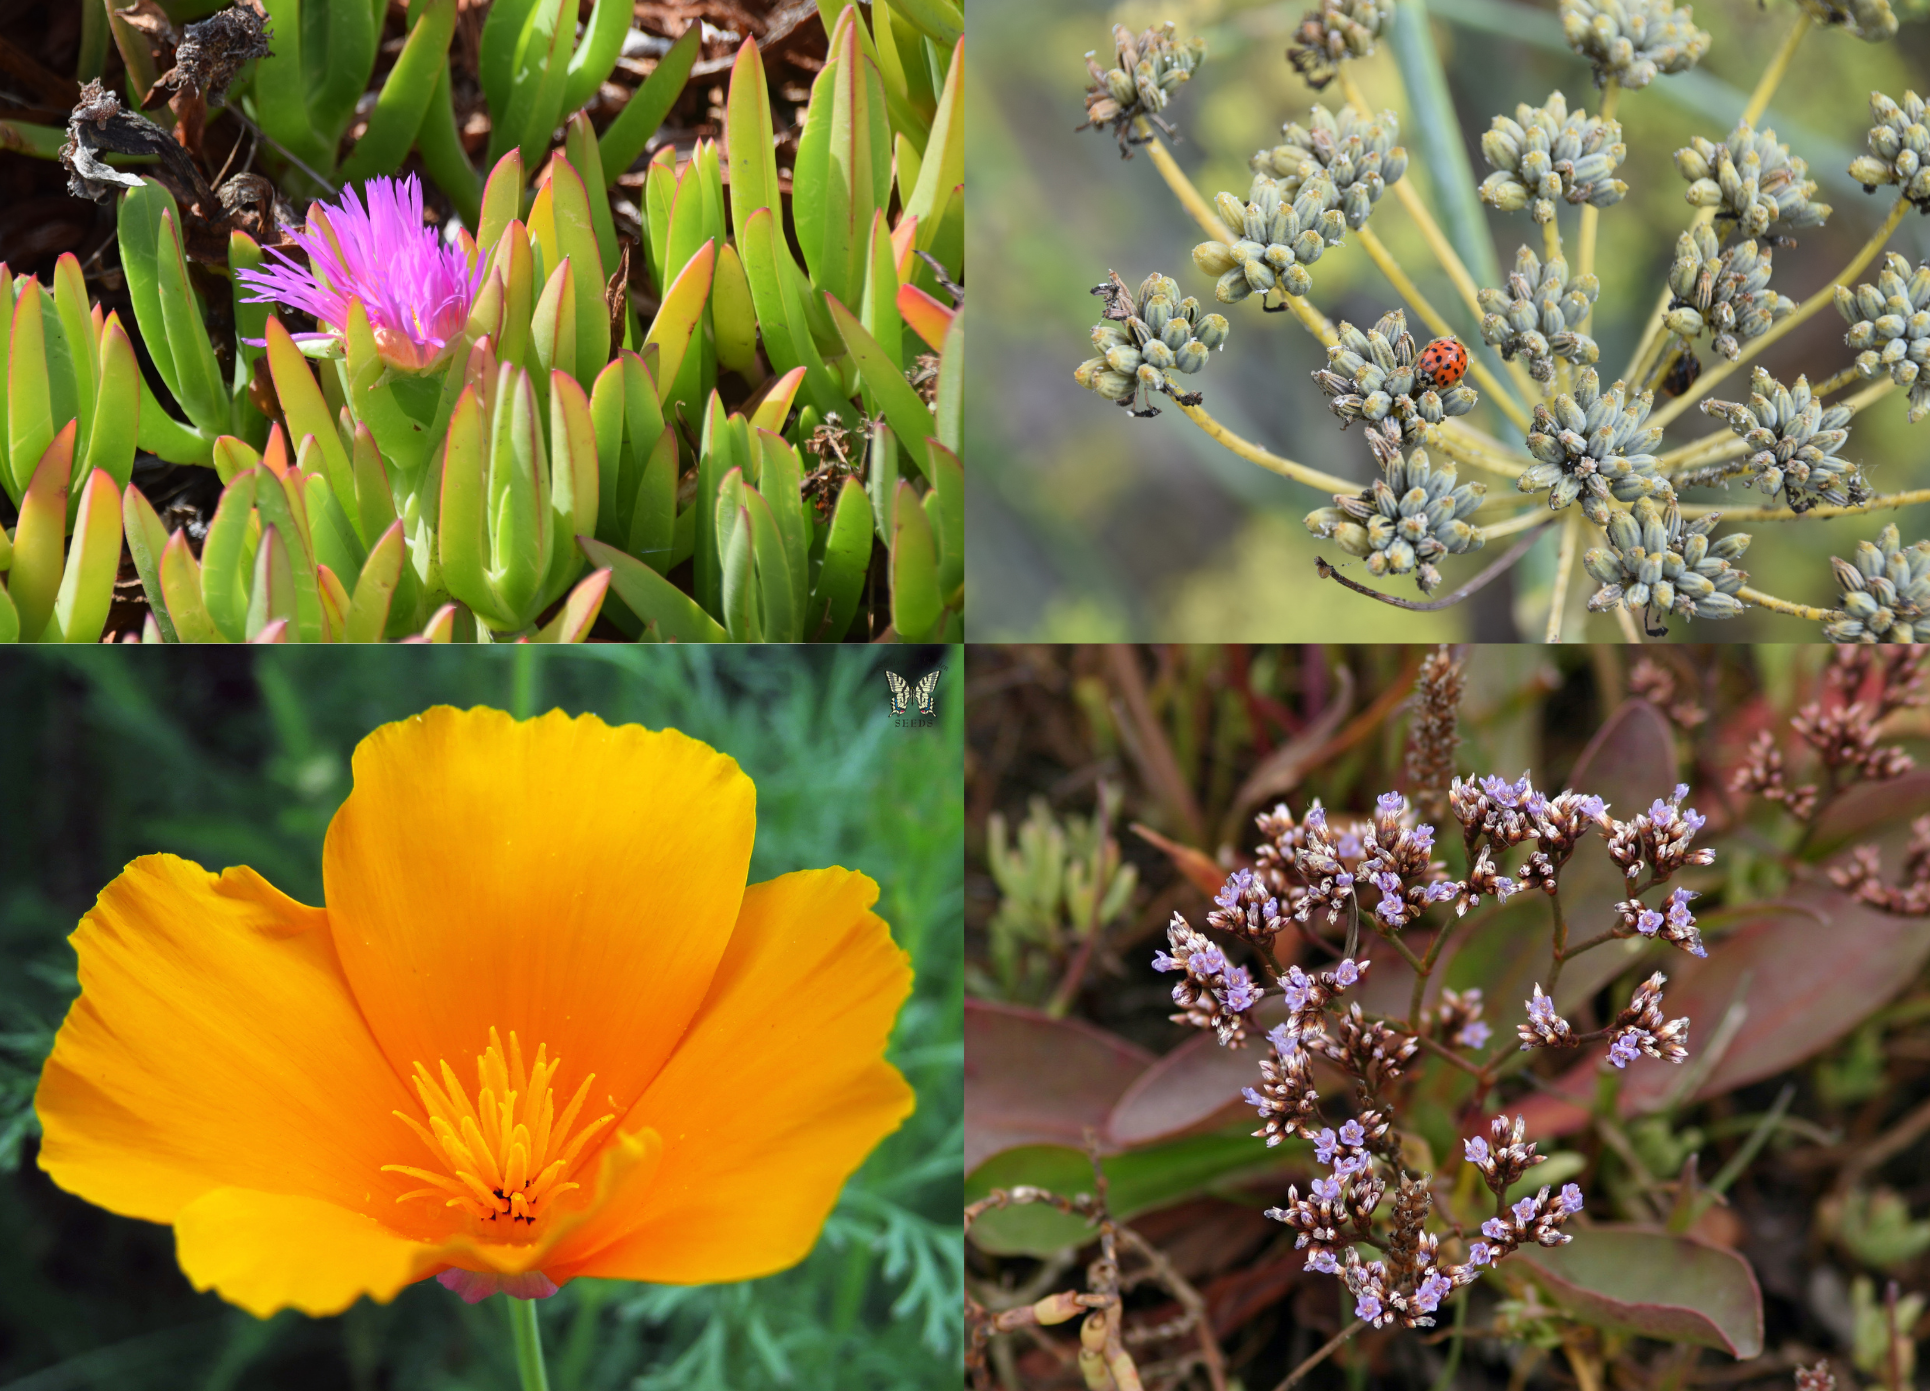
  • Lots of plants grow near and on the Jetty, but not all of them belong here. Ice plant and fennel are invasive species that harm native plants, so park rangers are gradually working on removing them. Native plants around the jetty include California sea lavender and the golden poppy.

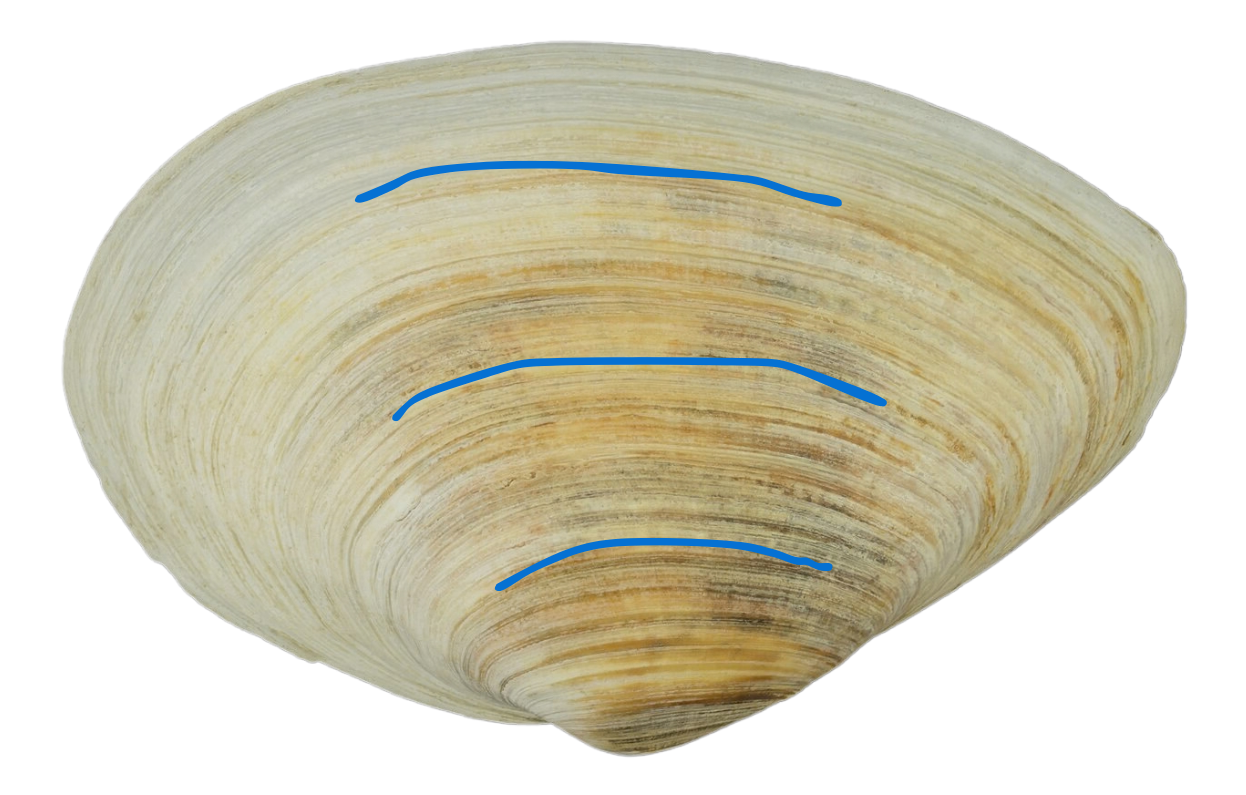
Scientists can calculate a clam’s age and learn about ocean conditions in the past by studying the rings in its shell (marked in blue). Photo by H. Zell via Wikimedia Commons (CC BY-SA 3.0)

The green lines and black arrows show wind flowing along the California coast, through the bay, and past Coyote Point. Images composited from https://earth.nullschool.net/ and https://www.windfinder.com/

Clockwise from top left: Ice plant (invasive); Fennel (invasive); California sea lavender (native) by David A. Hofmann (Flickr, CC BY-NC-ND 2.0); California poppy (native) by Swallowtail Garden Seeds (Wikimedia Commons, CC BY 2.0)

Know before you go:

  • To get onto the shell beach, you have to climb over some boulders. The shortest and easiest route is right next to the sign at the end of the paving. (If you don’t want to climb, that’s okay! There’s plenty to enjoy from the path. Watch for sunbathing lizards among the boulders!)

  • Because the Jetty sticks out into the Bay, the wind is usually much stronger there than it is up at CuriOdyssey. Extra layers can help you stay warm and comfortable. 

The easiest way to climb onto the shell beach is just behind this sign at the end of the paved path.

If you have long(ish) hair, a hair tie or scrunchie is essential.


While you’re exploring these special places, feel free to look, touch, listen, and smell. But when you’re done, please leave them as they are so others can enjoy them after you. Rocks, shells, bones, plants, animals, and other parts of nature should all stay here at Coyote Point. The Marsh, Rocky Beach, and Jetty will be waiting for you! 

Resources for exploring Coyote Point:


Activity Write-Ups and Concepts


Activity: Fossil Excavation and Dino Doodle

Objective: Campers will learn some techniques around excavating fossils. Then they’ll have a chance to try assembling bones into an animal or partial fossil, and figuring out what the animal might have looked like. This version is ideal for 1st grade and up. 

Timing:  40-50 minutes

Materials: 

  • Large trays or bins

  • Sand, dirt, and gravel

  • Laser-cut wooden dino bones

  • Paintbrushes (1 per camper)

  • Disposable gloves for sensitive skin

  • Journals or drawing paper 

  • Pencils 

  • Printouts of “shrink wrapped” animals

Set up: 

  • Work outside, or cover your space with newspaper or trash bags. 

  • Get large plastic trays and fill with dirt, sand, and gravel/rocks. Scatter the contents of one bag of laser cut bones into the tray and cover them.  

Safety: 

  • As you remove sand and gravel, put it in an empty tray. Keep sand and gravel in the trays. (Paleontologists often need to save the soil or sand to investigate for microfossils later.)

  • As you excavate, brush away from your neighbor’s dig site. 

Intro: 

  • What does excavation mean? What do you know about fossil excavation? 

    • Excavation: digging to remove something from the ground 

  • Does anyone know what a paleontologist is?

    • Paleontologists study ancient life: dinosaurs, plants, mammals, fish, insects, fungi and microbes.  Using fossil evidence they can see what life on Earth was like long ago. 

    • Paleontologists have to be really careful when they are excavating fossils, because the fossils can break easily. Their goal is to uncover the fossil without breaking off any pieces so that we know what the fossil looks like. 

  • We are going to practice being paleontologists and excavate fake fossils. 

    • We use these because real fossils are fragile and we want to preserve them as well as we can. 

  • In groups, you will use a shovel/spoon and paintbrushes to try to dig up the fossil pieces.  

    • Why do you think we are using paint brushes? Paint brushes let us move dirt and sand gently so that we don’t damage the fossils. 

  • Once a paleontologist has excavated a set of fossils, they might try to figure out what the animal is by putting bones or body parts together. 

    • Do paleontologists always know what something is? No! They might try a few different ways of putting bones together. 

    • They might use what they know about modern animals to make guesses about ancient animals. 

    • Found bones might make a complete skeleton or a partial skeleton. It’s rare to find a complete skeleton. A partial skeleton can still give us a lot of information about the animal! 

  • Once we find our bones, we’re going to try putting them together to figure out what these animals are. 

  • (Save this part of the intro until after they’ve excavated and assembled the bones) We’re going to look at our skeletons and try and guess what this animal might have looked like when it was alive. 

    • Bones don’t always tell the whole story, though. Animals have muscles, organs, fat, skin, feathers, and all kinds of decorations that don’t fossilize.

    • If we were to draw animals based just on their bones and nothing else, we might end up with a “shrink wrapped version” (show the images and see if they can guess what animal it is)  

Step by Step 

  • Introduce the concept of excavation. 

  • Share that while excavating our hands will be sandy. Offer gloves to those who want them. 

  • Give each student a paintbrush.

  • Give students 10 minutes or so to dig through their bins and uncover the wooden fossils. Encourage them to try and sort and/or identify bones as they find them. 

  • Give them maybe 10 more minutes to try and put the bones together to make a skeleton.

    • It’s okay if they only build partial skeletons, e.g. assemble a leg, or a head and neck, or a ribcage. 

  • Introduce the idea of figuring out the animal’s appearance based on its bones, using the “shrink wrapped” images. 

  • Students can draw (in their journals or spare paper) what they think their assembled skeleton would have looked like when it was alive. 

Expansion: 

  • What other tools do you think paleontologists use to excavate fossils?

  • What gave you clues about how to put the bones together? 

  • What information would give us a better idea on how to identify these fossils? 

Clean Up: 

  • Take sand and gravel from shallow trays and dump them back into large storage buckets.

  • Gloves go in the trash. 

  • Gather wooden bones and put them back in ziploc bags. You can use a sieve to collect them when putting sand back in buckets. 

Background / Explanation: Paleontologists study ancient life: dinosaurs, plants, mammals, fish, insects, fungi and microbes.  Using fossil evidence they can see what life on Earth was like long ago.  Fossils are very delicate and often buried deeply in rocks. Removing the fragile fossil takes skill, patience and the right tools. What helped you to be successful? What didn’t go as expected?


Activity: Paracord Keychains

Objective: Campers will have an opportunity to gain wilderness explorer skills by making a paracord keychain... and have a trendy accessory! 

Timing: 30 minutes

Materials: 

  • Paracord in lots of colors

  • Carabiners and key rings in different colors and shapes

  • Big scissors for cutting additional cord

  • Lighter 

  • Clipboards

Set up: Cut paracord for campers into 4-5-foot lengths. Use a lighter to melt the ends of the paracord so they don’t fray and unravel. 

  • Important safety note: Do not hold the flame close enough to actually light the paracord! Just holding it near the cord will melt the ends. Lighting the paracord can create molten globs that can cause burns. 

Safety: Only Leaders (not leaders-in-training) may use the lighter. After you use the lighter, make sure staff hold onto it. 

Intro: We are going to make a paracord survival keychain. Does anyone know what that is? 

  • Paracord is a kind of strong, thin rope that can be used in an emergency for repair, first aid, or extra rope material.

  • Having a paracord keychain with you means that you’ll be more prepared for exploring and for outdoor emergencies. 

  • There are lots of ways to braid or bind up paracord (or other kinds of rope) to keep it neat and organized. Today we are going to learn how to bind it in a cobra braid, but you can try other methods too. 

  • There are two different ways to start a cobra braid, but after it’s started, all the other steps are the same. 

Step by Step 

  • Step 1: Pick one carabiner or keyring, and one piece of paracord. You can pick any colors you’d like. 

  • Step 2: Fold your paracord in half to find the middle. Poke the middle fold into your keyring or carabiner.

  • Step 3: Attach your paracord to a keyring or carabiner in a way that gives you one short loop (about 6 inches long) and two long strands. There are two ways of doing this. 

    • Method A: Where each side of the middle loop touches the keyring / carabiner, tie a knot with the loose outside strand.

    • Method B: Tie the loop and the loose ends together into a knot. Then gently pull the loose ends out to either side of the loop.

      Step 5: Take the right outside strand and bring it over the top of both core strands. 

    • Step 6: Bring the left outside strand over the top of the right strand. 

    • Step 7: Fold the left strand behind the core strands, but over the top of the bent right strand. Step 8: Tighten the knot. 

    • Step 9: Take the left outside strand and bring it over the top of both core strands. 

    • Step 10: Bring the right outside strand over the top of the left strand. 

    • Step 11: Fold the right strand behind the core strands, but over the top of the bent left strand. Step 12: Tighten the knot and slide it up against the first knot. 

    • Step 13: Repeat steps 5-12 until you only have a few inches of cord left, or whenever you feel like it’s long enough. 

    • Step 14: Tie off the ends with a double knot.

Leaders and LITs can help with knots or other tricky steps, or with finding an alternative method of braiding or binding the cord.

Expansion: 

  • If a camper finishes quickly, they may make an additional keychain. They could try other techniques for braiding and binding the cord. 

  • If a camper is struggling, they might try a simpler approach like a three-strand braid. (LITs can help set up.)

  • Think about how to integrate other colors or designs, or use paracord to make bracelets or other accessories.

  • Help campers think about how to achieve a specific length (which is especially important if they want to make a bracelet). 

Clean Up: 

  • Make sure the lighter and big scissors are put away, out of reach of campers. 

  • Put excess materials back in the paracord box and onto the shelves.

Background / Explanation: 

Paracord is a lightweight nylon rope. The outside is made of tightly woven strands, and the inside is several strands of twisted cord. All the twisting and weaving makes the cord super strong without being too stiff or heavy. Nylon is a kind of plastic, which is why the cord melts when you hold a flame next to it. When we melt the end, it keeps the cord from unraveling and coming apart. The name “paracord” is a shortened form of “parachute cord.” 

Why might rope or string help us survive while exploring wilderness? What can we do with it? Ideas might include: 

  • Tying something to your backpack or belt

  • Tying down a loose tent flap 

  • Making a handle or net to carry something

  • Anchoring yourself or some gear on an unstable surface

  • May have some uses for first aid 

  • Wrapping around something for a better grip or for protection, for example a stick might have some thorns or splinters on it

  • Lowering an item down a ledge instead of dropping it or throwing it

  • Hanging a bag of food in a tree so a bear can’t get it

  • Measuring a distance

  • Repairing or replacing a broken shoelace (or other item of clothing)


Exhibit Signs

New sign copy for the California Newts

Species: California Newt, Taricha torosa

Conservation status: Near threatened. Species of special concern in California.

Our animals’ story: Fern and Mallow were found in Pescadero by a licensed amphibian collector. They came to CuriOdyssey in 2023.

About this species: Newts might look like lizards, but they are amphibians, like frogs and salamanders. Amphibians breathe through their moist skin, so they always stay near water. 

Diet in the wild: Newts mostly eat insects and worms, and sometimes snack on tadpoles. Sometimes they even eat their own eggs! [supplement with diet icons: insect, worm, frog]

Habitat and geographic range: California newts are only found along the Pacific coast. They like damp areas like streambeds and rainy forests. [supplement with range map]

Fun facts / Curiosity prompts:

  • California newts have bright red or bright orange bellies. The bright colors warn predators that they are poisonous. 

  • The slime on their skin can foam up and harden if the newt gets near fire. How do you think that helps the newt survive?

[Note for finding photos: Males have smoother skin, flattened tails for swimming, a larger vent (cloaca opening), and “nuptial pads” on their feet that help them hold onto females when mating. Unknown if Fern and Mallow are male or female.]

New sign copy for the racoon enclosures:

Species: North American Raccoon, Procyon lotor

Conservation status: Least concern

Our animals’ stories (main habitat): Brothers Jimmy and Drew were born at a zoo in Louisiana. They moved to CuriOdyssey in 2015. Pi is a rescue from northern California. She arrived in 2026.

Our animal’s story (senior raccoon solo habitat): Pebbles was born in the wild, but raised as a pet. She was too used to humans to return to the wild. She moved to CuriOdyssey in 2013.

About this species: Raccoons use their nimble paws to help them climb, grasp, and dig. They also use their paws to dip food in water. It might look like they’re washing their food, but they’re actually studying it to know what they’re eating.

Diet in the wild: Raccoons eat all kinds of things. They eat fruit, eggs, seeds, insects, crustaceans, and sometimes rodents or fish. [supplement with diet icons: seeds, berry, egg, insect, crab, fish, mouse/rat]

Habitat and geographic range: Raccoons can live almost anywhere in North America. The only places they can’t live are deserts, mountaintops, or arctic regions. [supplement with range map]

Fun facts / Curiosity prompts:

  • Raccoons like to play. What do you see in their habitat that would be fun for them to explore? 

  • Why do you think raccoons have dark masks or rings on their tails?


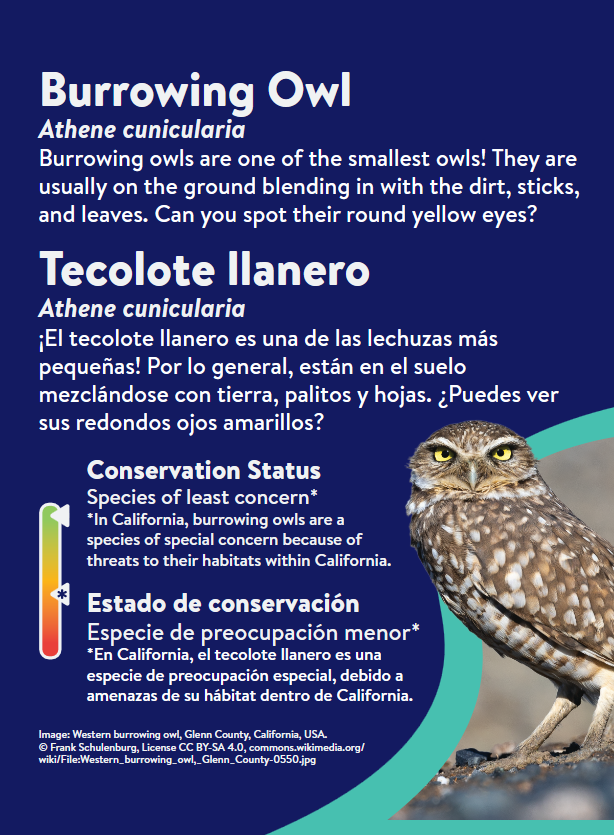
These aviary signs are smaller than the raccoon or newt signs, with less information, but are still built on curiosity prompts and fun facts.


Update to a sign for an interactive exhibit about gear ratios

This exhibit consists of a gear train that steps up the speed on one direction, and steps up the torque in the other direction. The gears are color coded and sit inside a clear box, with a turnable wheel at each end of the gear train.

New version (my rewrite):

Turn each wheel. What differences do you notice between the two? What differences do you notice between the gears inside the box? Which way do the wheels and gears spin? Do they all turn the same way? 

One wheel spins fast, without much effort. The other wheel takes a lot of effort to turn, and it spins slowly. The difference comes from the sizes of the gears inside the box, and how each one is connected to the other gears. 

The slow wheel spins the blue gear with 80 teeth, which turns the red gear with 20 teeth. One full rotation from the blue gear spins the red gear four times. In other words, the two gears have a 1:4 gear ratio, or a 1:4 difference in speed. The yellow and green gears have a 1:5 ratio. Multiplied together, the ratio between the two wheels is 1:20. For every spin of the slow wheel, the fast wheel turns 20 times! 

[Idea for future iterations of this exhibit: It would be super helpful for visitor understanding if we paint a high-contrast dot near the outside of each gear, or paint one of the teeth a different color so they can see the ratio in action right in front of them.]

Old version:

Gear Ratios/Force Amplifier: 

  • Turn the wheels. What differences do you notice between the two?

  • What differences do you notice between the gears on each side?  

  • Turn the wheels in opposite directions at the same time. What do you notice? 

  • Which wheel turns faster? Why do you think that is? 

What’s going on? The force (effort) needed to turn a gear is based on the size of the gear you are turning (input gear) compared to the size of the gear that it turns (output gear). The yellow gear is a lot smaller than the green gear that it turns. This increases the gear ratio and decreases the force needed to turn the gear. The blue gear is a lot bigger than the red gear that it turns. This decreases the gear ratio and increases the force needed to turn the gear. The illustration below shows these gear ratios. 

Back to top